


Hardware components | ||||||
 |
| × | 1 | |||
 |
| × | 1 | |||
 |
| × | 1 | |||
 |
| × | 1 | |||
 |
| × | 1 | |||
Software apps and online services | ||||||
 |
| |||||
Modulo Temperature Probe Exerciser
Or should that be Exorciser?
Copyright: © 2016 - William C Waggoner
License: MIT License
IntroductionThis project started out as a simple “I wonder how this works?” while going through my new Modulo Kit and coming across the TemperatureProbe. It certainly looked like an interesting bit, it didn’t seem to have a board, and it didn’t fit into the usual Modulo slots. The project simply grew and grew until you get what you see here.
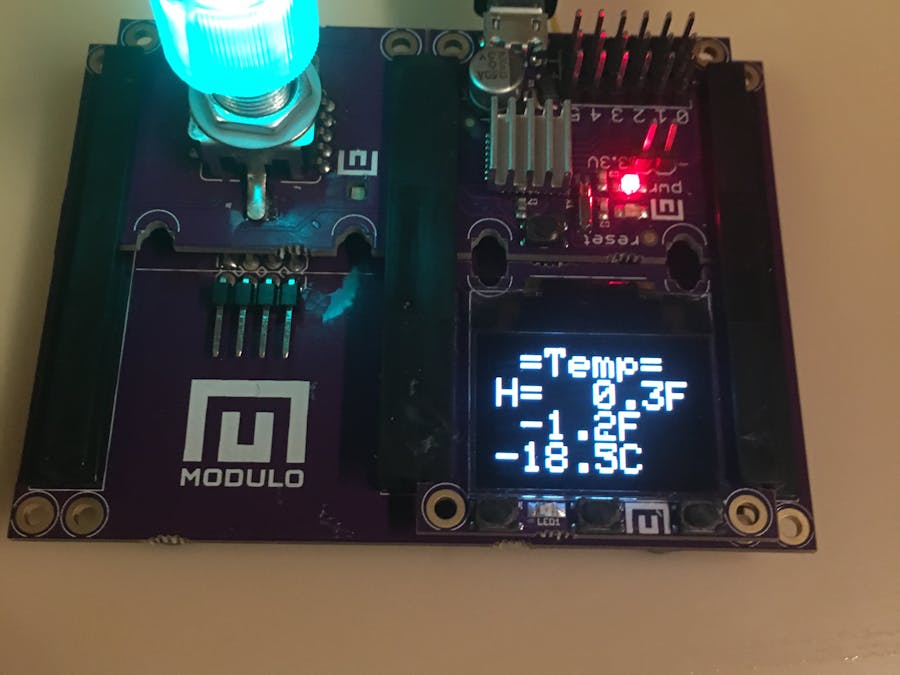
This ended up as a fairly functional thermometer.
- Display current temperature in Fahrenheit and Celcius
- Record and display high and low temperatures (resetable)
- Display color thermometer (Blue to Red) with selectable range
- Optional audible alarm when limits exceeded
Hardware
Modulo Base [http://www.modulo.co]
Modulo Controller
Modulo Temperature Probe
Modulo Display
USB cable (A->Micro)
Modulo Knob (Optional)
Software
- Arduino IDE [https://www.arduino.cc/en/Main/Software]
The steps needed are:
- Follow the instructions on the docs.modulo.co web site. In particular the Getting Started With Arduino section. You will have the Arduino IDE installed with the Modulo libraries available.
- Open the Arduino app. It should display a skeleton project. Delete all of that and copy and paste the code here into the window.
- Now save the code as TempProbe.ino. The IDE will suggest a location, you can use that or save it anywhere else you like.
- Use the Menu Sketch->Verify/Compile to check that the program will compile. If it compiles it will probably run.
- Build the Modulo using the Base, Display, and Knob. Attach the Temperature Probe to the Base using any one of the 4-pin jacks on the underside of the Base. The Temperature Probe is actually a full-fledged Modulo but in a teeny, tiny package attached to the wire.
- Attach the Controller to your computer using the USB cable (Micro USB).
- In the Arduino IDE use the Menu Sketch->Upload to upload the code to the project assembly.
- Marvel at the dynamic display of the current temperature.
- The project can now operate independently of the computer. You may disconnect it from the computer and use any cell phone charger that features a Micro USB plug.
- Stick the probe into interesting places to see just how hot they are … now, now, you know what I mean and it isn’t what you’re thinking!
The project responds to button pushes and knob twists as follows:
Display
There are three buttons on the Display:
- (Left) Selects the style of display for temperature (Both F&C, Only F, Only C)
- (Center) Selects the display of the High or Low temperature. (None, High, Low) The scale (F/C) is selected based on the main display. Normally in F it changes to C if only C is displayed.
- (Right) Resets the High/Low temperature to the current temperature.
Display 1
Display 2
Display 3
Knob
The knob (it is optional but well worth it to install one) will show a color-based temperature gauge. The color ranges from Blue to Red based on the set Low and High temperature limits. See below for how to set the limits.
Push down on the knob to jump to the Set Mode where you can adjust the High and Low temperature limits as well as turn on or off the temperature alarm.
NOTE: The temperature alarm is not currently implemented. It is settable but does not do anything.
Knob Push
Knob pushes cycle through three menus and return to the normal display. To set the value in each menu simply turn the knob to increment or decrement the temperature or cycle OFF/ON for the Alarm.
- Set High temperature limit
- Set Low temperature limit
- Set Alarm ON or OFF
Menu Set High Limit
Menu Set Low Limit
Menu Set Alarm
Certainly the Alarm function needs to be added. I have in mind both visual and audible alarms.
Any other suggestions would be appreciated.


Comments