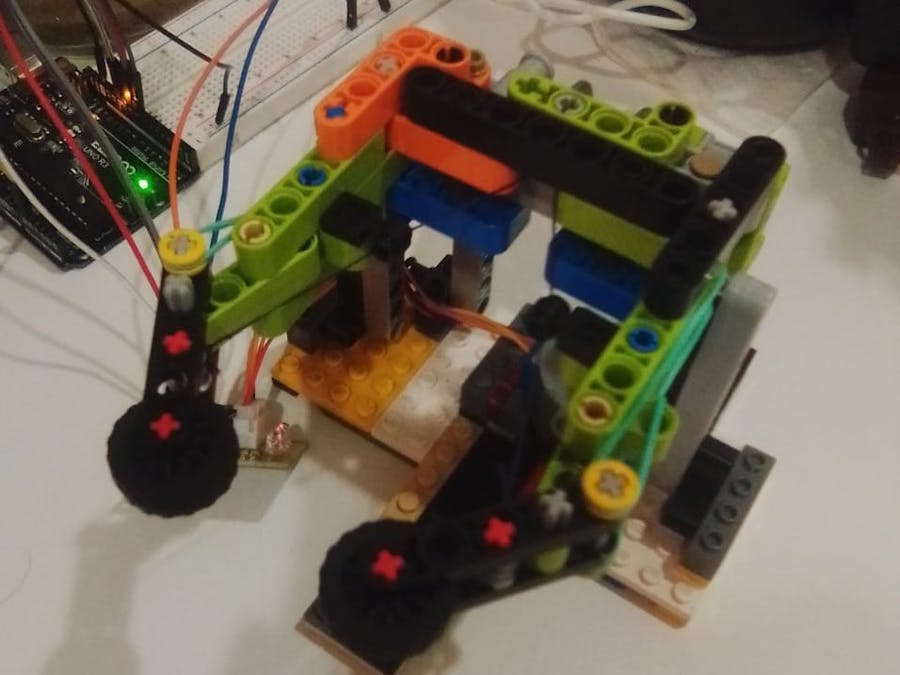
Arduinos and components are plenty of fun on their own, but they truly shine when used together with some mechanical parts, right?
That's where 3D printing comes in... or it should've, if I had a 3D printer. So, I used what was available to me, that being LEGO.
The idea was to build some kind of pen holder to adorn my desk with that I could motorize somehow, using my starter kit. The first problem to solve was how to couple these two things, as LEGO generally doesn't play nice with non-LEGO components.
However, I seemed to be in luck.
(I apologize in advance for the quality of my pictures... my phone is a bit of a budget solution)
STEP 1 : COUPLING LEGO AND ARDUINOI decided to go with a stepper motor for this project, with it's high torque and precision. Somehow the axle ended up being the perfect size to friction fit a LEGO technic connector on it.
I popped it on and then added another connector piece. Now then, I needed a way to place the stepper on something without it moving out of place and I was actually able to build a bracket without much fuss.
Usually, I like to use gears or more solid linkages for everything because they're more reliable to me but I thought I should try using elastic/string. One force would keep the arm open and the other can adjust to keep it closed. Initially I experimented and used the string to open the arm but that did not grab objects properly.
Here's the initial version.
It was weak and the spool that wound the string was uneven because the strings were different distances from their arms. I ended up mounting it horizontally and using the string to pull the arms in.
And there we go... it still isn't perfect though. I tried a lot of different rubber bands but it seems like no two in my box are of the same stretchiness - so one arm closes a wee bit earlier than the other. The range of motion is also a big limited.
Furthermore the strings were a pain to pull taut and attach properly, while making sure both sides were as even as possible. This probably contributes to that issue as well. Nevertheless, we have an arm.
The two dots are where it pivots freely. I tried to add two joints to recreate a more 'organic' motion but due to the small range of motion, it didn't seem to work. It just moves as a single unit, hinging on first joint, closer to the beginning of the 'finger'.
STEP 3 : PUT IT ALL TOGETHERWith the motor and arm now, I built a little frame to keep the arm upright to attach them together. I used a worm gear to couple the vertical stepper axle and the horizontal spool axle.
Worm gears have the advantage of more torque over regular gear setups but I think that advantage wasn't really needed here. I also slowed down the speed of the arm in doing that. The alternative was using bevel gears, but those were hard to pack into the small frame and well, worm gears look really cool, right?
STEP 4: THE PROGRAMMINGThe most underwhelming part of this is the coding. I used a single axis of the joystick to control this contraption, because it feels more robot-y. If the joystick is greater than A in one direction, it closes and less than B, it opens. As simple as you can get.
I was considering using a library to get acceleration of the stepper based on the joystick position but at any other speed than maximum, this takes eons to operate. I just kept it simple there and there I had it, LEGO and Arduino pincher-thing.
THE END
And, here it is. The position it started at is its maximum range unfortunately but it does close all the way in. The grip is decent for its size and once you can balance an object, it holds whatever (tiny) things you want.
I will most likely revisit this project in the future. The arm mechanism could definitely be improved as well as its range. I also have experimenting to do with faster gears and even different motors. I have tried making this triggered by motion but that requires a little more development.
That about wraps it up. I made this into a showcase instead of a tutorial because LEGO isn't exactly universal. If there's enough interest though, I can try to make a tutorial for the pincher/frame but I'm sure it's simple enough to try your hand at one too. The important thing was mainly the motor coupling and bracket and the rest you can let your imagination run wild with.


_ztBMuBhMHo.jpg?auto=compress%2Cformat&w=48&h=48&fit=fill&bg=ffffff)


Comments
Please log in or sign up to comment.