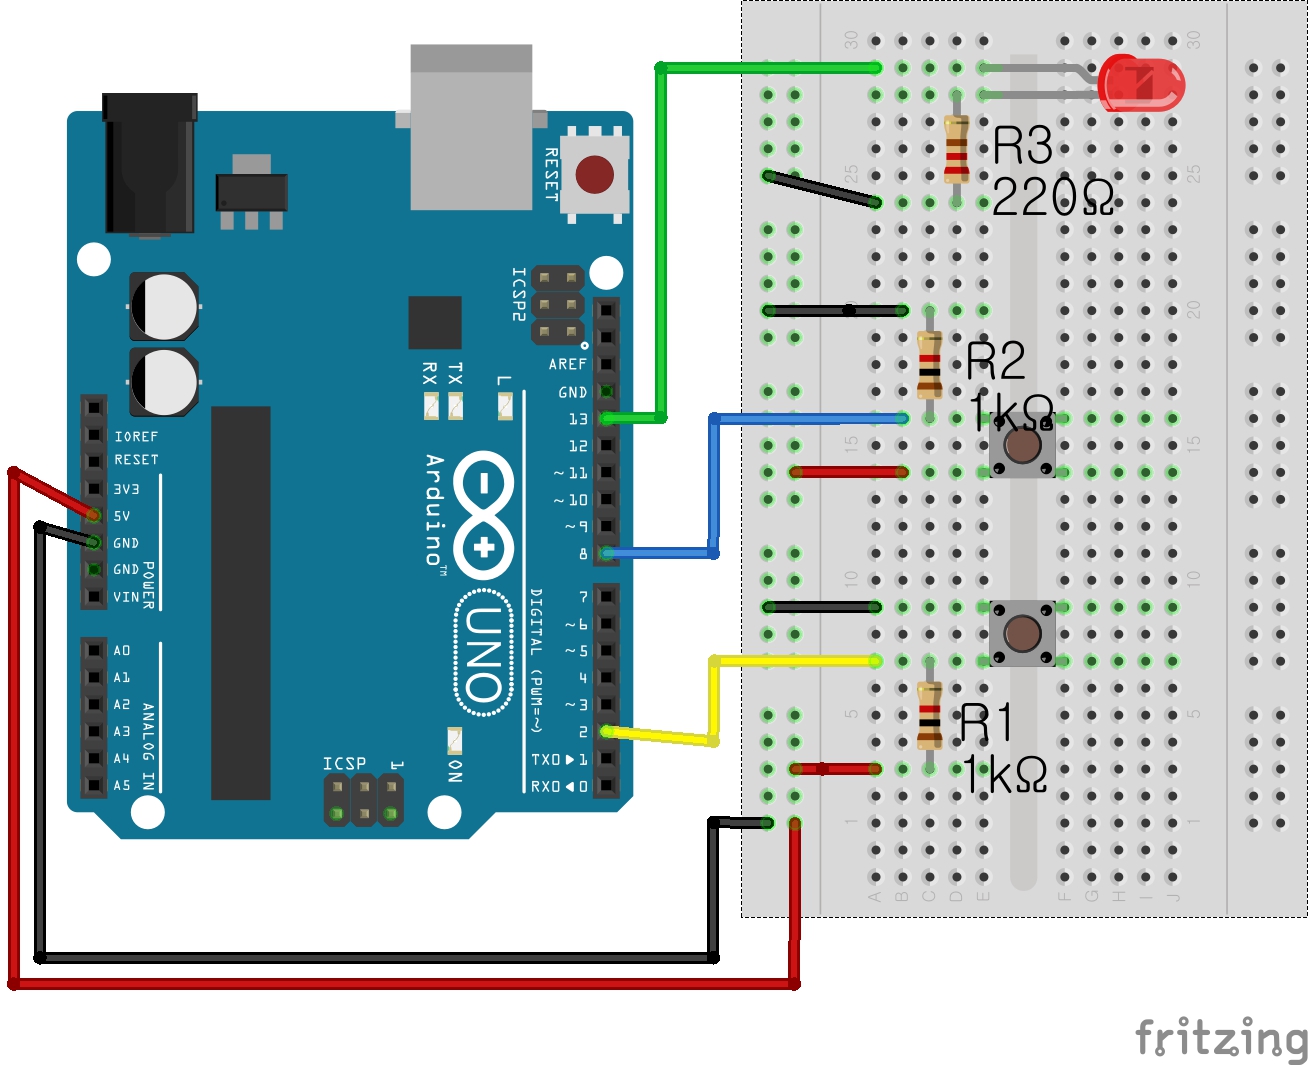
int led_pin = 13; //LED를 아두이노 디지털입출력 13번 핀에 연결
int sw_pin1 = 2; //스위치1을  디지털입출력 2번 핀에 연결
int sw_pin2 = 8; //스위치2를 디지털입출력 8번 핀에 연결
int sw1_value; //스위치1에서 입력받은 값을 저장할 변수
int sw2_value; //스위치2에서 입력받은 값을 저장할 변수

void setup(){
  pinMode(led_pin, OUTPUT); //아두이노 디지털 입출력 13번 핀을 출력 핀으로 사용
  pinMode(sw_pin1, INPUT); //아두이노 디지털 입출력 2번 핀을 입력 핀으로 사용
  pinMode(sw_pin2, INPUT); //아두이노 디지털 입출력 8번 핀을 입력 핀으로 사용
}

void loop(){
  sw1_value = digitalRead(sw_pin1); //2번 핀에서 입력받은 값을 변수에 저장
  sw2_value = digitalRead(sw_pin2); //8번 핀에서 입력받은 값을 변수에 저장
  if(sw1_value == LOW){ //스위치 1을 누르면 ->2번 핀이 GND(LOW)와 연결
    digitalWrite(led_pin, HIGH); //LED ON
  }
  if(sw2_value == HIGH){ //스위치 2를 누르면 ->8번 핀이 5V(HIFH)와 연결
    digitalWrite(led_pin, HIGH); // LED ON
  }
  digitalWrite(led_pin, LOW); //스위치1과 2을 누르지 않았을 때는 LED OFF
  }


_ztBMuBhMHo.jpg?auto=compress%2Cformat&w=48&h=48&fit=fill&bg=ffffff)


Comments
Please log in or sign up to comment.