This project uses two Particle Photons to open/close window blinds automatically, based on outside light conditions. The opening and closing of the blinds are graphed on Google Sheets through IFTTT.
How It WorksTwo Particle Photons are used, one connected to a photo-resistor, and the other connected to a continuous rotation servo. The voltage across the photo-resistor is checked every 5 seconds by the sensor photon, and is compared to the last reading of the photo-resistor, and also to a preset voltage threshold value that distinguishes between light/dark. If the newest voltage is lower than the threshold condition but the previous voltage is higher than the threshold condition, then the environment has gotten darker. If the opposite is true, and the newest voltage is higher than the threshold condition while the previous voltage is lower than the threshold condition, then the environment has gotten lighter. The sensor photon will publish either a “light” event or a “dark” event based on the logic.
The first pair of IFTTT programs wait for the sensor photon to publish an event; one program responds to“light” and publishes a "1" with a timestamp to Google Sheets, while the other program responds to “dark" and publishes a "0" with a timestamp to Google Sheets. Each publish from IFTTT automatically adds another row to the Google Sheet, and a graph of the events with respect to timestamps is automatically updated. Here is a link to our Google Sheet: https://docs.google.com/spreadsheets/d/1XVPyQSOPuph97yQJBeigwkboHUfV9TTU8nzb2Faqog0/edit?usp=sharing
A second pair of IFTTT programs listen to the first pair of programs, and publishes a notification to a smartphone that the blinds have been either opened or closed.
The servo photon is also subscribed to the ‘light” and “dark” events. If a “light” event is received, then the servo will rotate for 5 seconds, causing the blinds to open. If a “dark” event is received, then the servo will turn in the opposite for 5 seconds, causing the blinds to close. Once the motor has finished turning, an “on” event is published by the servo photon. The sensor photon is subscribed to this event, and once the “on” event is published, the LED on pin D7 will turn on for 10 seconds, verifying that the motor was turned.
How to BuildSensor Photon
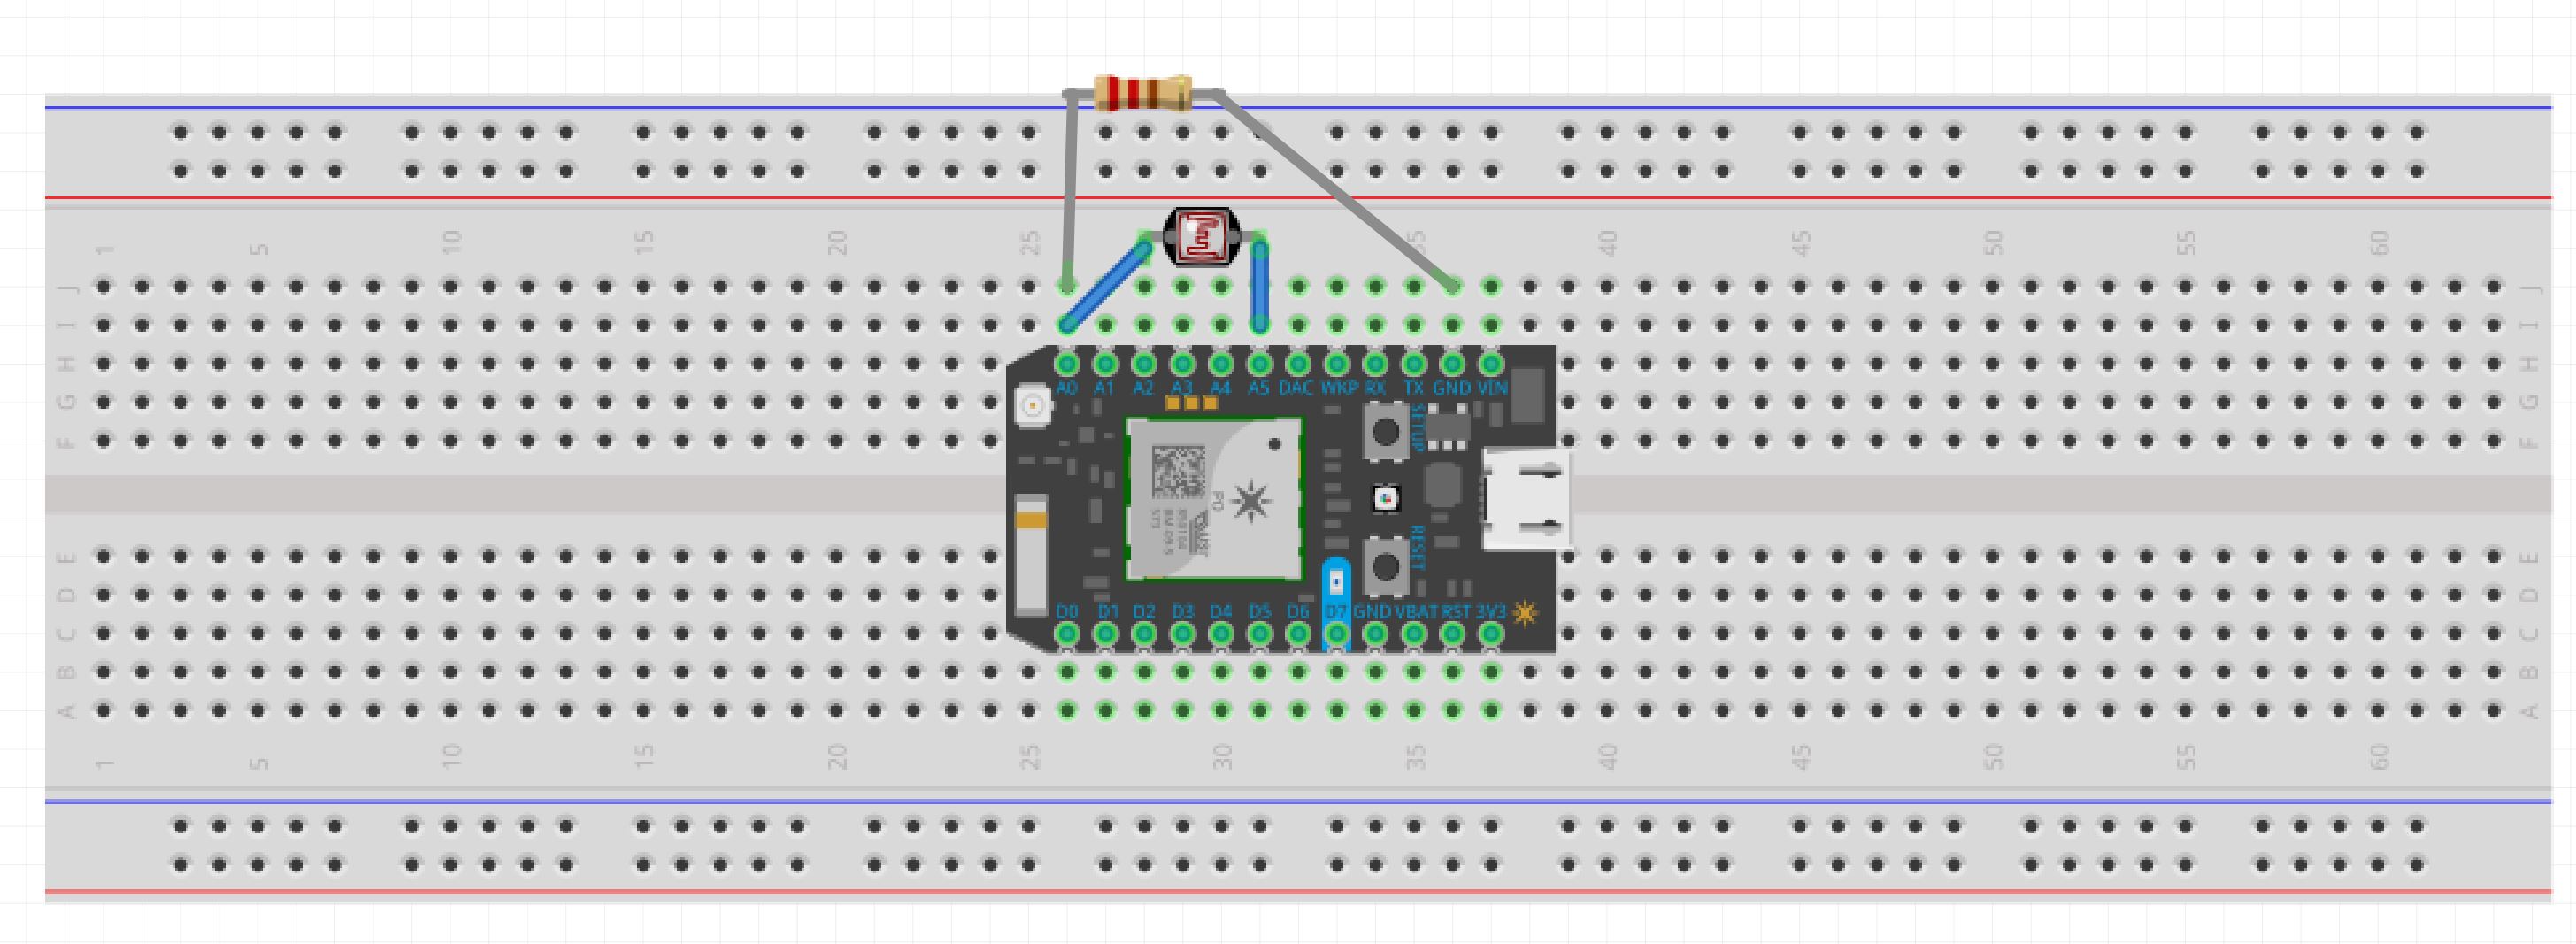
- Insert one Particle Photon into the breadboard.
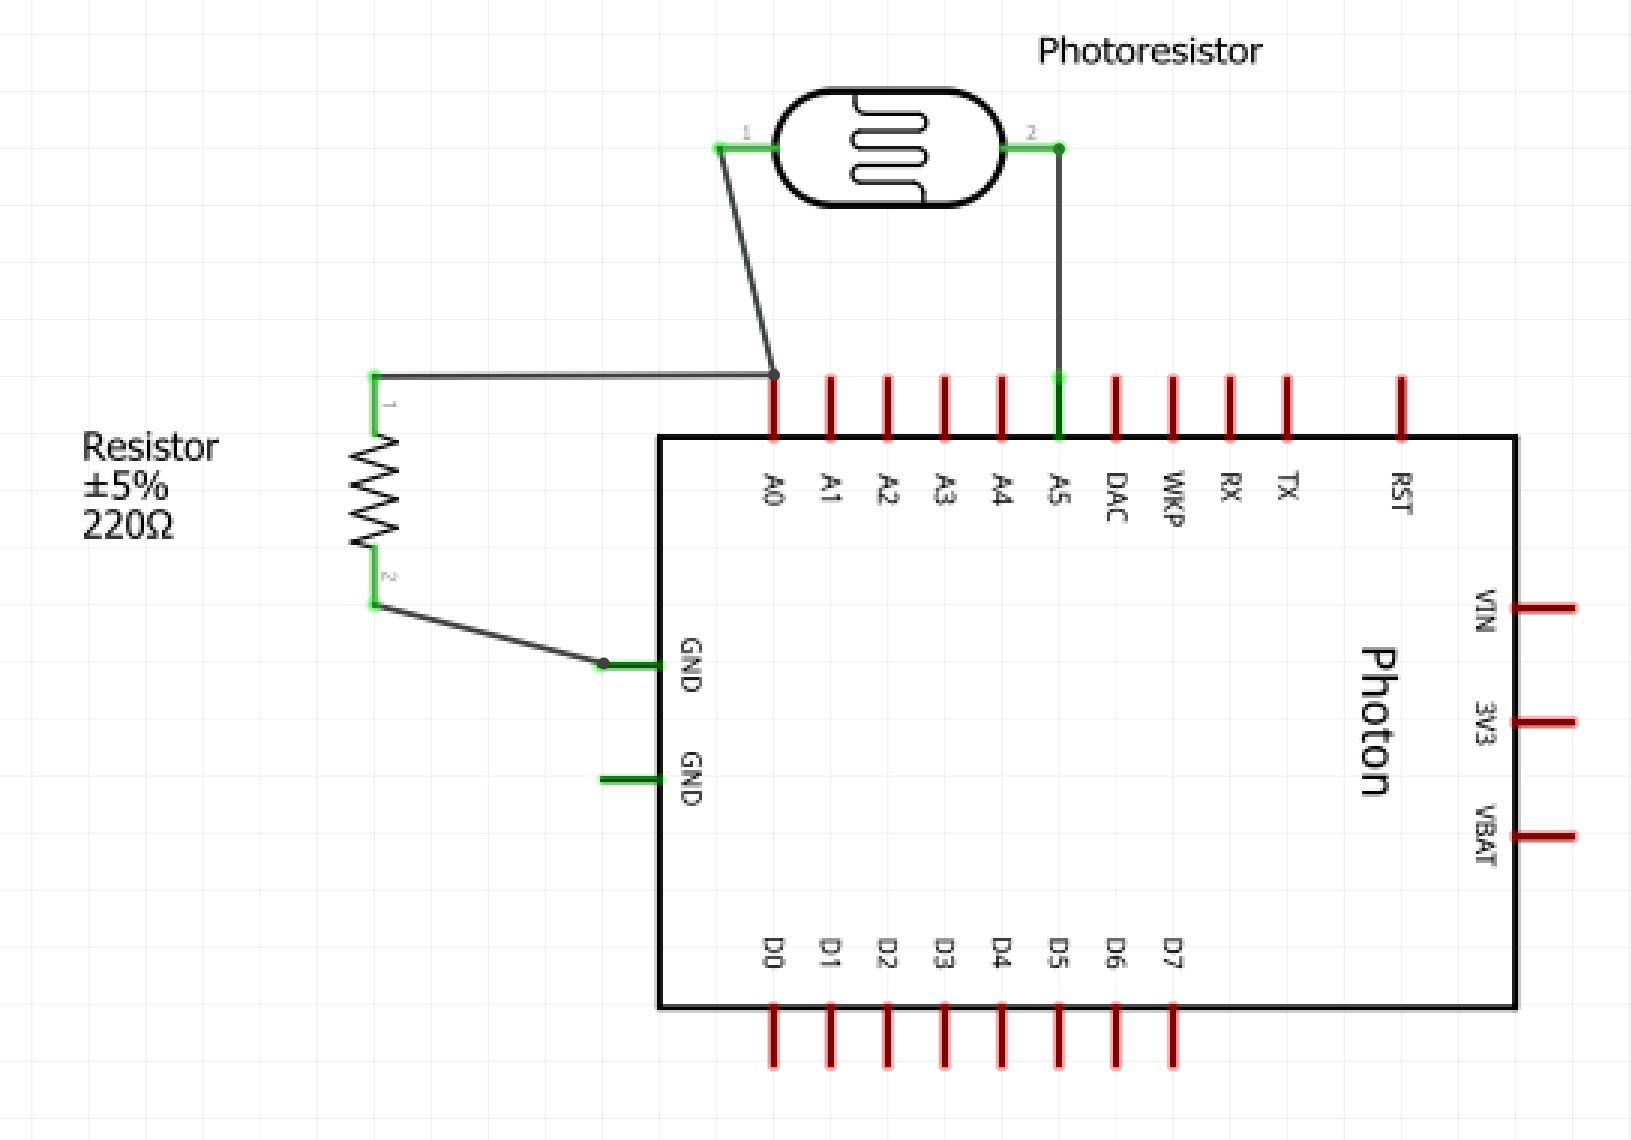
- Insert the photo-resistor into pins A0 and A5, and insert the 220Ω resistor into pins A0 and GND (neither has polarity, so orientations do not matter). (See Schematics at the end of the story.)
- Connect one power pack to the Particle Photon via micro-USB.
- Place the sensor photon on the window sill, with the photo-resistor pointed outside.
Servo Photon
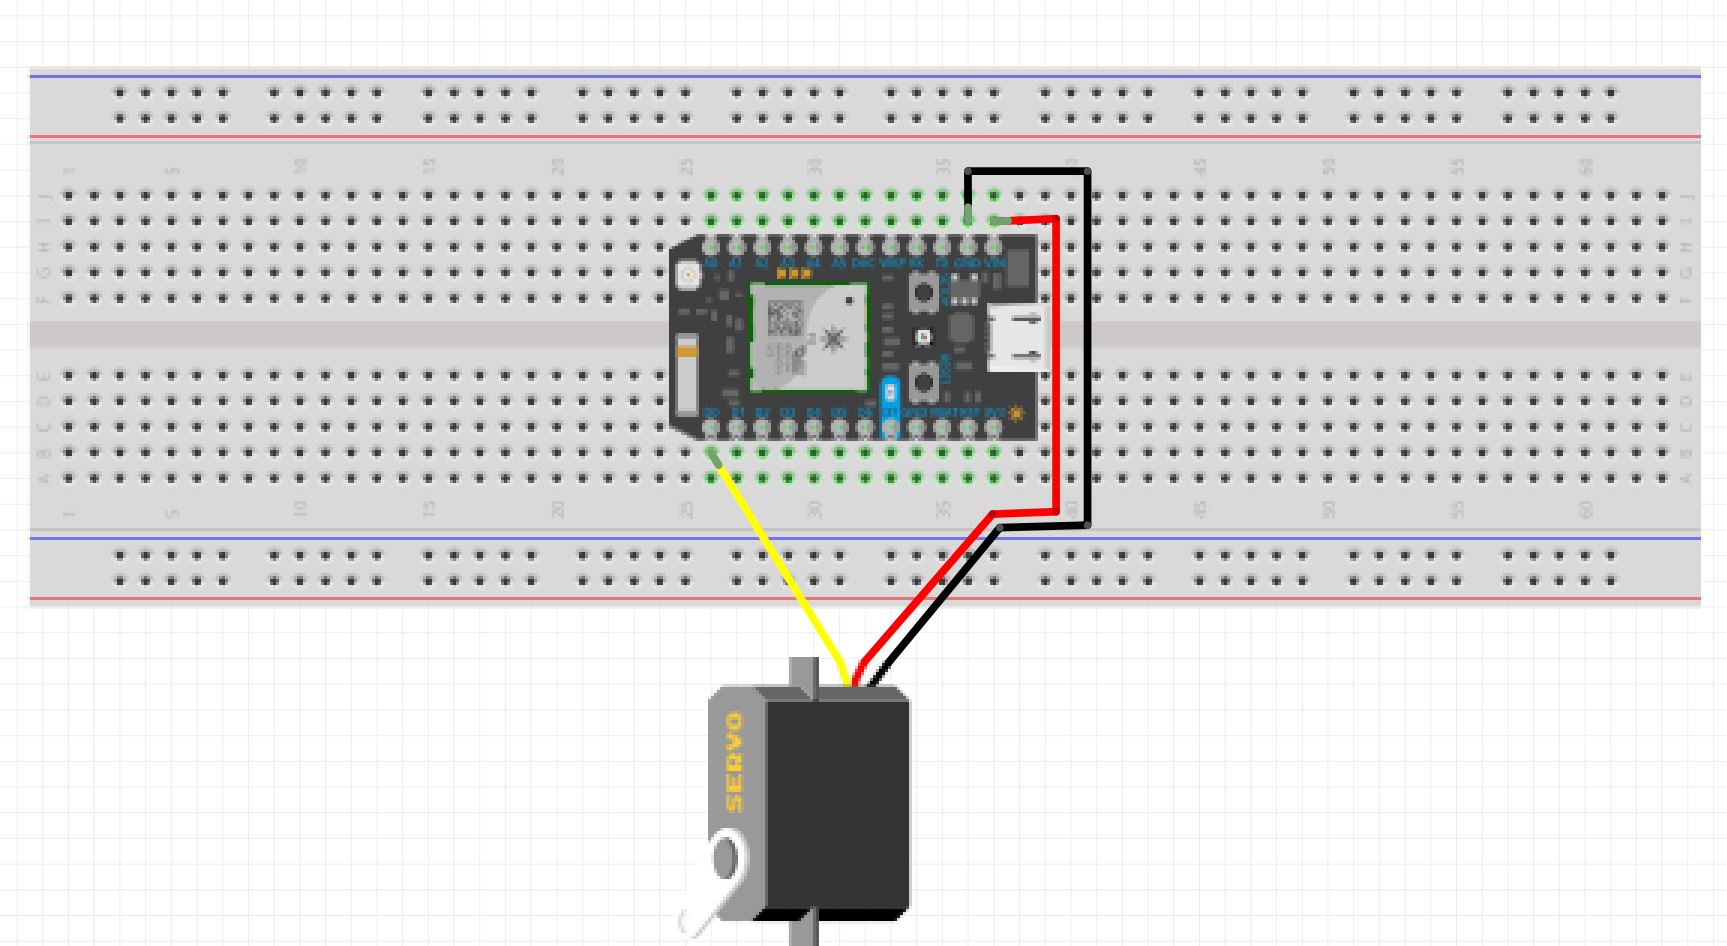
- Insert the other Particle Photon into the breadboard.
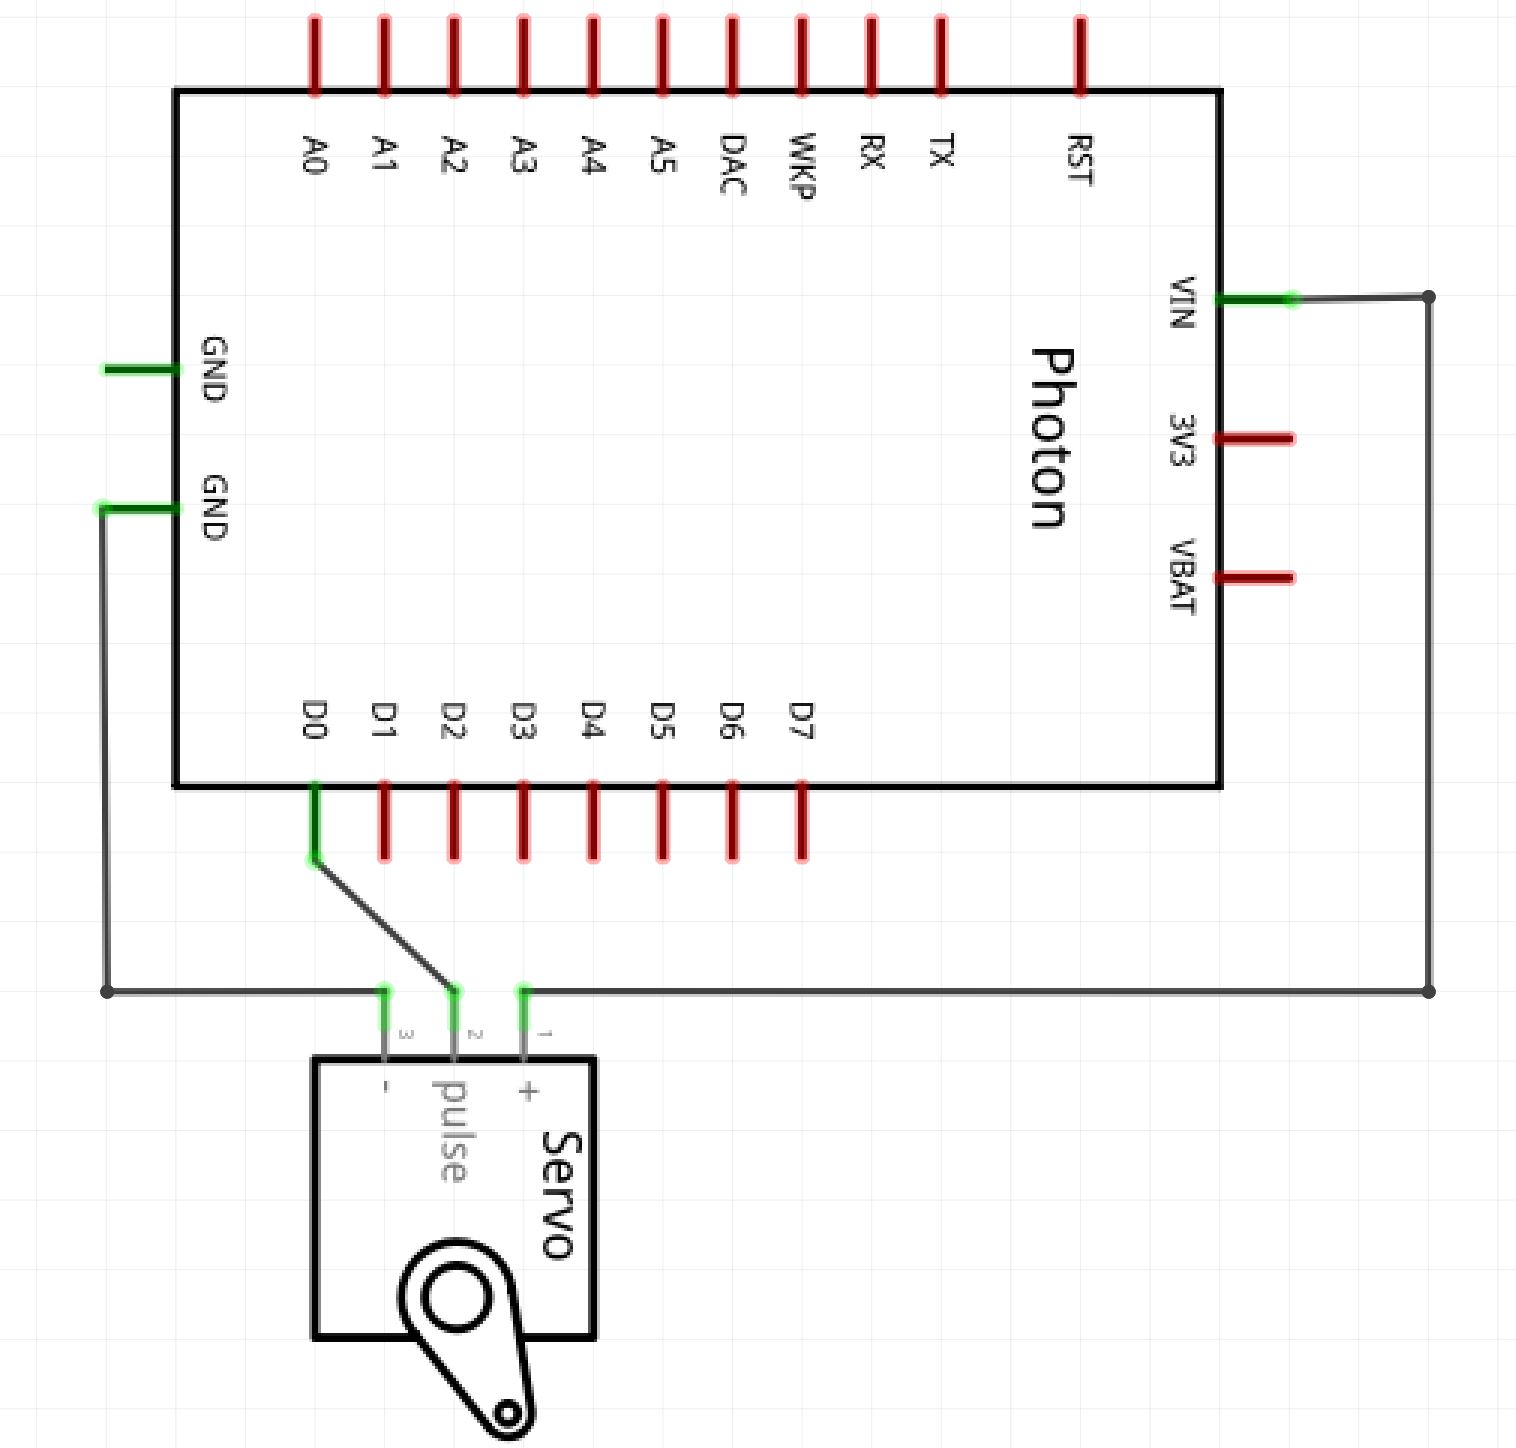
- Connect the servo to the Particle Photon via jumper wires (Red to Vin, Brown to GND, and Orange to D0). (See Schematics at the end of the story.)
- Connect the other power pack to the Particle Photon via micro-USB.
Bracket Connection
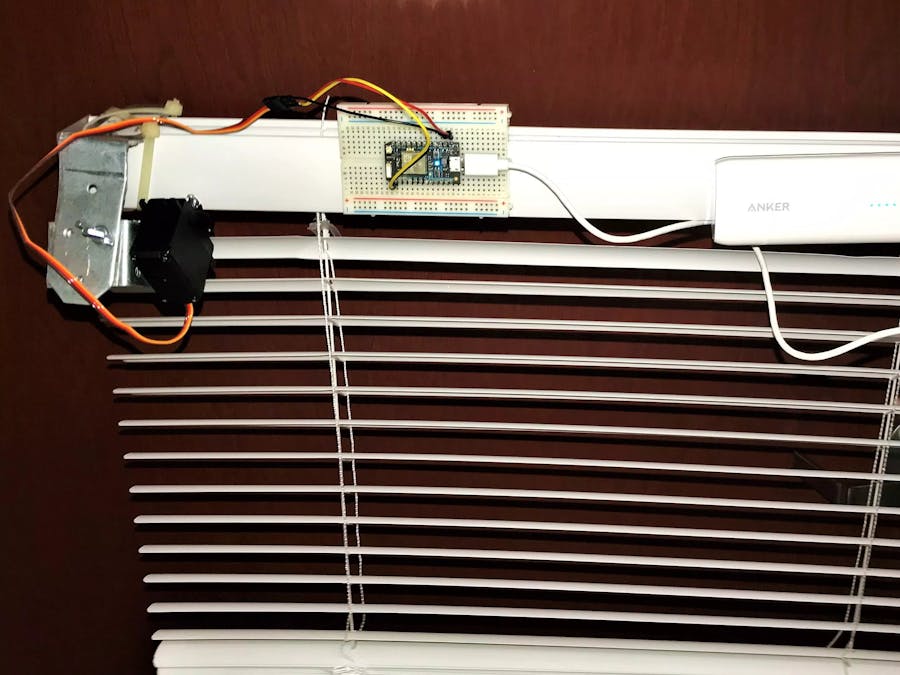
- Put the bracket on top of the shade support and use four Zip-Ties (in an X) to hold in place, as shown.
Attach the 90 degree bracket to the 135 degree bracket with the 4mm hex bolt and wingnut through the predrilled holes, and attach Velcro to the outside of the bracket as shown.
Blinds/Servo Connection
- Use part of a steel paper clip to attach the circular attachment that came with the servo motor to the blinds, as shown.
- Attach Velcro to the side of the servo, as shown. (Notice the servo shaft is above and to the left of the Velcro.)
- Put the circular attachment onto the servo, and connect the servo to the bracket with the Velcro, as shown.
Blinds/Photon/Power Pack Connection
- Attach the servo Photon and its power pack to the outside of the top of the blinds with Velcro, as shown.
- Plug each Photon into a wall outlet using a 5V phone charger with a Micro-USB cable, instead of using a portable power pack.
- In order to reduce uncertainty of servo position, the paper clip that connects the circular servo attachment to the blinds could be glued in place.
- Instead of using the non-destructive modifications to the blinds that are shown in this project, one could drill mounting holes and use self-tapping screws to mount different brackets to attach the servo, Photon, and power pack.






Comments