


Hardware components | ||||||
 |
| × | 1 | |||
 |
| × | 1 | |||
| × | 1 | ||||
| × | 1 | ||||
 |
| × | 1 | |||
| × | 1 | ||||
 |
| × | 1 | |||
Software apps and online services | ||||||
 |
| |||||
Introduction:
Has this ever happened to you? You are about to go outside but you cannot decide if you need a jacket or not. But if you have our Temperature Sensor, you don't need to leave your room to make your decision!
This device, placed outside your house or window, checks the temperature of your surrounding area. Using the dial, you can set a temperature threshold at which you would like to start using a jacket. If the detected temperature is within the acceptable jacket-less temperature range, then an LED will light red. If it's below the acceptable range, the light will turn blue and you should put on a jacket.
We have made it easy for you. With one button, you can change the temperature display between Celsius and Fahrenheit. No matter what country you are from, you will be able to easily know what temperature to set and what the temperature outside is currently.
Set-up:
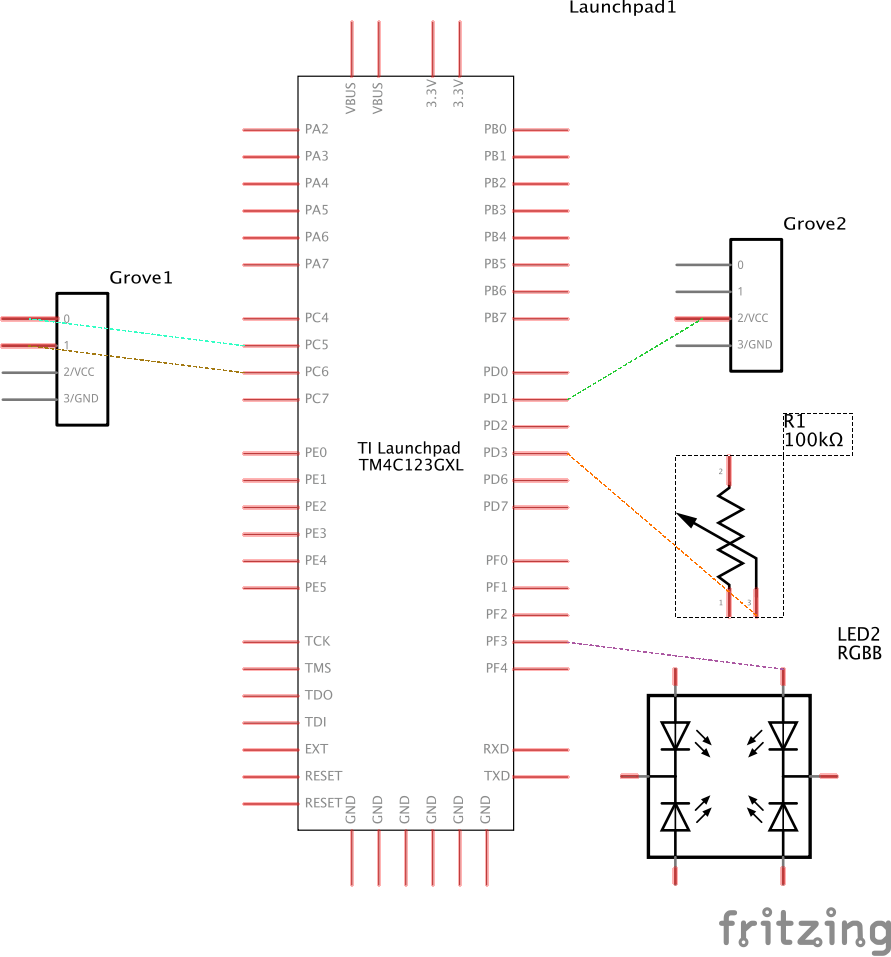
For this device, we used the Seeed Grove Kit's temperature/humidity sensor, 4 digit display, and rotary angle sensor, and Texas Instruments' Launchpad. We first attach the Launchpad onto the Grove Kit's Base Boosterpack such that the microprocessor is over the boosterpack (another indicator that you attached it correctly is if a red LED appears on the boosterpack when the launchpad is turned on debug mode). Attach the temperature sensor to pin 24, the 4 digit display to pin 35 and pin 36, and the rotary angle sensor to pin 26. Refer to Arduino-Energia Pin Numbers Guide on Canvas to see corresponding pin and port names for each pin.
Steps:
In reference to the provided code, declare and initialize the global variables that will be used later throughout the program. In the setup method, initialize all the modules and declare which LED colors you would like to display.
To convert the temperature from Celsius to Fahrenheit, we created a separate function to do so.
In the loop method, read in the data from the modules and store those values in variables. Check if button 2 has been pressed (to switch units of measurement for the temperature), and if it has, then change the units and then store that into the 4 digit display. Then add the code that allows the information to actually appear on the display. We can then move on to the step of changing the LED light depending on the temperature of the surroundings and the set temperature which is the last bit of code we need to get the device to work.


Comments
Please log in or sign up to comment.