.
Introduction.
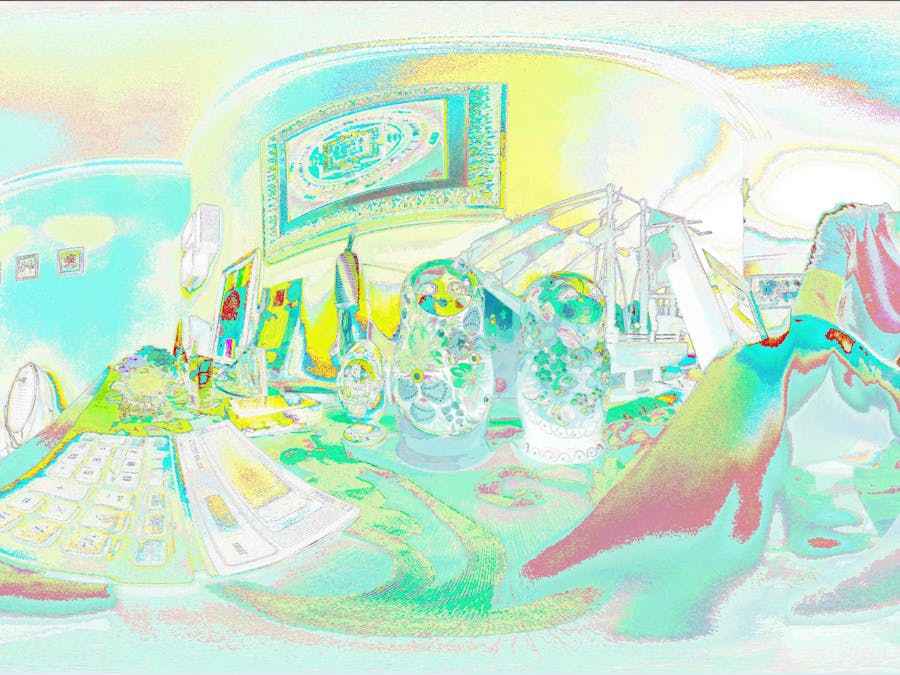
This project is about a Ricoh Theta V plugin which will make a painting-like image generated from captured image using the FastCV image processing SDK.
Note: My original plan was to make the Snap-to-Twitter plugin. However the project will take a longer time to participate in the contest. Hence I decided to change to this FastCV Painting project.
Getting Started.
I spent some times working with the Theta V device. I installed some plugins and got to know the meaning of the various LED statuses and buttons. Here are some of the useful links to get started:
Steps for putting your THETA into developer mode
Plugin development community guide
.
FastCV Image Processing.
FastCV is a Computer Vision library provided by Qualcomm. Operations involved in image processing are optimized for ARM processors and are particularly effective for Qualcomm’s Snapdragon processors. To use FastCV, it is necessary to program with C/C ++ using the Android NDK (Native Development Kit).
Follow these 4-parts series tutorials to setup the development environment and learn about the image processing library.
Part 1 - FastCV introduction and installation
Part 2 - How To Use Android NDK to Build FastCV for the RICOH THETA
Part 3 - How To Create a FastCV Application with the RICOH THETA Plug-in SDK
Part 4 - FastCV Image Processing
.
FastCV Painting Plug-in.
FastCV Painting is a plugin for Ricoh Tetha V camera. While user is snapping a photo, it will generate a painting-like picture and store both the captured and generated pictures in files on device.
The initial version of the plugin will generate a negative-like and an edge-detection pictures. The later version will generate a painting-like image too. The captured picture will be saved as theta_DATETIME.JPG and generated pictures as painting_DATETIME.JPG, negative_DATETIME.JPG and edge_DATETIME.JPG .
.
Set Permissions
.
In order to use the plug-in, you must set the permissions for camera, microphone and storage. If the permissions are not set, even if you activate the plug-in, it drops immediately.
For plugins installed via the plugin store, permissions are automatically set as described in the manifest. During development, you must set the permissions manually.
When developing, it is easy to set permission using Vysor.
.
Set Permissions via Vysor
.
.
Usage
1. To run plug-in mode, press and hold the mode button.
2. Press the mode button several times until the still mode LED is turned on.
3. Press the shutter button and capture.
4. The captured and processed images are saved at DCIM directory.
.
Code Fragments.
           byte[] dst2 = mImageProcessor.process3(data);
           if (dst2 != null) {
               // save image
               // String fileName = String.format("diff_%s.jpg", dateTime);
               String fileName = String.format("painting_%s.jpg", dateTime);
               String fileUrl = DCIM + "/" + fileName;
               try (FileOutputStream fileOutputStream = new FileOutputStream(fileUrl)) {
                   fileOutputStream.write(dst2);            // <- saving image
                   registerDatabase(fileName, fileUrl);    // <- register the image path with database
                   Log.d("CameraFragment", "save: " + fileUrl);
               } catch (IOException e) {
                   e.printStackTrace();
               }
           }
The above code calls process3 method (see next code fragment) which will generate the painting-like image.
.
       public byte[] process3(byte[] data) {
       Log.d(TAG, "ImageProcess");
       /**
        * Pre-process
        */
       // Convert JPEG format to Bitmap class.
       // To get byte[], copy the content of Bitmap to ByteBuffer.
       Bitmap bmp = BitmapFactory.decodeByteArray(data, 0, data.length);
       ByteBuffer byteBuffer = ByteBuffer.allocate(bmp.getByteCount());
       bmp.copyPixelsToBuffer(byteBuffer);
       int width = bmp.getWidth();
       int height = bmp.getHeight();
       /**
        * Image Processing with FastCVnative code
        */
       // get byte[] from byteBuffer and input to the function.
       byte[] dstBmpArr = median2Filter(byteBuffer.array(), width, height);
       if (dstBmpArr == null) {
           Log.e(TAG, "Failed to medianFilter(). dstBmpArr is null.");
           return null;
       }
       /**
        * Post-process
        */
       // copy byte[] to the content of Bitmap class.
       Bitmap dstBmp = Bitmap.createBitmap(width, height, Bitmap.Config.ARGB_8888);
       dstBmp.copyPixelsFromBuffer(ByteBuffer.wrap(dstBmpArr));
       // compress Bitmap class to JPEG format.
       ByteArrayOutputStream baos = new ByteArrayOutputStream();
       dstBmp.compress(Bitmap.CompressFormat.JPEG,100, baos);
       byte[] dst = baos.toByteArray();
       return dst;
   }
The above is the Java code process3 method calling the median2Filter C++ interface (see below).
JNIEXPORT jbyteArray
JNICALL Java_painting_theta360_fastcvsample_ImageProcessor_median2Filter
       (
               JNIEnv* env,
               jobject obj,
               jbyteArray img,
               jint w,
               jint h
       )
{
   DPRINTF("median2Filter()");
   /**
    * convert input data to jbyte object
    */
   jbyte* jimgData = NULL;
   jboolean isCopy = 0;
   jimgData = env->GetByteArrayElements( img, &isCopy);
   if (jimgData == NULL) {
       DPRINTF("jimgData is NULL");
       return NULL;
   }
   /**
    * process
    */
   // RGBA8888 -> RGB888
   void* rgb888 = fcvMemAlloc( w*h*4, 16);
   fcvColorRGBA8888ToRGB888u8((uint8_t*) jimgData, w, h, 0, (uint8_t*)rgb888, 0);
   // Convert to Gray scale
   void* gray = fcvMemAlloc( w*h, 16);
   fcvColorRGB888ToGrayu8((uint8_t*)rgb888, w, h, 0, (uint8_t*)gray, 0);
   // Filter Median
   void* median = fcvMemAlloc(w*h, 16);
   fcvFilterGaussian11x11u8((uint8_t*)gray,w,h,(uint8_t*)median,0);
   // Reverse the image color
   void* bitwise_not = fcvMemAlloc( w*h, 16);
   fcvBitwiseNotu8((uint8_t*)median, w, h, 0, (uint8_t*)bitwise_not, 0);
   // Gray scale -> RGBA8888
   void* dst_rgba8888 = fcvMemAlloc( w*h*4, 16);
   colorGrayToRGBA8888((uint8_t*)bitwise_not, w, h, (uint8_t*)dst_rgba8888);  /// negative photo
   void* dst2_rgba8888 = fcvMemAlloc( w*h*4, 16);
   fcvBitwiseXoru8((uint8_t*)dst_rgba8888, w*4, h, w*4, (uint8_t*)jimgData, w*4, (uint8_t*)dst2_rgba8888, w*4);
   /**
    * copy to destination jbyte object
    */
   jbyteArray dst = env->NewByteArray(w*h*4);
   if (dst == NULL){
       DPRINTF("dst is NULL");
       // release
       fcvMemFree(dst_rgba8888);
       fcvMemFree(dst2_rgba8888);
       fcvMemFree(bitwise_not);
       fcvMemFree(median);
       fcvMemFree(gray);
       fcvMemFree(rgb888);
       env->ReleaseByteArrayElements(img, jimgData, 0);
       return NULL;
   }
   env->SetByteArrayRegion(dst,0,w*h*4,(jbyte*)dst2_rgba8888);
   DPRINTF("copy");
   // release
   fcvMemFree(dst_rgba8888);
   fcvMemFree(dst2_rgba8888);
   fcvMemFree(bitwise_not);
   fcvMemFree(median);
   fcvMemFree(gray);
   fcvMemFree(rgb888);
   env->ReleaseByteArrayElements(img, jimgData, 0);
   DPRINTF("processImage end");
   return dst;
}
.
Photos and Paintings.
.
.
.
.
Summary.
This initial version is using a simple bit-wise manipulation of the captured image. Future improvements include using more advanced image processing techniques to generate more realistic images like watercolor and cartoon styles of images.
.


Comments
Please log in or sign up to comment.