

A lot of animation was used to make this watch but it is only a prototype at this stage. I renounced to many features for the simple reason there is no more space for me to burn the firmware into the board(32U4). The watch features include:
- Time
- Calendar there
- Stopwatch
- Flashlight
The original one is: http://blog.zakkemble.co.uk/diy-digital-wristwatch/
Instead of writing the codes in avr-style, I adopt his avr work bench into an Arduino solution, so every one can download the codes and upload hex to his own hardware easier!
Step 1: Functions
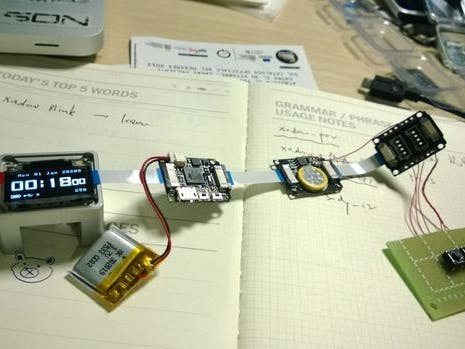
I use a RTC module so this won't lose time if it's out of power (Forget the time on the picture, only for testing).
Other functions:
- You can set up the current time
- Enter "stop watch" mode and start timer!
- Sleep mode help to save battery power
- Calendar mode
- Flash light
Step 2: Materials & Tools
- Xadow main board
- Xadow RTC
- Xadow breakout
- Perfboard
- Buttons
Notes: there is no button module on Xadow, so you have to use the Xadow Breakout and Perfboard. Add three more buttons presenting left, confirm, and right.
Step 3: Software
You'll find the code at https://github.com/xhbang/Xadow-digital-watch under GPL license (open-source). If you are familiar with Arduino, you can make a watch now!
Step 4: Handwork
A deeper understanding of the Xadow Watch There's a wired jumper you should pay attention to: there are two in the RTC module, but only one of them will be shown on the back of the board: INTB. The main logic is: the RTC and the button will send INT to MCU, and OLED changes according to the interruption. So connect the INT to the RX on the Xadow-compatible interface.
To make it simple and wear more comfortable, I suggest cutting off a short segment of cowhide.
Step 5: Later plans
In this picture, I added an ultrasonic module to use it as a add-on for this watch. Raise your hand, point to the girl you like: you'll know the distance between you and her!
xadow


Comments
Please log in or sign up to comment.