


Hardware components | ||||||
 |
| × | 2 | |||
| × | 2 | ||||
 |
| × | 2 | |||
 |
| × | 6 | |||
| × | 6 | ||||
 |
| × | 2 | |||
This project is for those of us out there that want to wake up to find that the coffee is waiting for us when we get into the kitchen. First thing right off the back we are college students who made this for a project that required us to use 2 particles, so as college students we know that people don't like spending unnecessary money, so we designed this project to work for one particle as well as two.
How it worksNow enough said about that, lets talk about the project inner workings. A short run down of how this project works is the time and day in the code determines if the light sensor can be activated, if the sensor detects the amount of light coming from artificial lighting, the particle will send the a message to the other particle to send a notification to a smart phone and turns on and starts the coffee machine. When it's done after a given amount of time for fire hazard reasons the particle will automatically turn off the coffee pot and will again notify your smart phone. Also you can activate the coffee machine by using the 'DO Button' on your phone. The 'DO Button' is part of the If This Then That (IFTTT) app on your phone, a link to installing the 'DO Button' on the home screen of your phone is included here. To use both the 'DO Button' and receive notifications on your phone you will need to use the IFTTT app on your phone.
So on the first part of that was ensuring that the day and time can be customized depending on your schedule. The idea for the photo sensor is that if your waking up before the sun rises or if it's still relatively dark out you can place the photon with the photo sensor to be activated once the light turns on. The original assumption for this project was that the photo sensor will be placed in your bedroom since the first thing people normally do in the morning is turn on the light, however the photo sensor can be placed wherever you wish. Now the photo sensor is an optional component should you not want to bother with the calibration or if your schedule is steady enough that your will be getting coffee at the same time everyday, or if you wake up at such a time that artificial lift is not needed and/or the amount of natural light could be a problem then one could remove that portion of the code and the component. Should you keep the photo sensor then it will need to be calibrated the sensor in the code.
ServosWhile looking over other peoples project to find examples similar to the things we were considering, we came across people using servos to hit buttons instead of wiring it into the power supply or something similar, when we saw that we thought it was a much better idea then what we were initially planning. Therefore we decided to use servos instead and configured the coffee machine and servos as shown below.
The servos were attached to the coffee machine by cutting notches in blocks of wood to mount the servos in the blocks. The blocks were then super glued to the coffee machine. Even though we chose to mount the servos in this fashion, how you choose to mount the servos is up to you. Just ensure that the arms on the servo are capable of pushing the buttons on the coffee machine before permanently mounting them.
CodeThe purpose of nearly every line in the code is explained in the code and the two videos below show the coffee being brewed using the photo sensor and the DO Button codes respectively.
GraphingThis next part was required for the "graphing" portion of our grade. It takes you to a page that lists every time the messages in our code were published.
This graph shows the times at which we received the messages. The first dot in each group of three is the message telling us the coffee is started, the second dot tells us the coffee has finished, the third dot says the machine was turned off.
This project can be used with several different coffee machines out on the market. Depending on the type of machine in use, the configuration may vary. For example, with the coffee machine shown below, only one servo would be necessary as the coffee would start brewing once the machine is turned on. This would mean you do not need the portion of code for the second servo. Therefore, depending on the setup that you use, you will have to determine which portions of the code are necessary for your project.
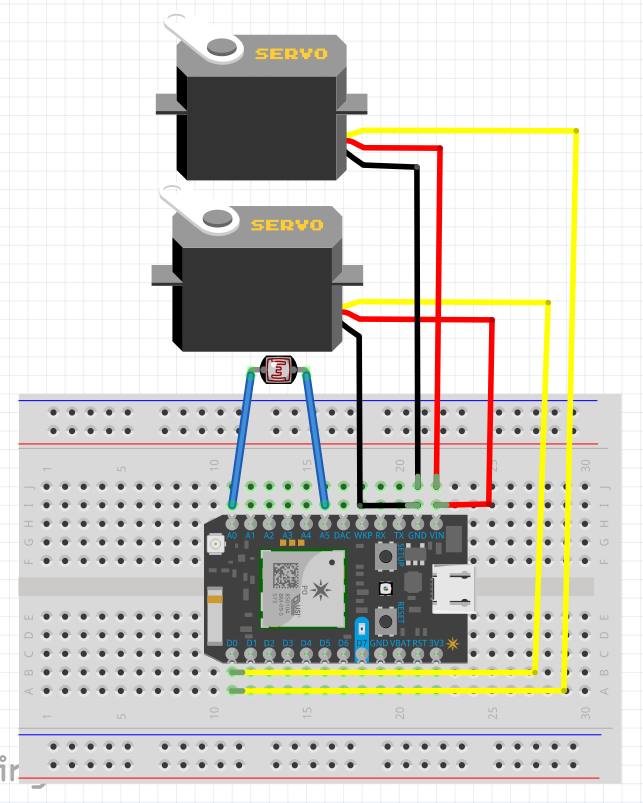
Schematic for 2 photons, servos

Photo Sensor
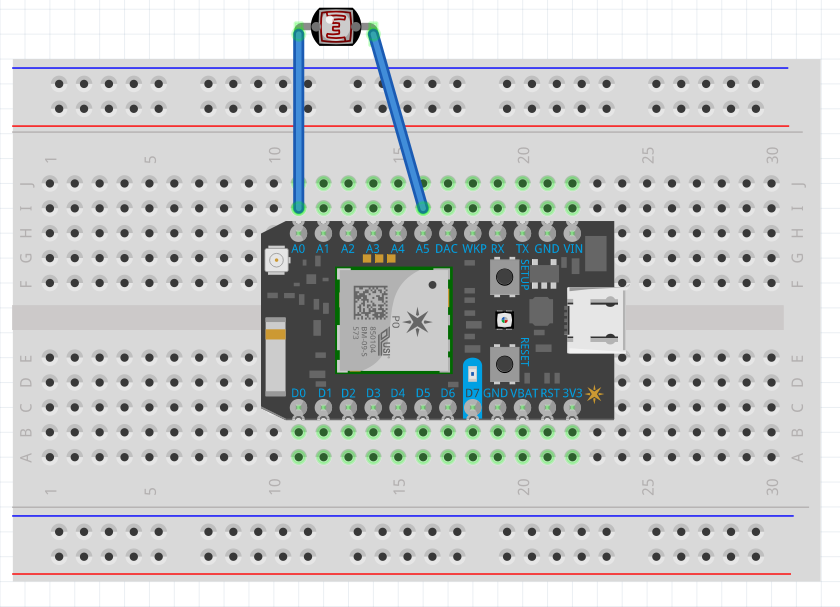
Single Photon Option


Comments
Please log in or sign up to comment.