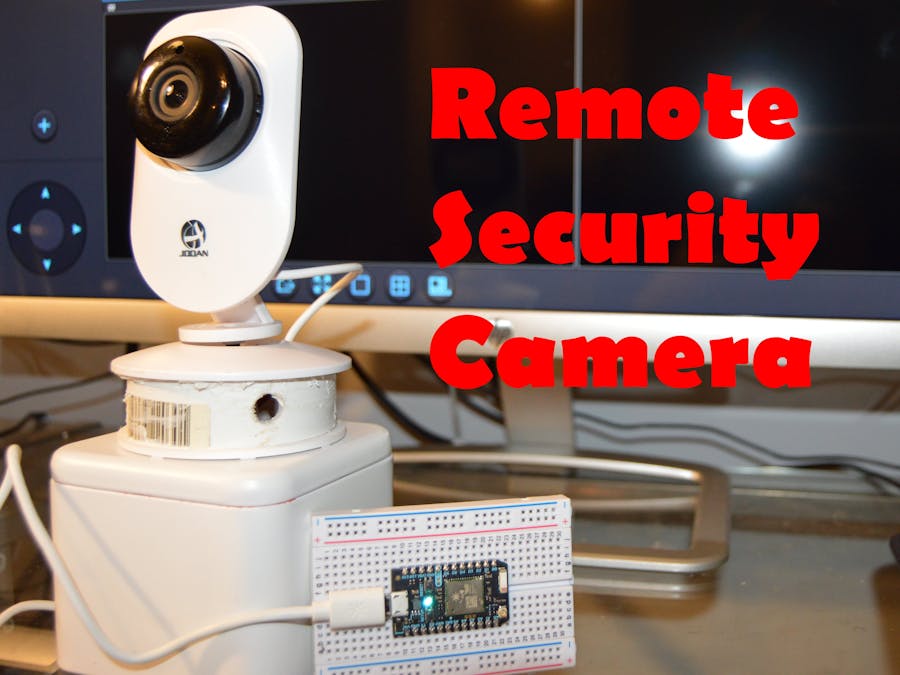
Idea Behind the ProjectWhen we began to brainstorm ideas about the project we decided to take a fairly expensive idea (home security cameras) and make it with the lowest cost possible while having control from our phone and computer. To do this we purchased an inexpensive security camera from Amazon along with a transistor to be used as a switch for turning the camera on and off. We also bought a mini servo to be used as the motor for controlling the camera's rotation.
Uses of the cameraThe project was driven with security in mind, however is not limited to security. There are infinite applications of the system such as:
The list is only limited to imagination. As long as the Photons are within range of a WiFi signal, the system is able to work.
Constructing the CameraOnce the supplies arrived, we took apart the base of the camera and mounted the servo to the base and the servo arm to the camera. A piece of PVC pipe was added to increase the height of the base to allow room for the servo. The picture below shows the servo in the base, along with another picture that shows the servo arm attached to the bottom of the camera.
Servo mounted in the base of the camera
Servo in the base along with servo arm on camera
The box was also added to the bottom of the camera as a place to house the electronics as shown below.
Close up of photon and circuit inside box
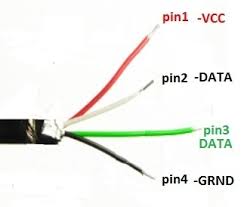
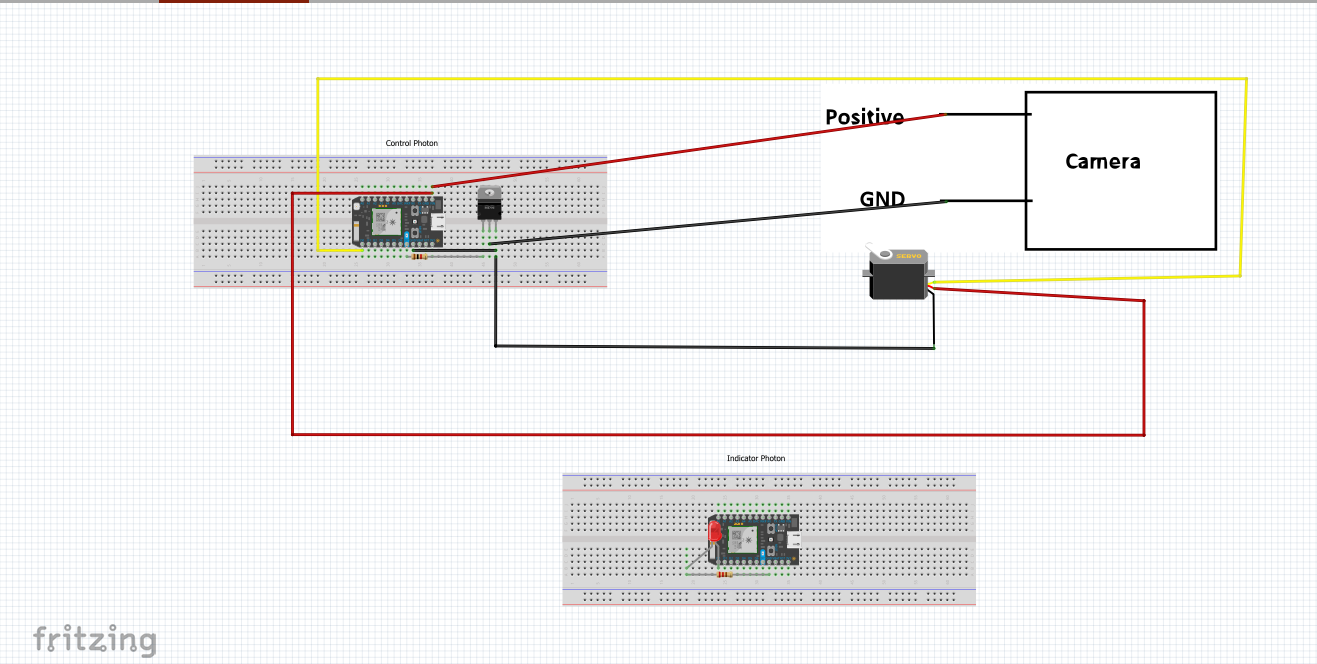
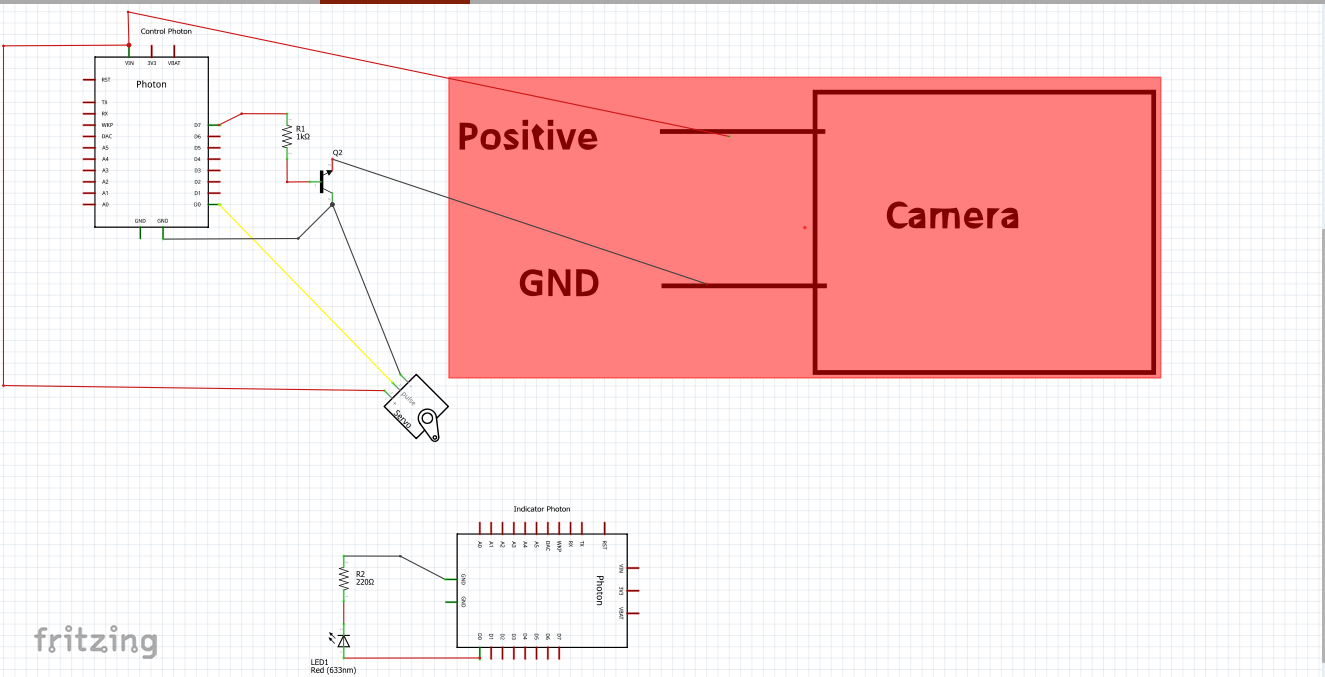
The circuit diagrams shown below show the full wiring. Simply, we used a transistor as a switch to turn on and off the camera and wired in a servo using the built in servo function in the code. The micro USB cable that powers the camera was stripped and the positive and ground wires only (micro usb cables have 4 wires total) could be wired into the control photon.
Functionality of CameraThe camera is controlled by using the control everything mobicle interface and contains five different commands. The commands (shown below) are camera on, camera off, turn camera right, turn camera left, and center camera. All of the functions can be seen in action in the video below.
Mobicle interface for controlling camera
Using two particles was not crucial to the camera function, but we did find a way to add a second photon that will be beneficial. The second photon simply lights up the on-board LED on D7 when the camera is on. When the camera is outside, having this close by will be helpful to insure the camera is on. When the camera turns on it takes a little time to connect to the software and see the feed so instead of thinking the camera is off or not working the second particle ensures that it is indeed on and that the feed will show up shortly. This can be seen in the video below. (For connecting photon to WiFi see this video made by Ben Kwiatkowski https://www.youtube.com/watch?v=1PWqEpQ-QIM)
Security Camera in ActionGraphsFigure 1: Displays behavior of camera when turned on and off (-1 for off, 1 for on)
Figure 2: Displays behavior of camera when centered, turned left, and turned right (0 for center, -1 for left, 1 for right)


Comments