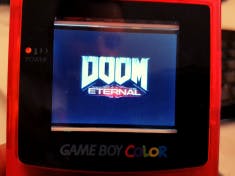
So of course it’s not really a GBC playing Doom Eternal it’s my Gameboy Raspberry Pi that I made way back in 2017 using Moonlight to stream from my gaming PC to the Raspberry Pi within the GBC shell.
With the release of the (awesome) Doom Eternal I thought it was time to try and play this on that same hardware for a bit of fun.
Build.Essentially go here and follow the steps if you want to try and build this one for yourself.
You will also need a gaming PC with an nVidia graphics card in with Geforce Experience installed.
Some extra stuff.So I did a standard install using PiBakery then whacked on the script from my GitHub for the input controls (the ‘buttons_doome.py’ file).
You can then launch this file with:
python buttons_doome.py
python buttons_doome.py
This will allow mouse movement for aiming with the d-pad, mouse clicks with A/B, forward with Start and Select is for jumping. So pretty limited; but I’m all out of buttons at this point.
Next up was getting the PiTFT setup again, can follow the instructions here. Then you want to ensure that the Pi is set to boot and auto-login to desktop.
Then the instructions for Moonlight installation are here – at the sources.list point I added in the ‘buster’ version to ensure to get the newest version.
The instructions here also help out with the sources and GPG keys.
Next up is sorting out the framebuffer copy – the instructions here. This will allow for the current frame to be written to the TFT screen so the game can be played.
In order to get accelerate video through to the Pi TFT, you need to use fbcp. Follow the instructions here. Under X server, Console and Framebuffer mirroring, the only change I found I needed to make was the ‘/usr/share/X11/xorg.conf.d/99-fbdev.conf’ file:
Section "Device" Identifier "myfb" Driver "fbdev" Option "fbdev" "/dev/fb0" EndSectionSection "Device" Identifier "myfb" Driver "fbdev" Option "fbdev" "/dev/fb0" EndSection
This makes it write the X server to fb0 which is then copied to fb1 by fbcp, which is then written to the TFT (I think, I could be technically wrong here, but it works for me). In your /etc/rc.local file, put the below in above exit:
fbcp &
fbcp &
There’s a few other config things need to be set in the boot config at /boot/config.txt:
framebuffer_width=320
framebuffer_height=240
hdmi_force_hotplug=1
hdmi_group=2
hdmi_mode=87
hdmi_cvt=320 240 60 1 0 0
framebuffer_width=320
framebuffer_height=240
hdmi_force_hotplug=1
hdmi_group=2
hdmi_mode=87
hdmi_cvt=320 240 60 1 0 0
After a reboot that should take effect and you should be able to see the desktop.
Ensure that the PC you are streaming from is on with GFE set to enable streaming.
Now open up a cmd window and connect Moonlight to the streaming PC:
moonlight pair X.X.X.X
moonlight pair X.X.X.X
x.x.x.x being the IP address of the PC. This will give you a code that then needs typing in on the PC to establish the connection.
Then start streaming with:
moonlight stream -width 320 -height 240 -fps 30 -localaudio -app steam –unsupportedmoonlight stream -width 320 -height 240 -fps 30 -localaudio -app steam –unsupported
And that should be it! I also had a keyboard and mouse plugged into the Gameboy Pi so that I could do certain things, as 4 buttons + d-pad aren’t enough to full operate menus and stuff.
But it works:
It does not work well.
As you can see in the video above, it’s slow and sluggish with the GPIO buttons being used as the input.
However – with a normal mouse and keyboard attached to the Pi… I don’t think this would be too ridiculous of an experience and Moonlight does a good job of getting the frames over to the Pi, given that Steamlink itself will not run on a Pi Zero (requires 3 or above) then this is pretty cool stuff.
The limitation, of course is my input methods – Doom E was just not made for Gameboy Controls or a badly written Python script written by me…
Just a bit of fun for the weekend… Now back to Doom.
…
On my PC.


_0oE9kS1W7E.png?auto=compress%2Cformat&w=40&h=40&fit=min&dpr=2)


_0oE9kS1W7E.png?auto=compress%2Cformat&w=60&h=60&fit=min&dpr=2)


Comments
Please log in or sign up to comment.