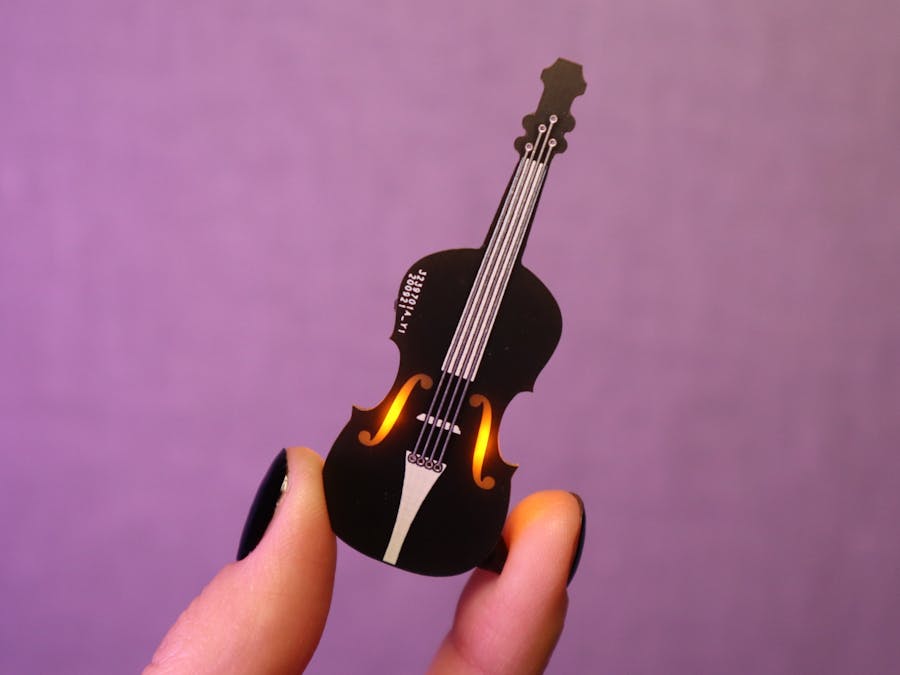
Designing and building this tiny violin was a fun way to experiment with building my own microcontroller development board from scratch, as I've been meaning to do for a while. So I'll be documenting the whole process here, from PCB design to programming the microcontroller.
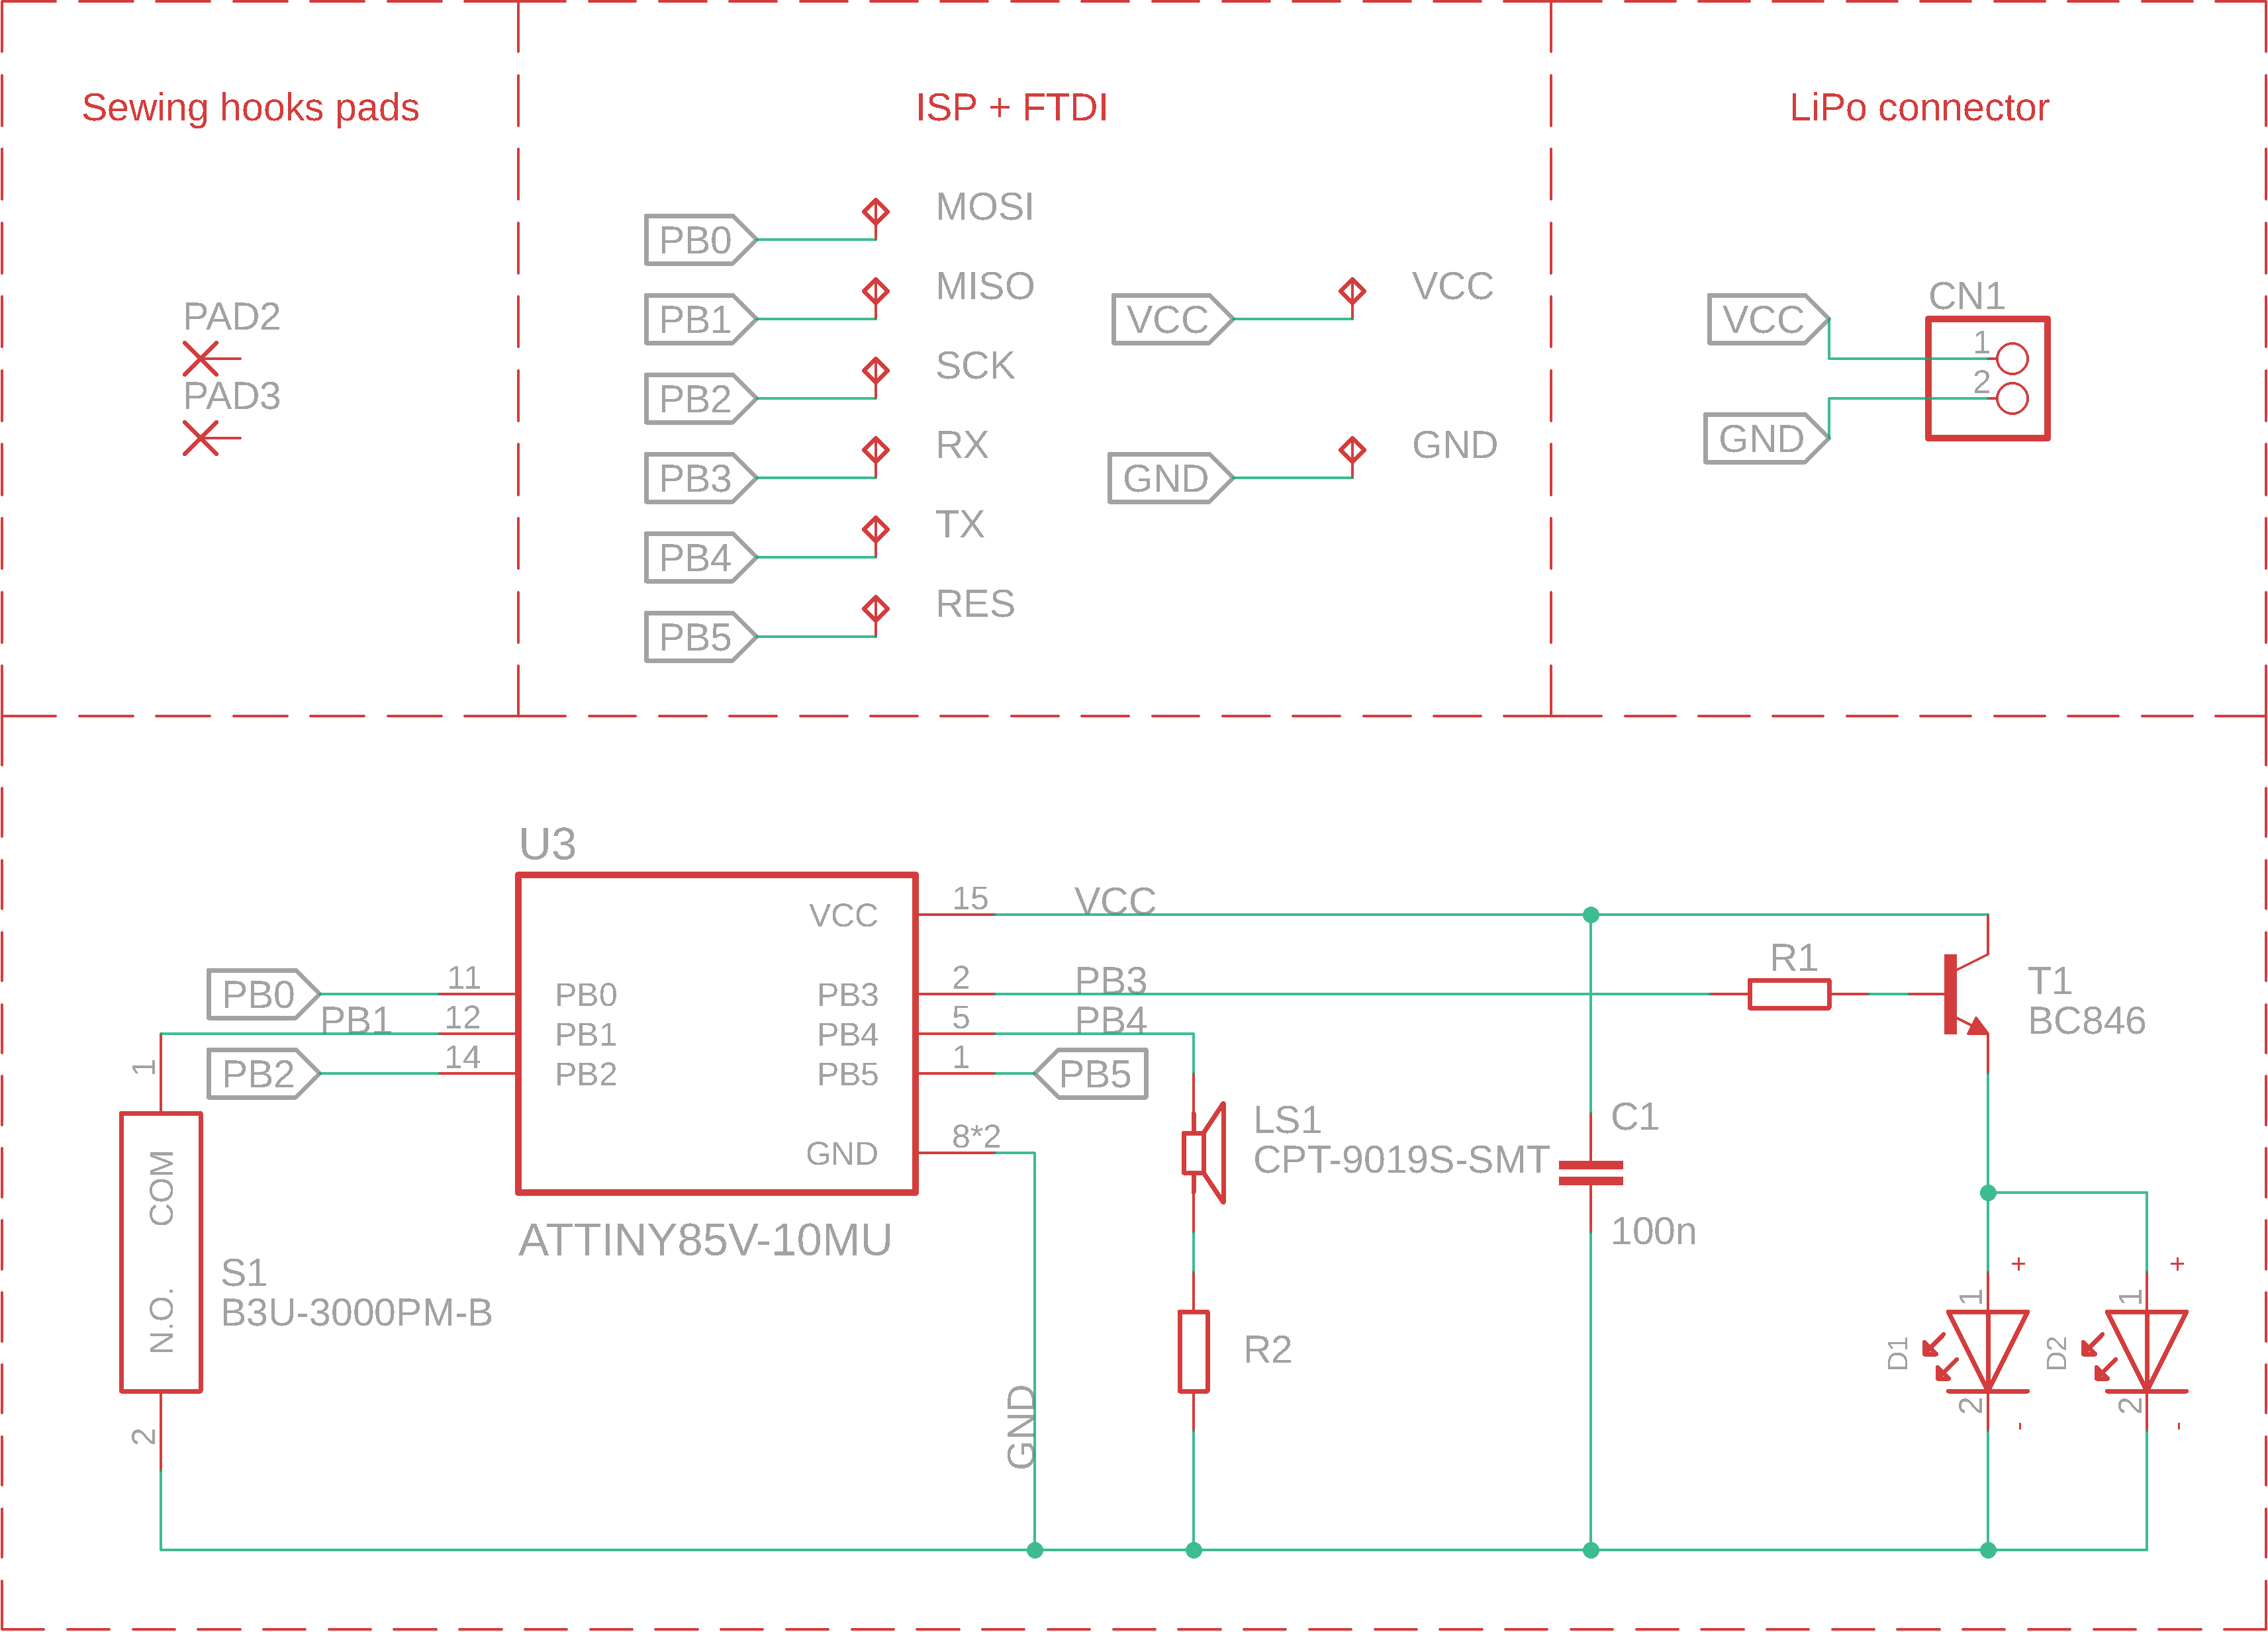
1. Circuit Schematic and PCB DesignThe first step was choosing the microcontroller I was going to use, based on the functionalities I wanted my violin to have. I needed at least one PWM pin for the piezoelectric buzzer and another two digital pins for the LEDs and for the push-button, so the ATtiny85 turned out to be the perfect fit.
Circuit SchematicThe circuit schematic is fairly simple. The ATtiny85 controls two LEDs and a piezoelectric buzzer, and I also added a push-button for switching between songs. The whole circuit is powered by a 3.7V LiPo battery.
I wanted to make the PCB as small as possible, in order to be able to use it as a badge, so I found the tiniest microcontroller package (MLF-20).
As an extra feature, I also connected the strings of the violin to an analog input of the microcontroller, in order to actually be able to play the violin by touching the strings with a conductive material.
I use Eagle CAD for designing my PCBs, and Gordon Williams' SVG to Eagle converter is always my go-to tool when I need custom PCB outlines. I traced the outline of a violin in Inkscape and then converted it to an Eagle script with this tool.
In order to obtain the shine-through effect for the F-holes of the violin, I placed side-view LEDs on the back of the PCB and I used the Top and Restrict layers to remove copper and solder mask from that area.
These are the PCBs I ordered from JLCPCB. The silkscreen is very detailed and I think the matte black solder mask suits the violins perfectly! I forgot to remove the order number this time, but JLCPCB has an option to do that when ordering PCBs.
I've added the Gerber files and the Eagle CAD files to this Github repository if you want to order it as well.
The PCB is just a bit larger than the smallest LiPo battery I could find, so I can hide the battery on the back of the violin. I didn't use the classic LiPo JST connector because it was huge in contrast to the rest of the components, so I soldered 2mm pins instead.
A great tip that I've seen others use to enhance the shine-through effect of the LEDs is covering them with black hot glue.
The first step was burning the bootloader and for that, I used this core and an USBTinyISP programmer.
The full program can be found here and I'll explain the main functionalities in the following.
I used some of the Arduino song scores translated into code by Robson Couto, which you can find here. The Arduino Tone library isn't compatible with ATtiny microcontrollers, so I used the TimerFreeTone library by Tim Eckel as an alternative.
Since the songs (the arrays of musical notes and durations) were way too big for the ATtiny85's data memory, I used PROGMEM to store them in the program memory instead (this means I also had to use special functions for accessing the arrays, such as pgm_read_word_near).
Depending on how long the push button is pressed, the program switches between 4 functions:
- playing Ode to Joy (if the button was pressed for less than 1s)
- playing Greensleeves (if the button was pressed for less than 2s and more than 1s)
- playing the Harry Potter theme song (if the button was pressed for less than 3s and more than 2s)
- freestyle (if the button was pressed for less than 4s and more than 3s).
The freestyle function reads analog values from the pin connected to the strings and maps them to a range of frequencies, so when the strings are touched by something conductive a musical note is played.
ResultsI'm looking forward to improving a few things in the future iterations:
- I should add a LiPo charging circuit to the PCB because right now I have to charge the batteries separately and it isn't very convenient.
- Right now the programming pads are placed around the microcontroller so I couldn't use pogo pins for programming it, I soldered some wires on them instead. In the next iteration, I should place all of them close to each other, equally spaced.
Hope you liked my project! Drop a comment if you have any questions. ^^
UPDATE
I soldered some strings to the violin and added a small bridge made of expanded PVC.


_IHYK2AHej1.png?auto=compress%2Cformat&w=40&h=40&fit=fillmax&bg=fff&dpr=2)
Comments