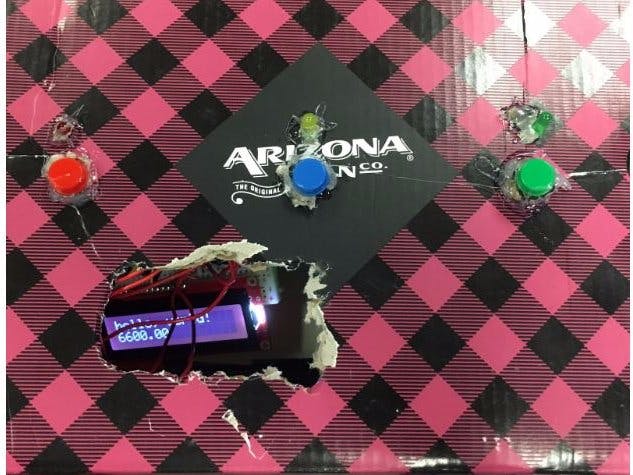
Simplistic and fun, that is the aim for our game, Whack-a-Button. Lucas and I’s project is a perfect combination of simple yet interesting. This is how we wanted it from the start, on Hackster we saw that all of the best projects were simple and relatively easy to make, but exciting to use and play with. We also knew we wanted to make a game, it seemed like the most intriguing thing to make. With all these things in mind we created a remake of an original game, Whack-a-Mole, and turned it into Whack-a-Button.
Whack-a-Button works like this; when the light that is next to its corresponding button lights up you must press the correct button as quick as you can. Every time you hit the correct button you gain a point boost randomized between 100-300, points are displayed on an LCD. To make this game a little more difficult the yellow LED in our game does not light up, so if there are no LEDs lit the blue button must be pressed. You have no time limit because it is up to you when you want to stop, you can also time yourself.
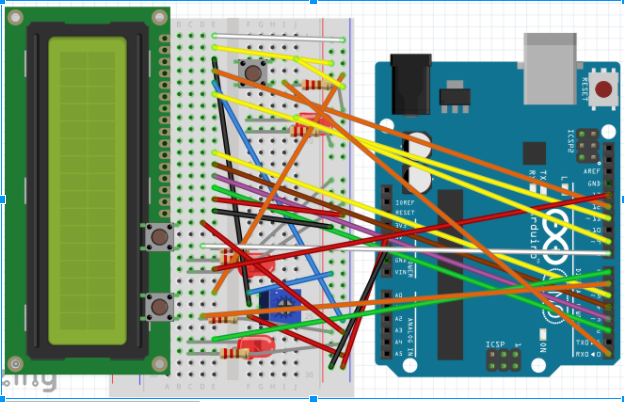
Step-by-step Instructions- Wire up your LCD just like the SIK Guide Book has it, this is a crucial part of this game and is intricate and complicated, make sure this is right.
- Use a soldering iron and solder together 3 LEDs and 3 buttons with a around 6 inch piece of wire. This makes it possible to put you Arduino in a box and make your piece not crowded with a ton of wires.
- Wire your LEDs and buttons according to the Fritzing document so they are wired to the correct pins.
- Copy the code provided and run the program. Don’t be surprised if it doesn’t work at first. The problem is most likely the wiring, this is the harder part of the game.


_3u05Tpwasz.png?auto=compress%2Cformat&w=40&h=40&fit=fillmax&bg=fff&dpr=2)
Comments
Please log in or sign up to comment.