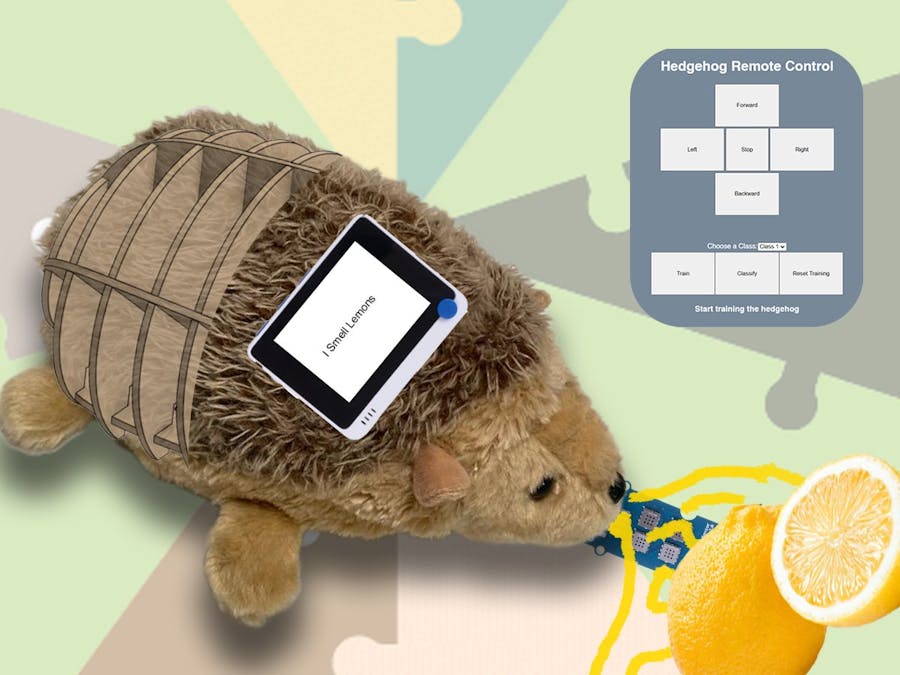
Hedgehogs walk a couple of miles every night looking for food, which they find thanks to their acute sense of smell. Their need to gain critical weight to face hibernation puts them in the face of many dangers, including pesticide poisoning.
This design is part of a game developed to educate the general audience - and kids in particular - about the dangers hedgehogs are facing, in urban and suburban areas, and the importance of trying to preserve them. Detailed game rules can be found in an attachment in the schematic files section.
We are in collaboration with Seed Studio and Tous aux abris! which is a collegiate association whose aim is to design and build protective shelters for threatened liminal animals* (birds, bats, hedgehogs, bees, etc.). They can be found at their website:https://tousauxabris.org/
Drawing inspiration from Benjamin Cabe's Artificial nose project that uses a WIO terminal, multichannel gas sensor, and edge-impulse to train a TinyML neural network to recognize smells such as coffee or bread, this guide focuses on the Robot design and programming for a robot that can be driven around and classify different smells.
Hedgehog ShellWe designed the shell to be laser-cut as this is faster and more accessible than 3d printed options. We used SOLIDWORKS for this purpose. This model is designed to be cut from 1/8 in plywood but the design can be modified to use different specification wood.
The shape of this assembly is made to fit perfectly inside the hedgehog plushie. It's made of 10 "ribs" held together by 3 "spines". This can interlock with the bottom base which is the main mounting plate for all the hardware.
A hole can be made at the bottom of the plushie big enough for the shell to fit through. The stuffing can then be removed from the plushie so it is empty. The shell can then be pushed into this skin.
At the bottom of the plate the servos can be hot-glued to the front and the caster can be screwed at the back.
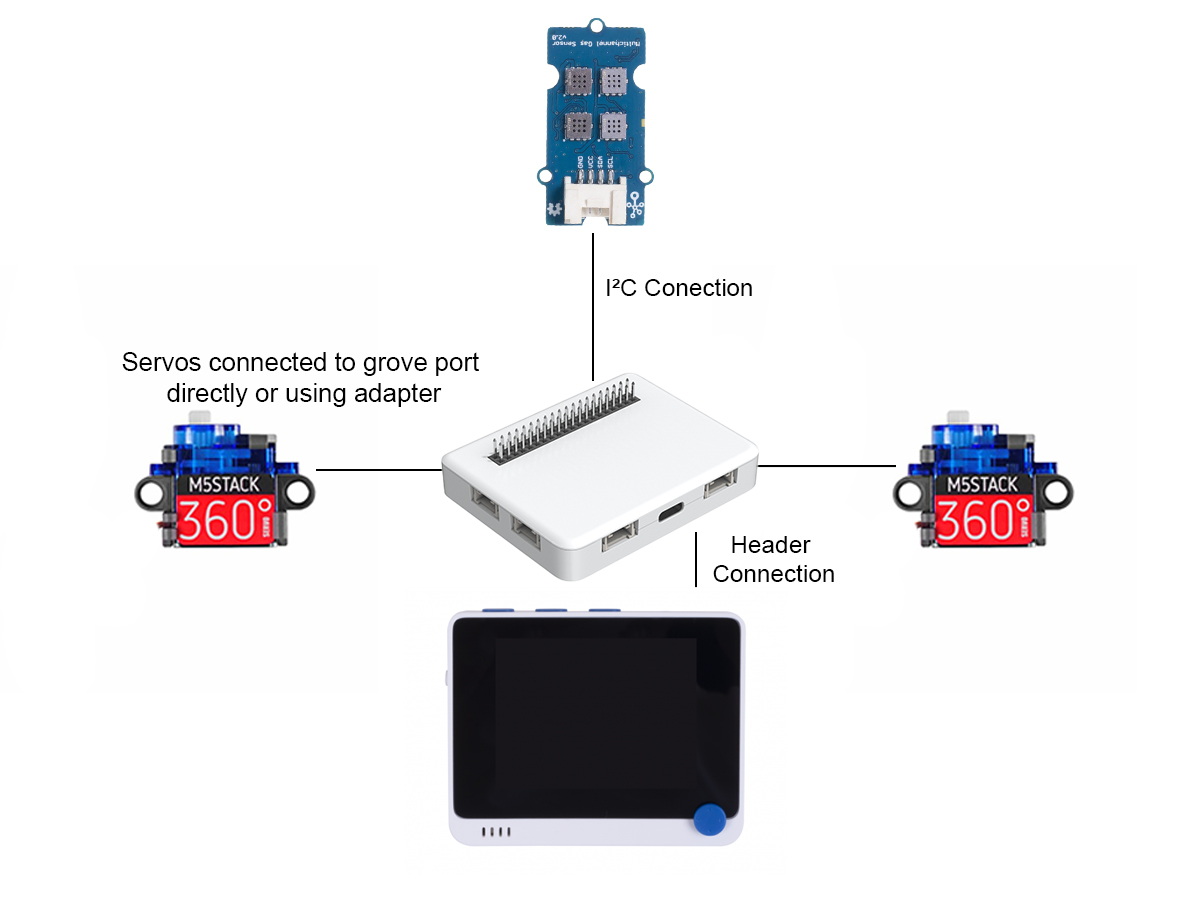
Mounting the WIO was trickier with the battery attached so we designed a small plate that can be screwed to the bottom of the main plate. This is held by four screws at each corner holding WIO at an offset under the plate. The WIO and battery can be slid through the hole in the plate and be held down by gravity resting on the faceplate. This allows the display, buttons and ports to be accessible while the robot is assembled.
The top of the plate just has the WIO battery and the gas sensor. The gas sensor is mounted with two standoff nuts with the modules facing down. we drilled holes to feed the wires. They can be connected to the WIO ports or the battery extension ports.
The two parts can be put together. It is easy to remove the top shell in order to charge the WIO battery or access something. It is held down by gravity during regular operation.
Once the Hedgehog is assembled it is time to program it. The Arduino Github Repo is linked here. Download the HedgehogMain.ino code and download Arduino IDE. There are some prerequisites that must be met before proceeding:
- Follow the instructions at this link to update your WIO firmware
- Install SAMD_ISR_Servo library using the.zip file
- Install Arduino_KNN library using Arduino library manager
- Install Gas Sensor V2 library
- Install the LCD library
Once all this is complete, you can open the code in Arduino IDE. You can enter your WiFi SSID and password.
Make sure that WIO terminal is installed under boards and the correct board and board is selected so you can begin uploading.
Once the code is uploaded, the robot is ready to use. By default it is loaded with a simple K Nearest Neighbors algorithm for classification of up to 5 classes. You can vary the number of neighbors being used in the code.
The usb cable can now be removed from the robot and the battery can be turned on to power it instead. The display will turn on and once it successfully connects to WiFi, it will show you the IP address of your robot.
The WIO is running a webserver which can be accessed from any browser on the same network. Enter the IP address shown on the WIO screen in any web browser to access the User controls.
Browser ControlThere are two parts to the webpage, the movement controls and the training controls. Each of the movement buttons make the robot move in the labelled direction. Since this robot works over WiFi it can become unresponsive sometimes, the stop button that can be used to stop the robot in that event.
Once the robot is driven to a smell source, you can select what class you're training for and click train. This will record the data for the class. Once enough data points have been collected you can move the robot to one of the sources and click classify to classify what it is smelling at the moment. The reset button can be used to delete all training data and make a new model if needed.
The robot is usable in this default setup and you can stop here but if you want to use a different model or experiment with Neural Networks, You can use the following integration guide.
Edge Impulse Setup
First you can edge impulse account here https://www.edgeimpulse.com/ as most of the steps will require an account. Then you need to setup a data forwarder to collect data using your WIO gas-sensor.
To setup the data forwarder. First install edge-impulse-cli by following linked instructions. There are instructions on the use of the data forwarder linked here.
To send data from your WIO to edge impulse you need to print it over the serial port. Upload the program named EdgeImpulse_DataCollection to your WIO using the Arduino IDE.
#include <Multichannel_Gas_GMXXX.h>
#include <Wire.h>
GAS_GMXXX<TwoWire> gas;


void setup() {
  // put your setup code here, to run once:
  gas.begin(Wire, 0x08); // use the hardware I2C
  Serial.begin(115200);
}

void loop() {

  String NO2 = String(gas.getGM102B());
  String C2H = String(gas.getGM302B());
  String VOC = String(gas.getGM502B());
  String CO = String(gas.getGM702B());
  Serial.println(NO2+","+C2H+","+VOC+","+CO);

  delay(10);


}
Once edge-impulse-cli is installed including the nodejs requirements and your WIO is ready, open your command prompt and run the following line:
edge-impulse-data-forwarderYou will then be prompted for your account information. Enter your edge impulse account information from before.
Enter the sensor axes when prompted:
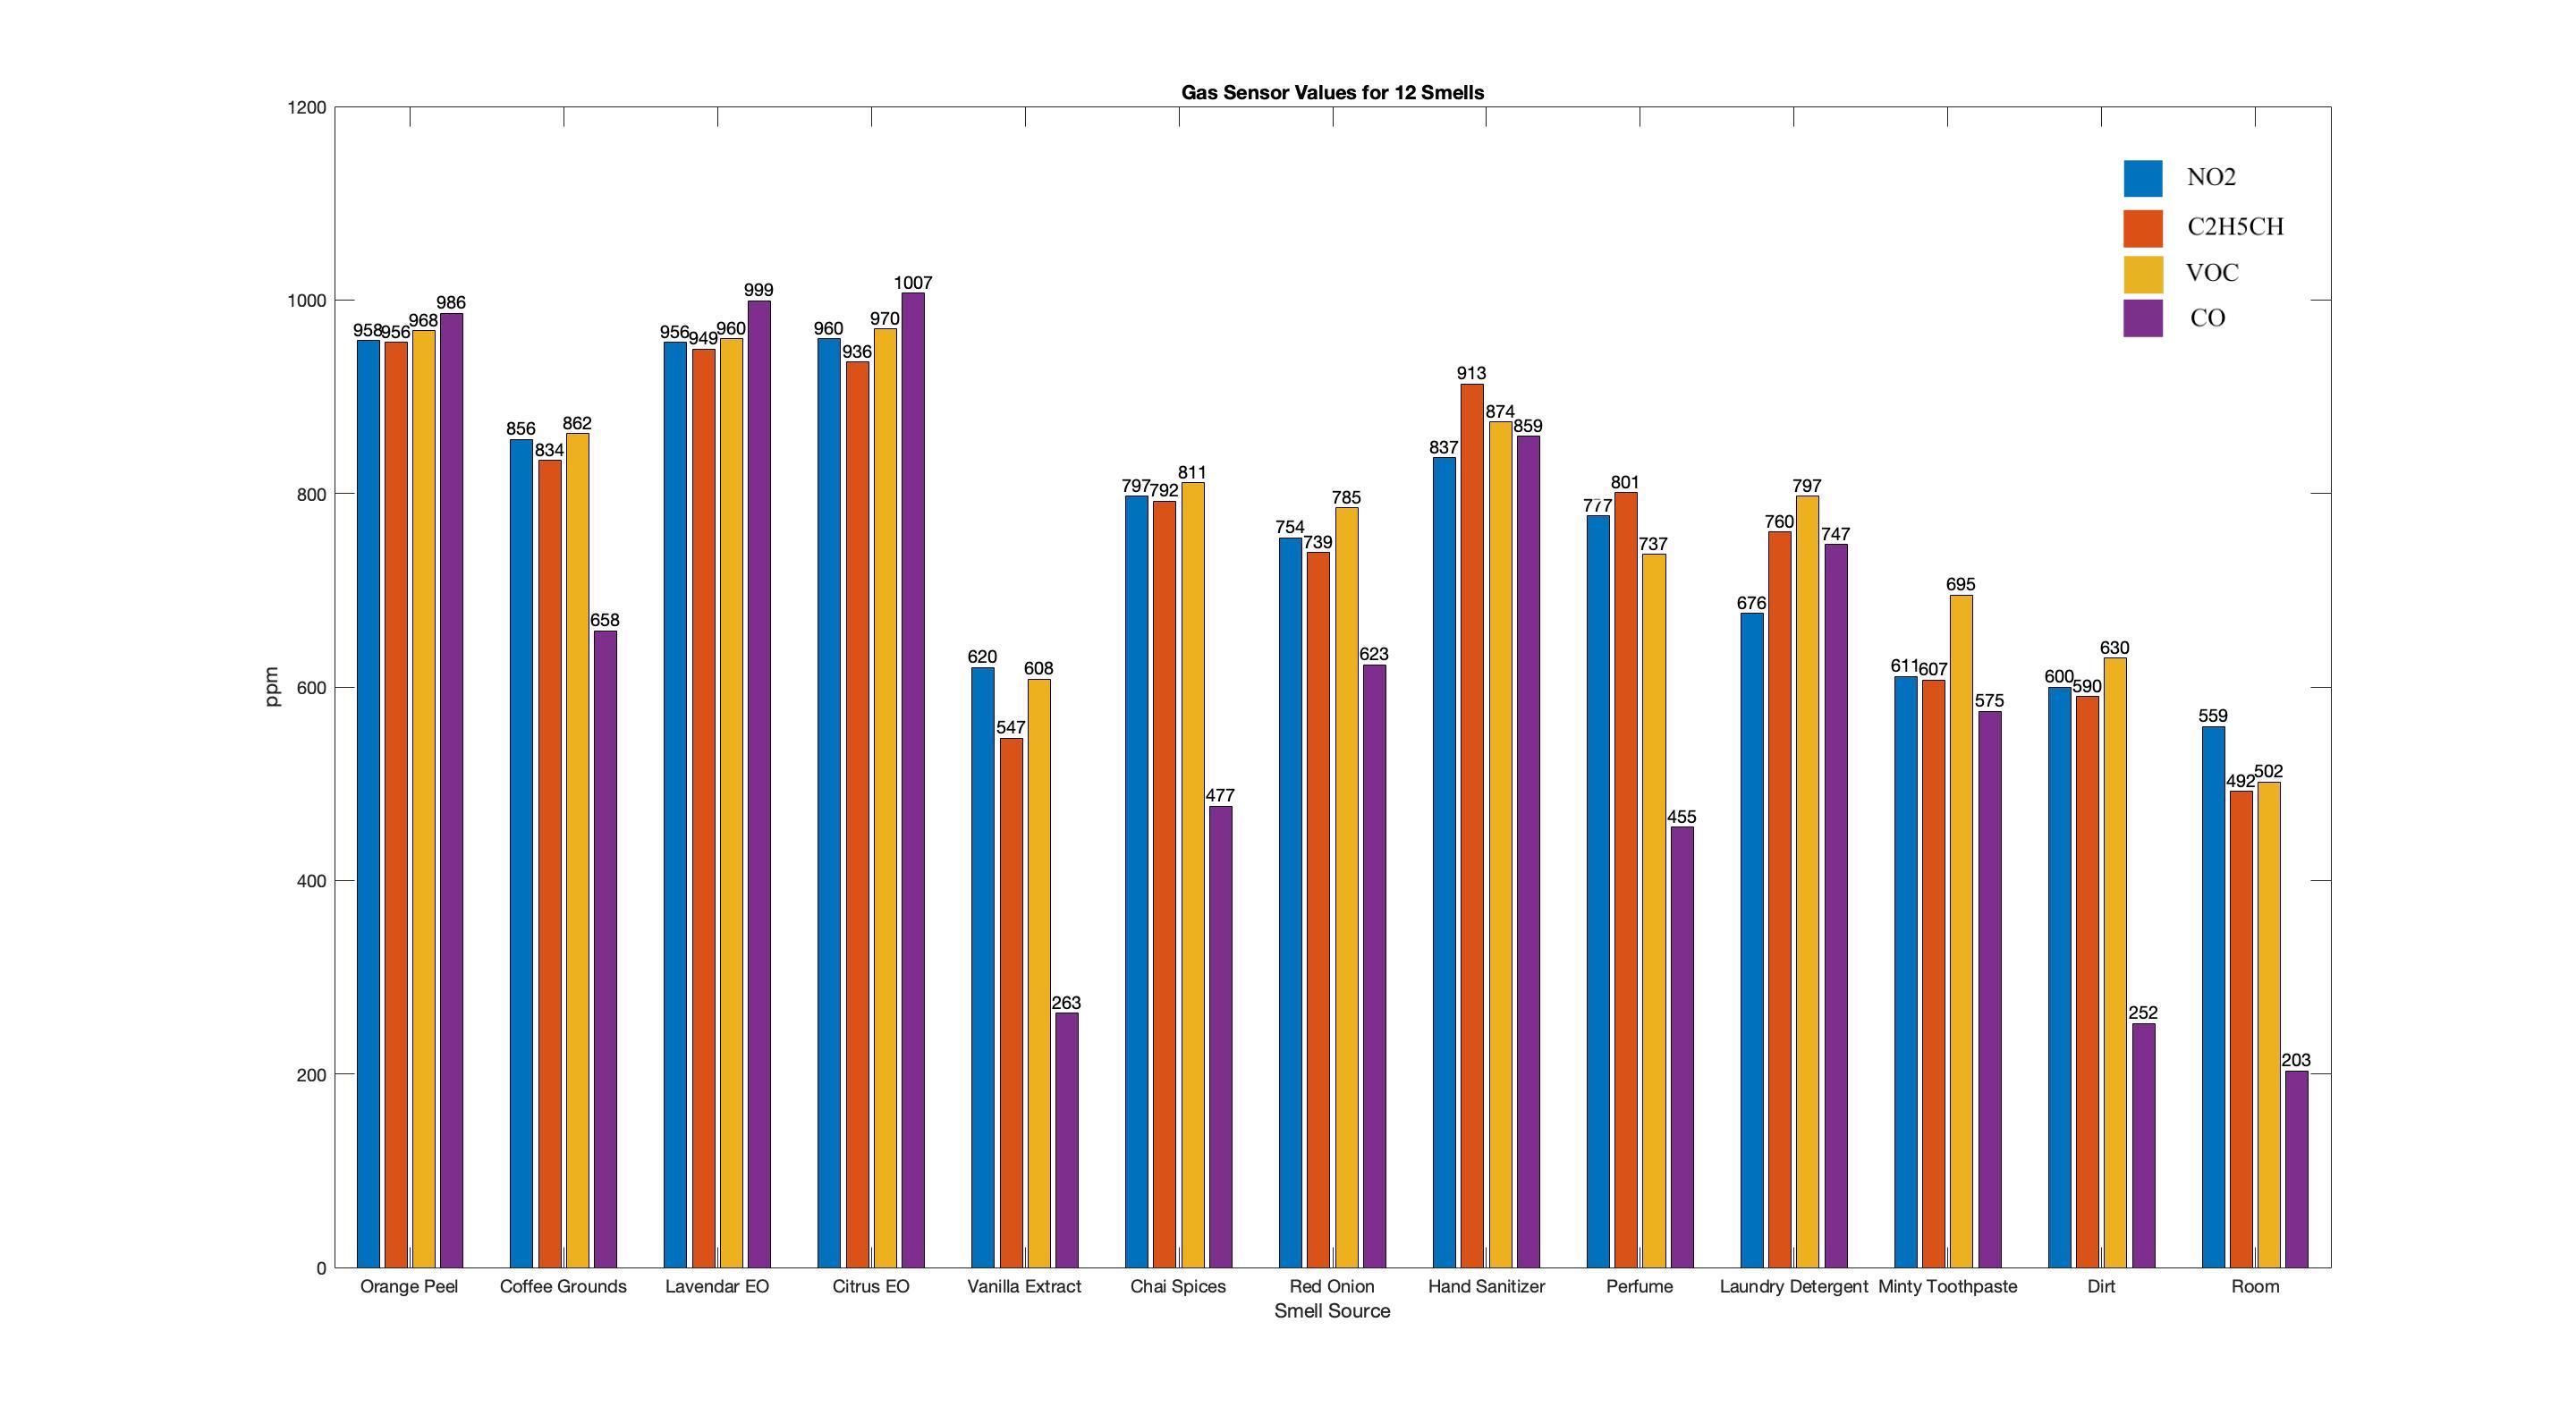
NO2,C2H5CH,VOC,COEnter a name for your device and you will be connected to edge-impulse.
Data Collection
Now data collection can begin. Open the data acquisition tab in edge impulse for your project. You will see your data forwarding device name under Device.
A sample length can be set which is the number of milliseconds that you will record for each sample and a label name which is the class identifier for this particular sample.
Select your classifier settings as shown below:
Generate your model and features:
In the deployment tab export your model as an Arduino library.
You can now load the other code named hedgehogEdgeImpulseMain from github which includes edge impulse support. Install your.zip library and include it in the code as shown. Make changes as required.
This web interface has just a classify button. When this is clicked the edge impulse classifier is invoked and the pretrained model can be used.
This project was made possible with the help of seeed studio,Tous Aux Abris, and Tufts University. We would also like to thank the following people in their support for this project.
- Benjamin Cabe (Principal Program Manager Azure IoT)
- Didier Destabeaux (Founder of "Tous Aux Abris")
- Elaine Wu (Marketing Manager at seeedstudio)
The following students worked on this project, supported by Chris Rogers (Professor in Mechanical Engineering at Tufts University):
- Rebecca Shen
- Alex Savic
- Aashir Jalal


Comments
Please log in or sign up to comment.