


Hardware components | ||||||
 |
| × | 1 | |||
 |
| × | 1 | |||
 |
| × | 1 | |||
 |
| × | 1 | |||
Software apps and online services | ||||||
| ||||||
We often forget the FPGA can be used in consumer applications and not just industrial, automotive, defense / aerospace etc. This is especially true for devices in the cist optimised range such as the Artix, Spartan and Zynq 7000 series devices.
Programmable logic and SoC provides a range of benefits which at first might not be obvious including
- System Integration - combine several discrete processing elements into a single package.
- Time to Market - Reduced time compared to ASIC Solutions
- In Field Update - ability to upgrade not only the SW but also the "fixed" logic design as standards and product road maps evolve
- Architectural Flexibility - The ability to provide a wide range of interfacing and acceleration of functions to the programmable logic.
- De Risking - The ability to start development early.
One common application of FPGA in the consumer market is home automation. In home automation systems there is often a central secure gateay which manages connection of devices and the wider system.
For this project we are going to demonstrate the central gateway which connects to series of ZigBee controlled lights.
The road map for the project is to interface it at a later stage with a Smart AI based digital lock which will communicate with the gateway and establish the home settings for the person unlocking.
Home Automation, PYNQ and ZigBeeIt's entirely possible to control and automate ZigBee devices right from the PYNQ's Juptyer notebook. This has some great benefit such as customising User Interfaces which is pretty unique itself when compared to the other Home Assistant and Automation software. Not only that, we can even leverage the fact that this is a PYNQ board and we can utilize the PL to further customise our application. It's perfect for the home assistant community and surprisingly its relatively simple. Let's show you how we did it.
Featured ImagesThis section is to summaries the methods used in this project.
The PYNQ framework runs and underlying OS. The underlying OS for the PYNQ frame is Ubuntu. We are going to leverage this later on to install docker which in turns install the deCONZ software.
What and Why docker ?
Simply put docker is a great way of distributing software and reduces the overhead of multiple virtual machines. Docker has the ability to run software in what's called a "Container", a container is a fully package software, which includes the image, libraries and configuration files. Since the container will run the software we don't have to worry about compatibility issues and will run as expected straight out of the box with minimal intervention.
What and Why deCONZ software
The Conbee II uses the deCONZ software which is provided by the manufacture Dresden Elektronik to connect and control devices. The deCONZ software allows us to connect and control device through the Web App. What makes this all work is the fact that the deCONZ web app has a built-in REST API, which we can interface from within the Juypter Notebook enivronment!
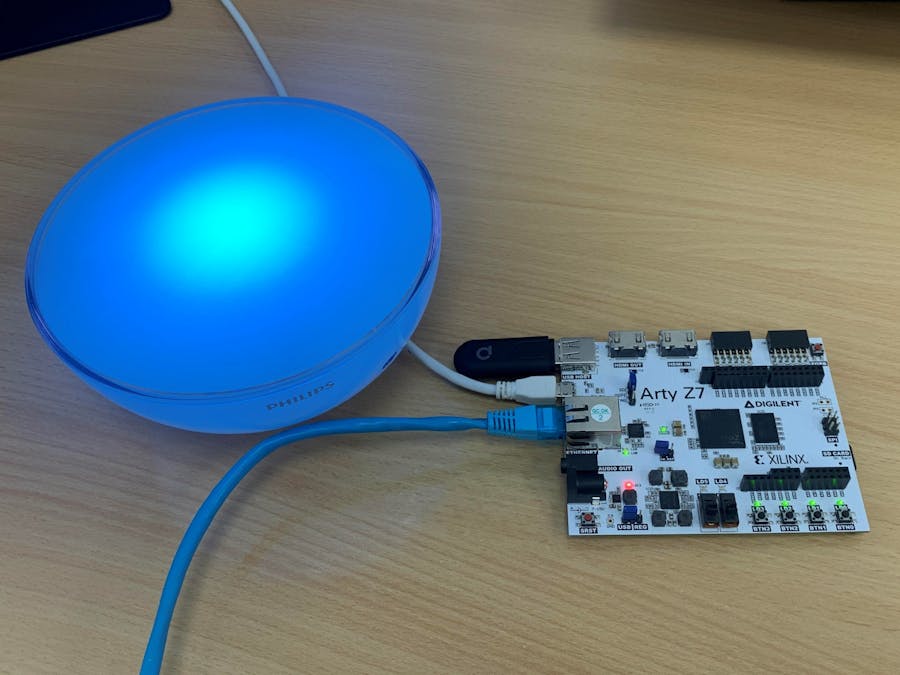
Prerequisites - HardwareFor this Demonstration will be using for the Hardware:
- Arty Z7 Xilinx ZYNQ 7000
- Conbee II USB GATEWAY
- Smart Light - Philips Hue GO Portable light
The Arty Z7 is capable of running the PYNQ framework and has a USB slot. The USB slot is a requirement as we will be using the ConBee II USB Gateway directly off the Arty Z7 itself.
The Conbee II is a great little USB stick that can connect smart devices such as lights, switches, outlets and sensors. This little stick is capable on all platforms from Windows to Ubuntu and we will be installing it on PYNQ.
The smart light in this project, is a generic Bluetooth smart light that you can pick up online. You don't have to purchase the same one, but make sure to check that its compatible with the Conbee II. The full list of compatible devices can be found here: https://phoscon.de/en/conbee2/compatible
Setting up PYNQTo get started the first thing we need is to download the PYNQ image from http://www.pynq.io/board.html at the time of writing Version 2.7 is the latest release. Here we are going to download the PYNQ-Z1 image since its compatible with our Arty Z7 board.
Once downloaded we need to flash the image onto a SD card. We are going to use the software WinDisk32 to flash the image. Note Flashing the SD card willeraseeverything. Make sure you don't have anything on the SD card.
After the flashing process has completed. Remove the SD card and insert the card into the Arty Z7, make sure that the Boot Jumper is set to SD. Plug in Arty and wait for the Pynq image to Boot.
Once PYNQ has finished loading, we need to find our IP Address enter the command below.
ifconfig -aFind our IP Address, it should be under the eth0 interface. Here our IP Address is 192.168.0.38. Take a note of this we will need it later.
As mentioned in the Method Summary section we will be installing Docker. To begin we need to add the current user to the dialout group
sudo usermod -a G dialout $USERNext we need to download the docker package using the command below:
sudo apt-get install docker.ioWait for the install is done. Once completed we need to install docker compose. Docker compose is a use tool, and will help us create and modify our software.
sudo apt-get install docker-composeWith the docker-compose installed we next need to setup the deCONZ container/Application, this is the software that interacts and finds our zigbee devices.
Navigate to /opt folder:
cd /optNext we are going to create a new docker-compose.yaml file.
What the heck is a.yaml file ???
This is the file that we add and configure our container. In future as well if we wanted to add more containers. This is the file.
So, going back to creating the yaml file.
sudo nano docker-compose.yaml3. Copy and paste the container into the yaml file. Make sure to keep the indentation correct !
version: "3.2"
services:
  deconz:
  image: deconzcommunity/deconz:latest
  privileged: true
  container_name: deCONZ
  network_mode: host
  restart: always
  volumes:
   - type: bind
   source: /opt/deconz
   target: /opt/deCONZ
  devices:
  - /dev/ttyACM0
  environment:
   - TZ=Europe/London
   - DECONZ_WEB_PORT=8090
   - DECONZ_WS_PORT=443
   - DEBUG_INFO=1
   - DEBUG_APS=0
   - DEBUG_ZCL=0
   - DEBUG_ZDP=0
   - DEBUG_OTAU=0
This will configure the container so that it will download the latest version of the deCONZ software and set our web portal on port 8090. This is key, because the PYNQ utilise the Web portal for Jupyter’s notebook, which by default uses Port 80 for webpages and has opened an extra port of 9090. This is why we have set the port for the deCONZ application to use 8090. As this does not interfere with the Pynq Jupyter’s notebook web sockets.
Save (CTR-S) and close (CTR-X) the configuration.
Next we can start the deCONZ application using the docker-compose. Enter the command below:
sudo docker-compose up -dThis will download the deCONZ application and automatically start the container when done.
When we get the "Done" response, let's do a sanity check to see if the container is actually running.
sudo docker container lsThe container is running, Awesome!
Conbee II and deCONZ setupNow with the deCONZ application running in the container. We can open the deCONZ web app by using the instructions below.
Open a web browser and enter in the IP along with the port number 8090. In our instance, our IP address is 192.168.0.32 and with the Port number: 192.168.0.32:8090.
This will open the Phoscon web app. From the figure below we can see our gateway click on the icon to begin the setup.
On the next page we need to create our login credentials (See next image). Click next when done.
The Phoscon App will now ask you to connect any lights. You can connect your lights now or later. We are going to connect our Philips Hue GO Portable Light. Make sure our Lamp is plugged in. Click the search Button.
As we can see from the figure above, we can see our Lamp. If you click on the Lamp, you can rename it to make identifying the lamps easier. Once all the Lamps have been detected. Click the proceed without lights. Don’t worry the Lamps that already have been detect will be remembered.
On the next page we can create a new group to add the lamp to. Below is an example.
Create a new group, edit, manage lights.
Add our lights to the group. We only have 1 light to add. Click on the Green Plus Icon
Click Save and press the arrow icon to return to the group page.
With the lights added to our custom group, we can control it. Note the can be some latency below the webapp and the light. Be patient. If there are still issues consider refreshing the page, moving the device closer or restarting the container using the command below:
sudo docker container restart deCONZA Quick Test (Let's play around)
Click on the lights tab to adjust the brightness, colour, and saturation. The colour temperature can also be changed using the icon in the figure below.
Now with the light setup we can create our own interface using Jupyter’s Notebook. This is relatively easy. Since the deCONZ application has a built in API we can leverage this by using some simple python scripts.
Open a new web browser and navigate to Jupyter’s notebook page. In our case 192.168.0.32:80. This will open the familiar jupyter’ notebook.
We are going to create a new folder to keep everything tidy. We have named the folder ConBee II and inside this folder create a new python3 application
The REST API works by making requests. For more information on how to access the API on the official website: https://dresden-elektronik.github.io/deconz-rest-doc/
We need to import some libraries to make the requests.
import requests
import json
Next we need to create a request to obtain an API key. In a new cell enter:
URL = "http://192.168.0.38:8090/api"

device = {'devicetype': 'application'}

p = requests.post(URL, json=device)

pretty_json = json.loads(p.text)
print (json.dumps(pretty_json, indent=2))
Running the code above, we will receive the following error:
The error is Link button not pressed. This is referring to the authentication check. We need to authorise third party apps. Head back into the Phoscon App and click on the gateway option.
Under the advance settings, click Authenticate app. You will have 60 seconds to rerun the code on the previous step. If done within the time the results are successful with an API key. You have now successful authenticated your app and can start configuring and controlling device with Jupyter.
To make requests now we need to provide our API key. For example, we would like to see our lights.
The # represent the API key from the last step
r = requests.get(URL+"/D########9/lights")
pretty_json = json.loads(r.text)
print (json.dumps(pretty_json, indent=2))
The figure above shows us both the Philip Hue Lamp and the ConBee II device
Please see the full list using the commands. Using the link provided:
https://dresden-elektronik.github.io/deconz-rest-doc/
The parameter that can be modified are the parameters listed under the “state” category:
These parameter require a request PUT command. For example we could turn on of off our device.
Now that we know how to control our devices, next is to integrate them into Jupyter’s build in GUI creation tool. We will use the ipywidgets library.
import ipywidgetsLet’s first get some basic controls for our Light. We need an ‘On switch’ and an ‘Off switch’. There aren’t any switches, but we can use buttons instead. The code below create a button which changes the “on” value to True.
btn = widgets.Button(description='On')
display(btn)

def btn_eventhandler(obj):
    data = {"on": True}
    r = requests.put(URL+"/D78828C329/lights/1/state", json = data)
    print("Lamp is On!")

btn.on_click(btn_eventhandler)
Next let's turn off the Lamp. This time we’ll set the ‘on’ value to False!
btn = widgets.Button(description='OFF')
display(btn)

def btn_eventhandler(obj):
    data = {"on": False}
    r = requests.put(URL+"/D78828C329/lights/1/state", json = data)
    print("Lamp is OFF!")

btn.on_click(btn_eventhandler)
We can even add a colour picker widget. The colour picker widget returns to RGB values of the selected colour. However, this presents a little problem. The deCONZ rest api expects the values in HSV. The hue parameter in the HSV colour model is between 0°–360° and is mapped to 0–65535 to get 16-bit resolution.
First lets add the Color picker
colorpicker = widgets.ColorPicker(
        concise=False,
        description='Pick a color',
        value="#121254",
        disabled=False )
colorpicker ## Click the little blue squareNext is taking the information in the color picker and converting the value to a useable format that the deCONZ software can understand. After countless hours of debugging and head scratching. Copy the code below:
import math
#print(colorpicker.value)
def RGBtoHSV(colorpicker):
    R = int(colorpicker.value[1:3],16)
    G = int(colorpicker.value[3:5],16)
    B = int(colorpicker.value[5:7],16)

    R1 = R/255
    G1 = G/255
    B1 = B/255

    #print(R1)
    #print(G1)
    #print(B1)
    #print("\n")


    Cmax = max(R1,G1,B1)

    #print(Cmax)

    Cmin = min(R1,G1,B1)
    #print(Cmin)

    delta = Cmax - Cmin

    if delta != 0:
        if Cmax == R1:
            Hue = round(60*(((G1-B1)/delta)%6))
        elif Cmax == G1:
            Hue = round(60*(((B1-R1)/delta)+2))
        else:
            Hue = round(60*(((R1-G1)/delta)+4))
    else:
        if Cmax == R1:
            Hue = R1
        if Cmax == G1:
            Hue = G1
        if Cmax == B1:
            Hue = B1

    if Cmax != 0:
        Sat = 255*(delta/Cmax)
        #print("\nSaturation: {0}% of 255 is {1}".format(round((delta/Cmax)*100), round(Sat)))
    else:
        Sat = 0
        #print("Saturation: 0%")
    Vis = 255 * Cmax

    Hue = round(Hue * ((2**16)/360)) ## Mapped to 360 degrees

    #print("Visablity: {0}% of 255 is {1}".format(round((Cmax*100)), Vis))

    #print("\nRed {0} Green {1} Blue {2}".format(R,G,B))
    #print("Hue {0} Sat {1} Vis {2}".format(Hue,round(Sat),round(Vis)))
    #print (json.dumps(pretty_json, indent=2))
    return Hue, Sat, Vis
This correctly returns the Hue, Saturation and Visibility from the color picker. Call this function with:
Hue,Sat,Vis = RGBtoHSV(colorpicker)Next is to simply send the PUT request and the Lamp will change color as desired.
data = {"on": True,
        "bri" : Vis,
        "hue" : Hue,
        "sat" : Sat
       }

r = requests.put(URL+"/D78828C329/lights/1/state", json = data)

#print(r)
pretty_json = json.loads(r.text)
#print (json.dumps(pretty_json, indent=2))For our final example we are going to control the Hue, Saturation and Brightness using sliders!
With this we can change how we want our light to look.
Now that we have all our GUI elements that we want. We need to add them together to create a GUI. We can do this by using Juypter/Labs create our own custom interface with no extra modification!
Save and close the Python3 notebook. We want to navigate to Jupyter Labs, simple type in the search bar <ip>:9090/lab. In our case 192.168.0.38:9090/lab. This will open the Lab environment. Here we want to navigate and open our python3 file.
From here you can click and drag in the cells with the UIs and begin to create a unique UI
Here is our very basic UI. This can be opened in a new tab as shown below.
The Full code can be found on our GitHub Page: https://github.com/AdiuvoEngineering/Home-Automation-PYNQ
ConclusionSo you see it's possible! We hoped that you have found this project useful. Be on the look out for future posts. Why not check out some of Adam's other Awesome projects.


Comments
Please log in or sign up to comment.