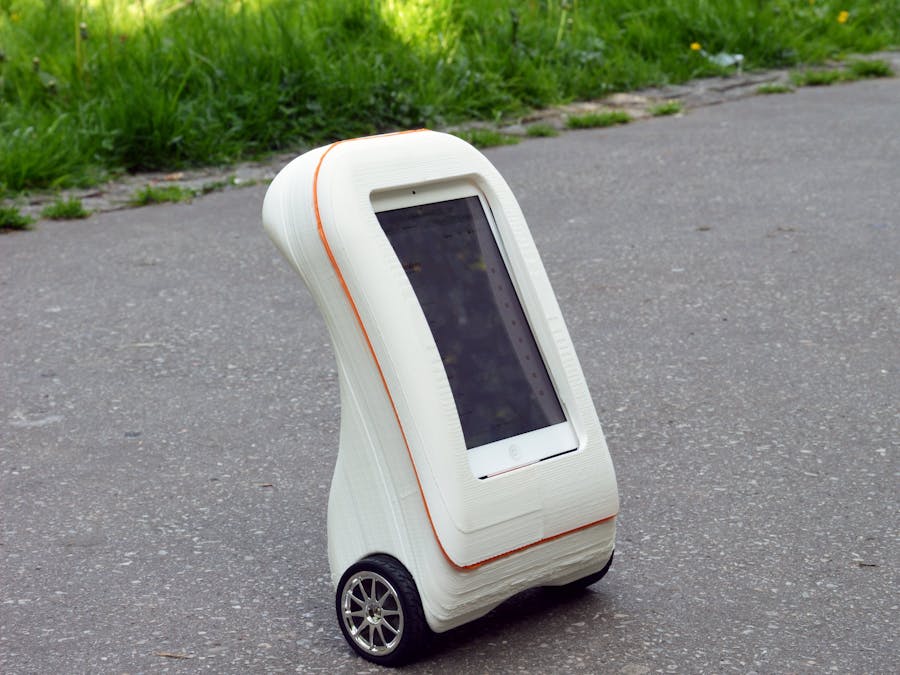
Our newest design - it is fully 3D-printable self-balancing telepresence robot made as a visually better version of Husarion Development Kit. The robot can drive when balancing itself and can be steered via web browser. On a tablet you can see a person controlling the robot, and also that person can see you. Video streaming in two directions makes you feel like in remote location.
We just wanted to improve the design of the original Ralph - telepresence robot, to make it look more cool. We had fun with 3D designing and 3D printing. We also added some features.
Basically everything is now better, covered inside a 3D printed functional case. We replaced the 6xAA batteries with 3x 18650 Li-Ion batteries, added a charging port to easily charge them and an on/off switch to control internal electronics. Leg stand is now improved and also looks better when it is closed and hidden. Tablet is now covered and more protected from damage.
Whole case is basically 3D printed, so if you have a 3D printer it's no problem for you. Otherwise, you can still order printed parts at many 3D printing workshops. The project is available to download here at GitHub: https://github.com/paweljarosz/deRalph
Other parts - connectors, screws etc. - are available in most electronics shop. The Husarion Core2 board here: https://www.crowdsupply.com/husarion/core2
In case you have your Ralph from Husarion, all you need to do is to print the case and add the on/off switch, the balancer port (4 pin JST-XH for 3S packets) and the DC jack for charging purposes.
How can I assemble it?1. Attach a 3D printed leg to a micro servo and then mount it inside a back case.
2. Tighten DC motors with M3x6 screws and assemble two couplers and wheels on them.
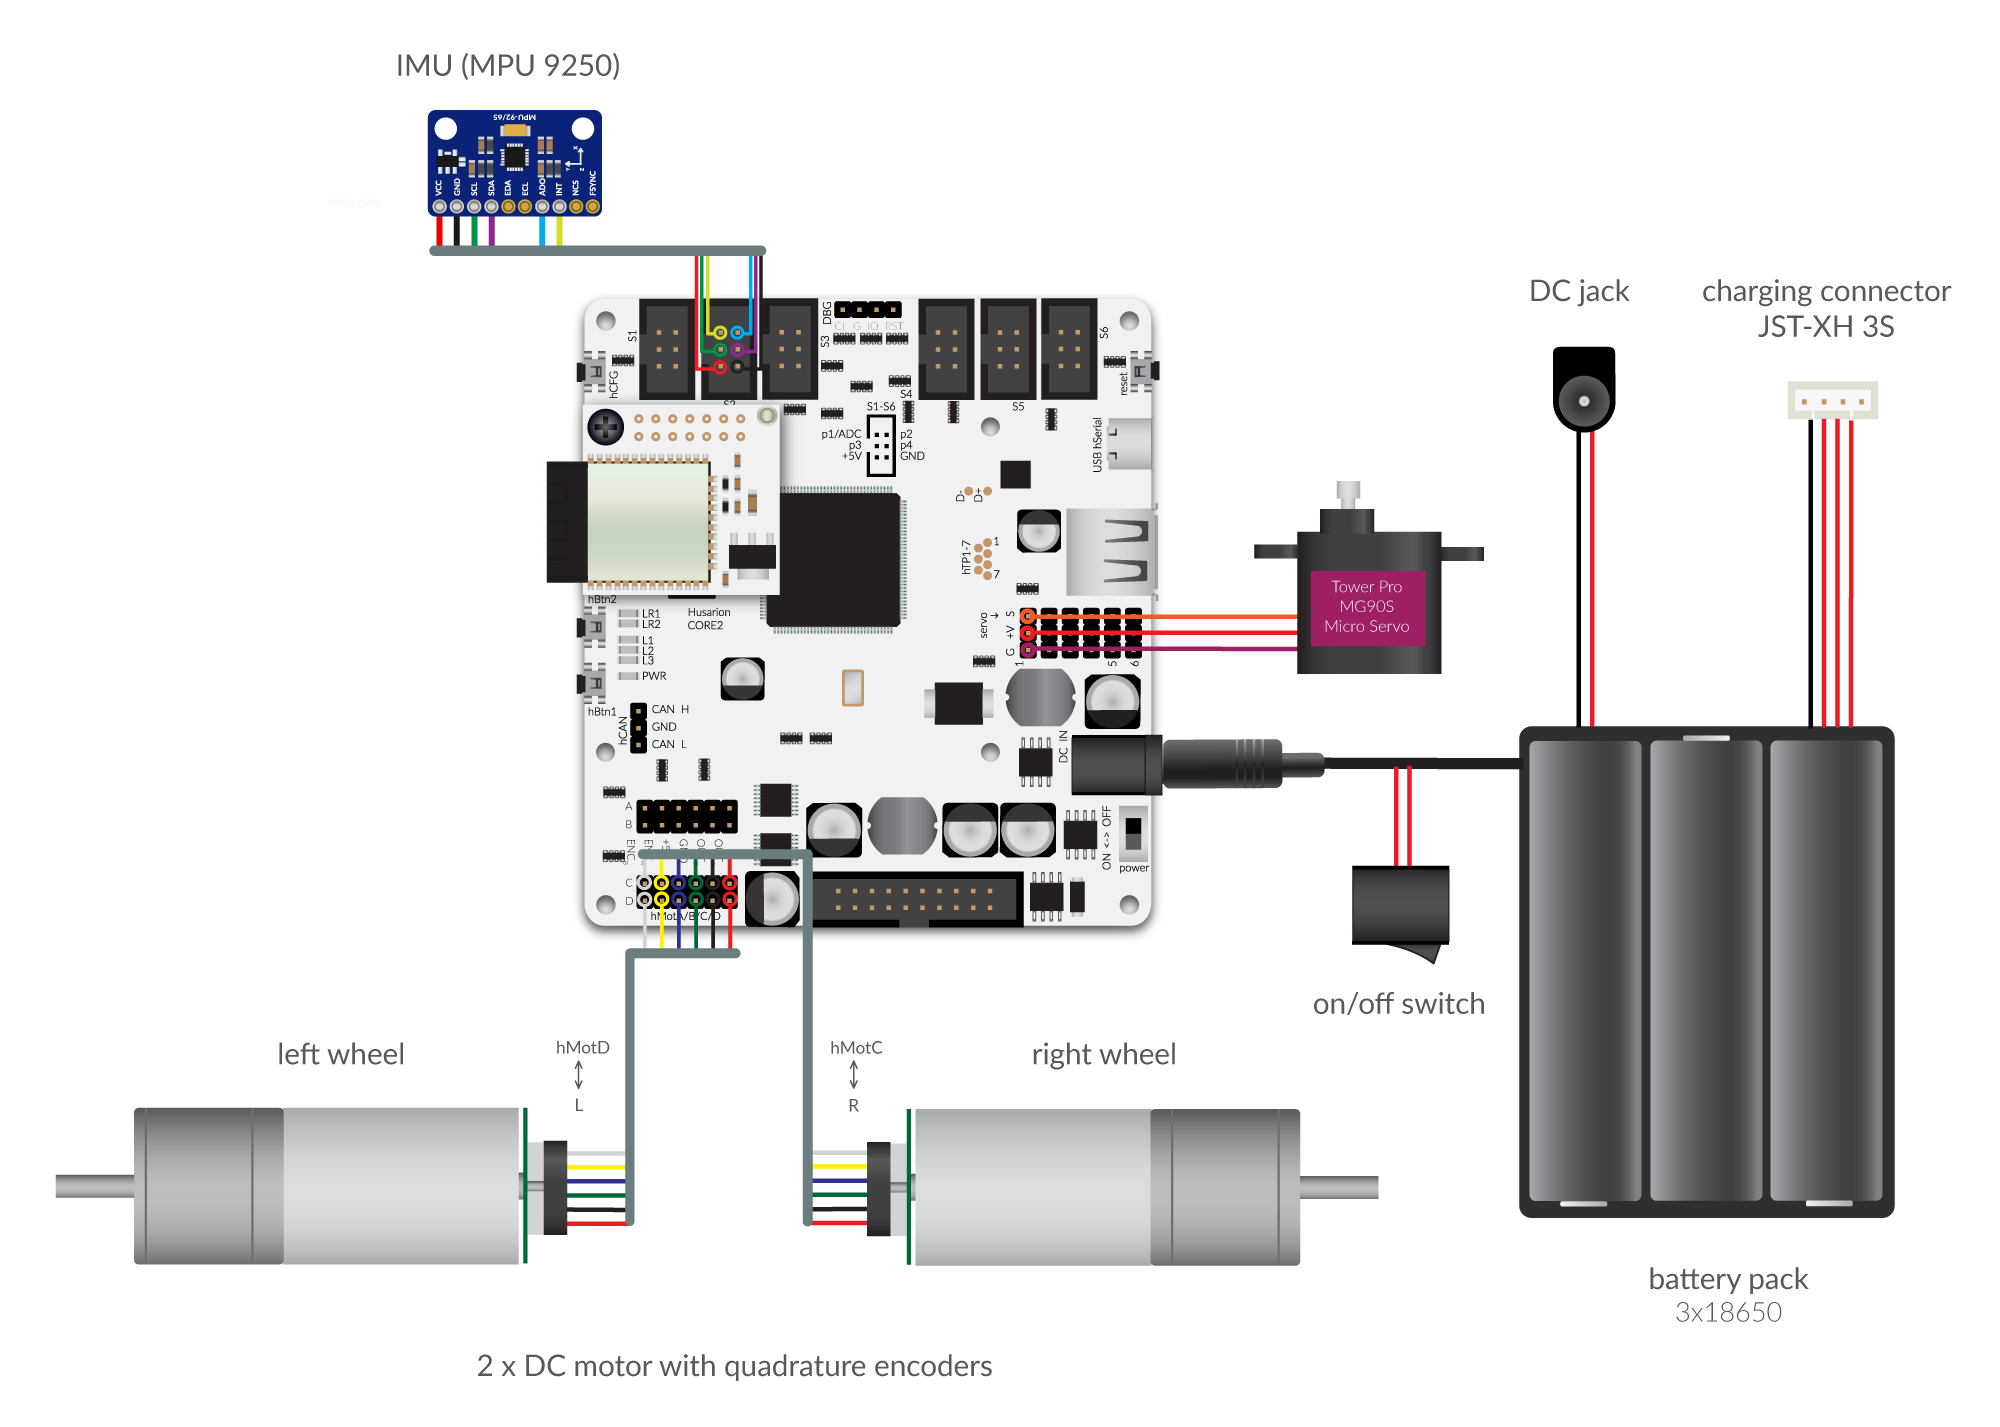
3. Solder electronic circuits for charging purposes as showed below and in the attached circuits schematic. If it's your first time with charging battery cells, try to google "balancer charging connector JST-XH 3S" to figure out what's going out.
4. Attach the MPU sensor with cables as showed below.
5. Mount the CORE2 board with screws.
6. Plug motors, a servo, an orientation sensor and a power cable to the CORE2. Turn power off.
7. Attach the Wi-Fi module and connect your CORE2 to the Cloud following these tutorial: https://husarion.com/core2/hardware/#internet-access
8. When your tablet is paired with CORE2, install the hVideo app and install the tablet in the front cover.
9. Assemble a central part and the front cover to the back case and tighten them.
10. Program your robot via WebIDE - use Husarion source code template: "6. self-balancing telepresence robot template", then edit in settings.h:
#define LEG_OPENED_WIDTH 1710
#define LEG_CLOSED_WIDTH 1380
and calibrate the balancing position.
Or you can simply download package from github here: https://github.com/paweljarosz/deRalph/tree/master/Code and upload it using Husarion Cloud.
Check out our video:
If you have any suggestions, please, feel free to leave feedback ;)If you have any suggestions, please, feel free to leave feedback ;)


_3u05Tpwasz.png?auto=compress%2Cformat&w=40&h=40&fit=fillmax&bg=fff&dpr=2)
Comments
Please log in or sign up to comment.