SmartEverything Fire Alarm is a simple alarm device for fire and high temperatures. This project is perfect to be installed to high-flammable storage locations or kitchens.
The project uses a flame sensor that is sensitive even to a small flame, then it will compare the reading with the SmartEverythings temperature sensor to confirm that a fire is truly detected.
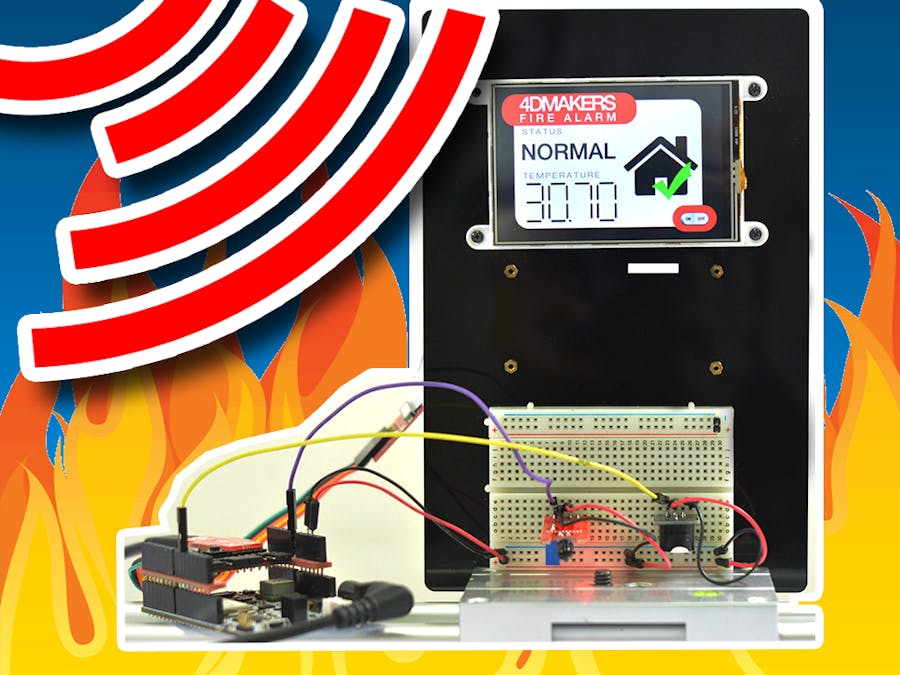
gen4 HMI display acts as the interface between the user and the machine, it displays the temperature value detected and the status of the flame sensor. Users can also turn off or turn on the alarm device through the display.
Users can further improve this product by connecting a smoke sensor to further improve the fire-sensing capabilities, or create their own circuit breaker system that trips the relays when high temperature or a fire is sensed.
How it Works
ComponentsImplementationStep 1: Install the Arduino SAMD Boards- Open the Arduino IDE, then go to the Tools tab, select the Boards then the Boards Manager.
- On the drop-down menu box select “Arduino” and then choose the “Arduino SAMD Boards”, select the file and install.
Step 2: Install the AMEL-Tech Boards- Then go back to the drop-down menu box, select “Partner” and choose the AMEL-Tech Boards”, select the file and install.
- Once the installation is complete, connect your SmartEverything development board and it should be detected the PC under the “Control Panel”.
Step 3: Download the libraries for the SmartEverything Board- Go to Sketch and hover over the “Include Library” to select the “Manage Libraries” this will prompt a pop-up window.
- On the pop-up window, select the “Type” drop-down menu bar and select “Partner”
- Install all the necessary libraries related to the SmartEverything Board so you do not encounter any error or missing libraries.
The SmartEverything Libraries include:
- SmartEverything HTS221 by Seve - Library code for HTS221 Capacitive digital sensor for relative humidity and temperature.
- SmartEverything LPS25H by Seve - Library code for LPS25H MEMS pressure sensor
- SmartEverything LSM9DSI by Seve - Library code for LSM9DS1 iNemo intertial module.
- SmartEverything NFC NT3H1101 by Mik - Library code for NXP NT3H1101 a NFC_i2C Module
- SmartEverything SE868-AS by Seve - Library code for the Telit SE868-AS GPS System
- SmartEverthing SIGFOXLE51-868 by Mik - Library code for the TELEIT LE51-868 a SIGFOX Module
- SmartEverything VL6180X by Mik - Library code for the Ambient Light and Proximity sensor from ST component.
For more information regarding the SmartEverything Development Board, you can download the user manual using this link.
Loading the Graphics & CodesStep 1: BuildBuild the circuit as shown in the diagram. Please note that the SmartEverything Board built as a low-power device, which cannot power-up the gen4 HMI display alone. You must need an external power supply and follow the schematic diagram.
Step 2: Program- Download the project file here.
- You can download Workshop 4 IDE and the complete code for this project from our website.
- You can modify the properties of each widget.
Step 3: Compile- Click on the Compile button.
Note: This step could be skipped. However, compiling is essential for debugging purposes.
Step 4: Comp’n Load- Connect the display to the PC using μUSB-PA5 and a mini USB cable. Make sure that you are connected to the right port. Red Button indicates that the device is not connected, Blue Button indicates that the device is connected to the right port.
- Now click on the “Comp’nLoad” button.
- Workshop 4 will prompt you to select a drive to copy the image files to a μSD Card. After selecting the correct drive, click OK.
Step 5: Mount uSD Card- The module will prompt you to insert the uSD card.
- Properly unmount the uSD Card from the PC and insert it to the μSD Card slot of the display module. The image below must appear on your display after completing the steps above.
Step 6: Program the SmartEverything Fox module- Open the project using the Arduino IDE. Make sure you have already downloaded/installed/added the necessary drivers/tools/library for the SmartEverything Fox module by following the “Implementation (Using the SmartEverything dev board for the first time)
- Change and configure the settings on the “Tools”
- Select the correct Communication Port.
Step 7: Compile- Click on the “Upload” Button to compile, debug and load the code to the SmartEverything Fox module
- If uploading is successful, you will encounter this message:
Demonstration


Comments
Please log in or sign up to comment.