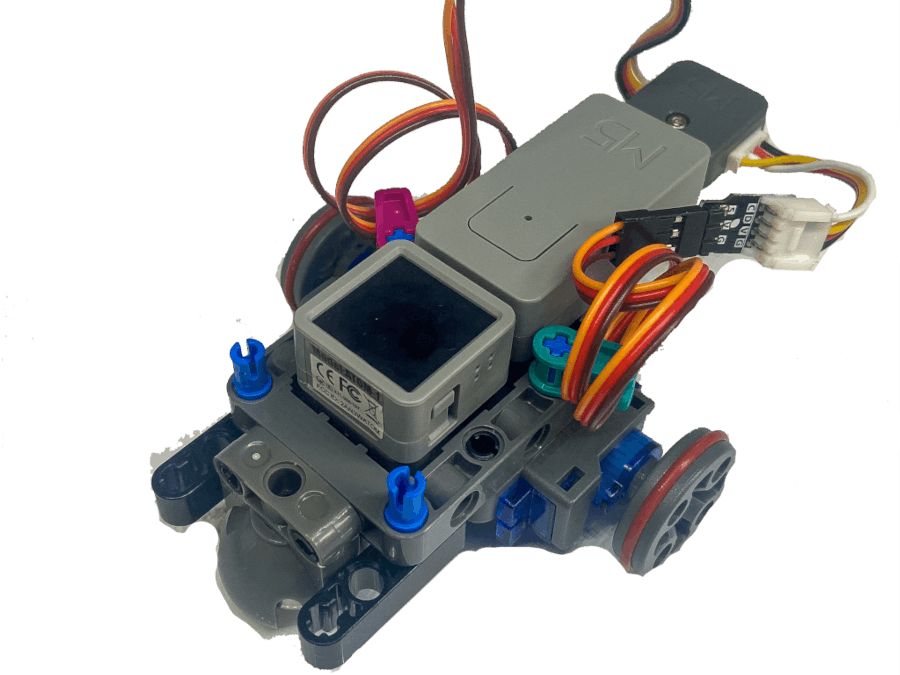
This guide is part of my upcoming Prototyping Ideas with Lego®, M5Stack® and UIFlow book due December 2022.
In this guide I will show you how to make a simple Lego Mouse Robot powered by the M5Stack Atom Matrix.
For this you will need the following Components.
- 1X M5Stack Atom Matrix
- 1X M5Stack 360 Degree Servo Kit
- 1X M5Stack TailBat
- 1X Grove T
- 2X Small Grove Cables
- 1X Lego Caster
And Assorted Lego technic pieces.
Assembling the Lego Technic ChassisI have made a basic guide to assembling the chassis that is available free from here: https://github.com/Ajb2k3/M5Micro-Mouse/blob/main/micromouse.pdf
In step 20 there is the insertion of a "T" shaped piece. This is actually the "T" Shaped part from the Atom Mate kit and must be screwed to the back of the Atom.
The screw hole is found under the sticker which has a yellow circle marking the place. if you push the Allen wrench through the cable in the circle, the screw can be fitted. Don't over tighten the screw as you could end up damaging the Atoms' PCB.
Next push the Atom and adapter as shown in step 20, and connect the Tailbatt to the Atom. Next connect the 360 servos to the Grove T via the short cables, plug the Grove T into the Tailbatt and the mouse is complete.
The Wiring.For the wiring I will be using a similar connection to that which I used in the previous guide found here: https://www.hackster.io/AJB2K3/2-servos-1-grove-port-9fe6ea however, I will be modifying the cables in stead of the Servo2Grove adapter that I used in the previous guide.
All you need to do is take one of the small cables and switch the white and yellow wire around in the socket and the rest will be sorted out in UIFlow.
Next push the Atom and adapter as shown in step 20, and connect the Tailbatt to the Atom. Next connect the 360 servos to the Grove T via the short cables, plug the Grove T into the Tailbatt and the mouse is complete.
Programming.Add two servos from the Unit selection, Both must be set as Port: Custom or micropython will throw up an error failing and telling you to move a servo to a different port.
The SDA/TX must be set to 26 with the SCL/RX set to 32 on one while the other must have SDA/TX set to 32 and SCL/RX set to 26 (pins reversed) on the second. If you try to set one as Port:A and the other to Port:Custom you will also get the error message to move the servo to another port.
With the servo's setup we can now control them using the Servo Write block.
The Servo Write block has a range of 500 up to 2400 microseconds (µs). 500 results in anticlockwise rotation and 2400 results in clockwise rotation. To stop a servo you would need to set this to around 1300 µs.
If you set both servo's to 600µs as shown in the above example, the Mouse will just rotate on the spot. The servo write setup depends on which servos you use but I find 600 and 2300 will make the mouse move forwards or backwards depending on which side the servos were plugged in.
If you build your own, play with the servo settings then let me know how it went. I would love to see what you the reader make based on my mouse design.
Tank you for taking the time to read this guide and you can contact me via Twitter, Youtube, Facebook and Discord if you have any questions or feedback.


_cb1jwgVyin.jpg?auto=compress%2Cformat&w=48&h=48&fit=fill&bg=ffffff)


Comments
Please log in or sign up to comment.