


SimpleScrew StampShield.
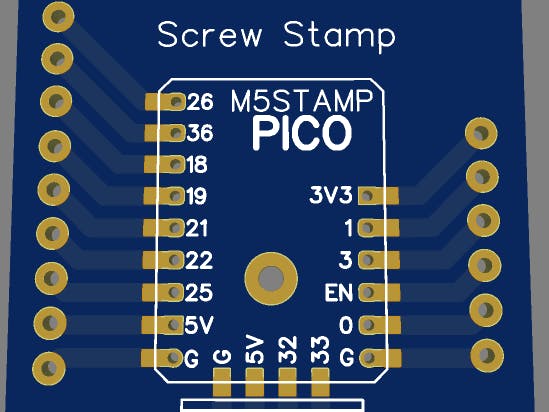
The ScrewStamp is a simple PCB that breaks out the connections of the M5Stack M5Stamp Pico D4 into screw terminals for simple prototyping. For this project we will make the schematic and PCB files in EasyEda https://easyeda.com/ and have the PCB's manufactured by JLCPCB https://jlcpcb.com.
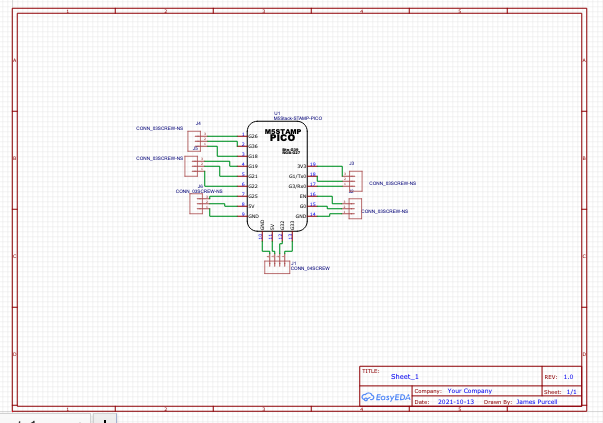
This is a very simple project with a very simple schematic diagram.
However, the components that will be soldered to the PCB take some researching.
The main component of the board is the M5Stamp Pico D4 which will be soldered direct to the PCB and is purchased as a pack of five from https://shop.m5stack.com/collections/m5-controllers/products/m5stamp-pico-5pcs?ref=pfpqkvphmgr&variant=40279393468588
Next we have the connectors that will be ordered from LCSC. The connectors are through hole screw terminals manufactured by Cixi Kefa Elec and we will need 2 way and 3 ways connectors which can be found at the following links:
Once the schematic above is created using the components linked, goto Design>Convert Schematic to PCB.
This takes you to the PCB designer with a generated PCB outline and the components:
The components are moved around, the PCB outline is rescaled and the tracks are drawn in to join the connections.
Next save the PCB and click File>Generate PCB Fabrication file.
If you have a linked Easyeda+JLCPCB+LCSC account, you can just click on the Order PCB button but as I registered eased/JLCPCB at one time and then LCSC at another, my setup is slightly broken.
This however is only a quote and the price will differ.
Here the price is only $2 for 5 PCBS but we can beat this price and get more PCBS for our money.
Go back to the PCB designer and go to Tools>Panelize
Select "V-CUT" and change the other settings as shown above. Click on Apply and a new panelized PCB will be generated.
Repeat the steps to order the newly generated PCB
The first PCB added to the shopping basket is always $2 for 5 and the next being $4 for 5 penalised PCBS. Even though you can see that the price is now doubled but we now have 4 times the PCB's.
By panellising the PCB's and keeping the panellised PCB to under 100mm X 100mm we can get 20 individual Screw Shield PCB's for very little increase in price.
The above photo shows examples of PCB's that I have panellised in order to increase the quantity I receive for the same production price.
I ordered the first batch in basic colours in panel form and they arrived looking like this:
I separated out the first panel (which is why there are only four in the photo above) and found a big issue.
The Screw terminals I stock have a 3.5mm spacing but the holes don't match. I went back to check my schematics and discovered that I had placed connectors with a 3.69mm spacing (Insert Expletives) Back to the part search I go to find the correct spacings. I replaced the connectors on the PCB and created a new version.
I also discovered that I forgot to put holes in the PCB connections for the grove connector. I have now added the holes and that's as far as this PCB version has gotten to.I will have to wait until 2022 in order to order a new revision.

Comments
Please log in or sign up to comment.