


Hardware components | ||||||
 |
| × | 1 | |||
 |
| × | 4 | |||
 |
| × | 20 | |||
 |
| × | 4 | |||
 |
| × | 1 | |||
| × | 1 | ||||
| × | 1 | ||||
| × | 1 | ||||
Software apps and online services | ||||||
| ||||||
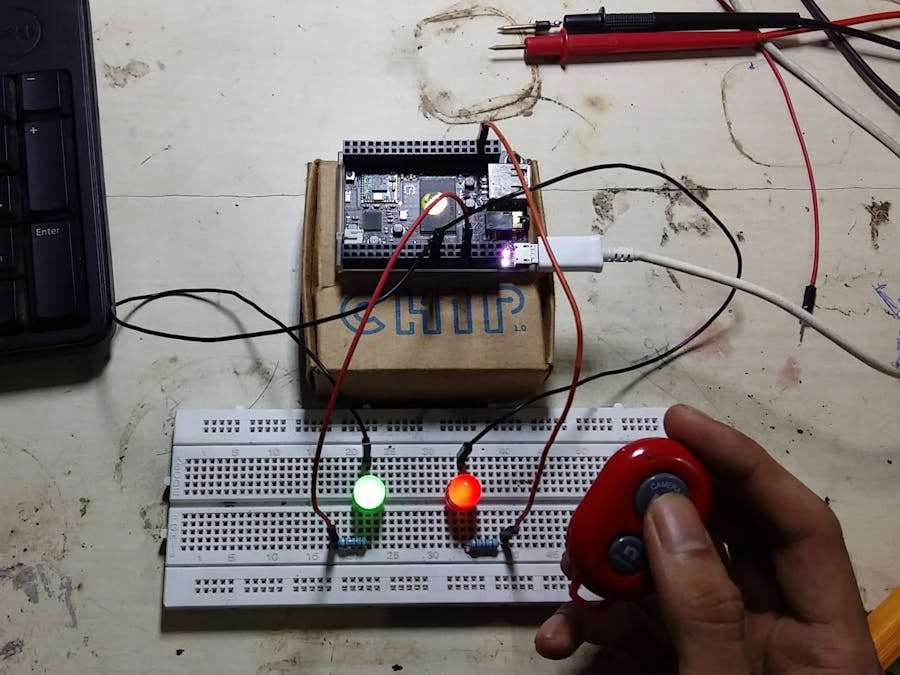
I recently received the C.H.I.P computer. While searching for the project, I came across this blog which talks about using a cheap off-the-shelf selfie BT controller for general purpose. This project is based on the same idea.
Configuring C.H.I.P:- Install required libraries:
CHIP comes with pre-installed Bluez 5.xx version which is fully compatible with our project so no changes there. We also need two Python libraries, CHIP_IO for controlling GPIOs on the board and evedev for capturing the events sent by the selfie Bluetooth controller.
Install CHIP_IO library:
# you need to install each library as superuser
$ sudo pip install chip-io
Install evedev library:
$ sudo pip install evdev
- Setting up the Bluetooth:
Now we have both the libraries installed, so let's configure the Bluetooth. Bluez 5.xx has client program called bluetoothctl. Let's use it:
Open the Terminal and type:
$ bluetoothctl
bluetoothctl will open its own interactive shell, in that type:
[bluetoothctl] # power on
Then type:
[bluetoothctl] # scan on
While bluetootctl is scanning for Bluetooth connections, start your BT controller and make sure its in available mode (indicator LED blinks rapidly). Once the scanning is over you should see your BT controller listed in available devices:
In my case it was device with name 0C:FC:83:22:77:CB AB Shutter 3
Now we have our device listed, lets pair with it by typing:
[bluetoothctl] # pair <your MAC address here>
After successful pairing you should see the following message (of course, the MAC will be yours):
Now its time to connect the CHIP with the BT controller:
[bluetoothctl] # connect <your MAC address here>
And we're done with the configuration part.
Electronics:There are two versions of schematics: one with only two LEDs and the other with four LEDs using a de-multiplexer and an inverter IC.
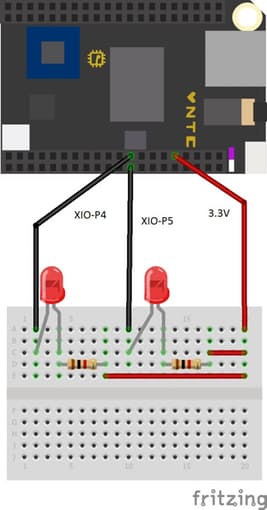
- With 2 LEDs:
The connections are simple; all you need is two LEDs and two resistors. The GPIOs I'm using are XIO-P5 and XIO-P4. You can use whatever pins you want, but make sure to change the pin names in source file.
Here's a Fritizing diagram:
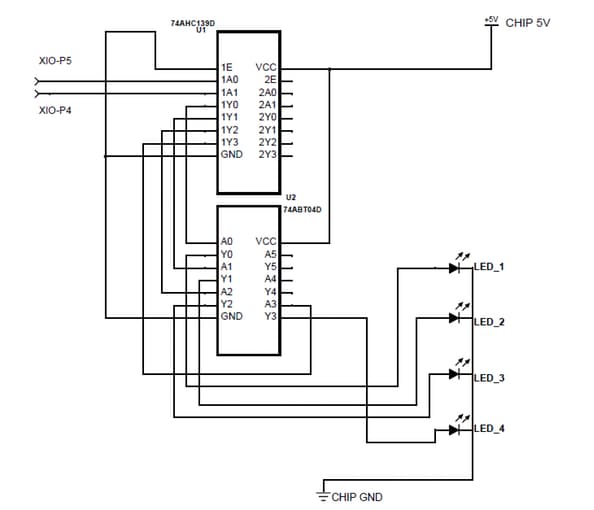
- With 4 LEDs:
We can use state machine logic to get two states per each button. We have variables to keep track of whether LED is ON or OFF. Also, two variables to store when the last change happened. Now we can take actions by looking at the current state of the variables.
Instead of hooking up the CHIP GPIOs to the LEDs we will connect them to a de-multiplexer. Here I'm using is a 2-to-4 line DEMUX, means it has two select lines and 4 outputs. By toggling the two input pins, we can control the state of each output pin.
Here's a schematics:
Blue.sh shell script: automatically connect the Bluetooth with the BT controller.
#!/bin/bash
# save this code with the filename Blue.sh
# make this file executable by typing:
# sudo chmod +x Blue.sh
bluetoothctl << EOF
power on
connect <your MAC address here>
quit
EOF
Selfie.py Python script (see code); this is the main script which will drive the GPIOs depending upon event received from the BT controller.

Comments
Please log in or sign up to comment.