


Hardware components | ||||||
| × | 1 | ||||
Hand tools and fabrication machines | ||||||
| ||||||
 |
| |||||
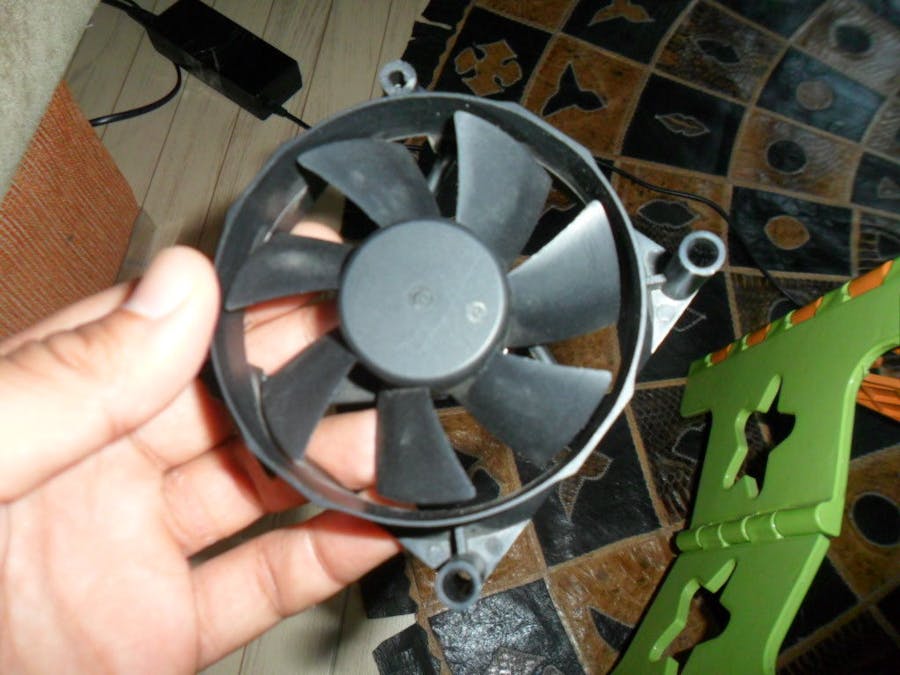
I looked at some old PC Fans I have and thought that they can be used as Small Wind Turbines. It has been my dream for a long time to make a wind turbine generator even to light an LED. The PC Fan is Brushless DC (BLDC) Motor. It can be converted to a generator in 5 Minutes.
I saw this project on already sold on Amazon for $44 from here. I also found this great little tool on eBay for only $36 from here. You can read this article in Arabic in my blog. You can read this article in English on my blog.
ConceptThe concept is simple. You can skip this part and start directly with the conversion. The BLDC motor used here has a stator winding and a Permanent Magnet Rotor. The motor is supplied by 12V DC. But the magnetic field rotation is generated by electronics (Electronic Commutator). As the name implies, the electronics components convert DC into AC which makes the magnetic field in the stator rotate. The electronic commutation is achieved by a small IC. To get the induced current from the motor used as a generator, you must remove this IC.
DisassembleThis is what I'll show you how to do. First remove the sticker on the back of the fan. Then you'll find a small piece of plastic lock that holds the fan shaft secured. Don't break it. Remove it with a crocodile clip.
This crocodile clip is very useful in this job. Many people have been asking how would they remove this plastic lock and I've answered them that they can easily use the crocodile clip to do it without breaking it.
Step 3: Winding SolderingYou can see 4 poles of winding connected in series and have only 2 terminals. To get the induced current, connect supply wires to those terminals and let the fan rotate. With a solder iron, gently remove solder under IC pins and then remove the IC. Remove any surface mount resistors or transistors. Remove the supply wires form there place to put them in the holes of the removed IC. Connect the supply wires in the winding terminals. Make sure that you connect the terminals (from which you will get the generated Voltage) in a way that makes the two sets of winding connected in series.
FinalAssemble the fan in its place and lock it with the piece of plastic I told you about. Put back the sticker. Connect LED terminals to the Supply wires. Don't worry about +Ve and -Ve terminals, the LED will light if you connect it any way, trust me. Roll the fan. This video shows the fan in action.
Video is in the frame on the upper photo. And you can also find it here. Here is the link to the project on my blog.
Further and future work: I want to try these ideas:
Thank you for reading my tutorial. You can also find my book Learn By Making on Amazon website.


Comments
Please log in or sign up to comment.