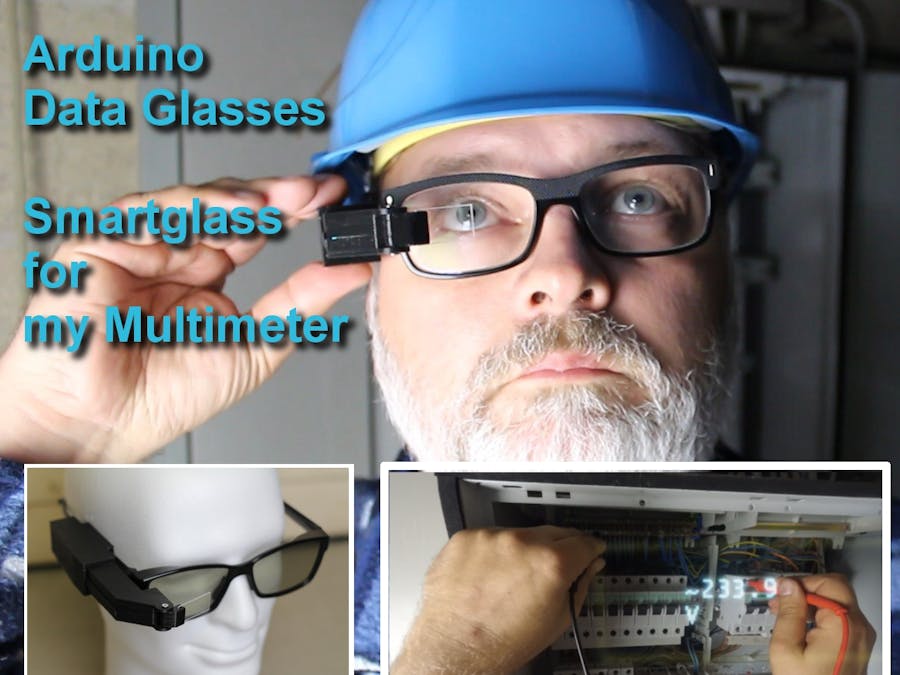
Trying to build a cheap Arduino Data Glasses for everybody. Why? I just wanted one.
It's working, and now it can even help to avoid accidents. From the first idea to the working prototype, it took 4 months.
The challenge was that it should be constructed out of common materials that can be found easily. The project is more about how to build the optical system for this HMD. One thing is clear, you cannot just place a screen in front of your eyes, because it will not be possible for them to focus it.
In the logs, you can see from the first tests to what I have now.
The optical design was the most difficult part, but I think I found a solution for this. The costs of the prototype amounted to +-70Euros.
And now I have a head-up display for high voltage.
Step 1: What's Inside and How Does It Work?The received Bluetooth data is displayed, on the OLED display. It's then reflected over the mirror, goes through the lens and you can see the picture in the little transparent acrylic glass.
I made the data glasses work, but it was more a trial an error challenge.
So I took a google crash course in optics.
First of all I had to understand the difference between a real and a virtual image with lenses. Then a very important thing is, that a human eye can only focus an object at a distance of min 25cm. And all what I needed was this formula (1/f) = (1/o) + (1/i) where f is focal length of the lens o is object distance to the lens and I is the distance of the virtual image.
Here are the values I used:
with f=10cm and o=7.3cm
you will get an i=-27.03cm (virtual images have always a negative value) and a magnification M=3.7
Lens calculation website: http://hyperphysics.phy-astr.gsu.edu/hbase/geoopt/image4.html
Step 3: Alternative LensI know that the lens is hard to find. I uses one of a cheap cardboard wich has lenses with a Focal length of 100mm and not like the google cardboard 45mm
UPDATE
I think I found a good solution for the lens. I just checked the physical data (FL = +- 110mm). and they should be perfect. I have no time right now, to test them, but if somebody could do it and give me a feedback, this would be great. A small Fresnel lens should do the job. and they are cheap and easy to find on the internet. And you can cut them with a cutter.
Like this one https://www.amazon.com/Small-Fresnel-Lens-Magnifier-Pack/dp/B00CF5ZXKK
An otherf alternative is a the lens of a head mounted magnifier. Normally they deliver 3 to 5 lenses and one of these should have a FL between 110mm and 120mm which works fine. It's just a little bit heavier and not so easy to cut
Step 4: ElectronicsHere are all the electronic parts for the data glasses.
I just used a smaller battery in the final version.
To use the 280mA battery, I had to change the 3k resistor against a 5.6k resistor on the original board. The charging current is now reduced to +- 200mA.
For the first tests, I used an enclosure made out of cardboard. This was a cheap solution and worked very well
For the final version, I used my 3D printer. The style file has been created in 123design. I need to make a few modifications to the design, but it's not bad for the first try.
This multimeter has an internal Bluetooth 4.0 communication, so you can connect it to your phone or tablet
I had to reverse engineer the serial protocol.
Config of the BT module. I used a simple Arduino program to send and receive data to and from the module. First you have to set the module to central.
AT+ROLE1 moule = central
AT+RESET reset AT+SHOW1 show Bluetooth name in response
AT+IMME0 connect automatically
AT+FILT0 scan for devices
AT+DISC? Show devices
To connect to the Owon B35T type AT+CONE0 (Mac adress of the multimeter)
These softwares can be found on GitHub: https://github.com/awall9999/Arduino-Glass
Videolink to the bluetooth test
Step 7: The Final Arduino Data GlassesHere you can see, how all the parts fit in the enclosure. I tried different holders for the acrylic reflector
Here is also a part list:
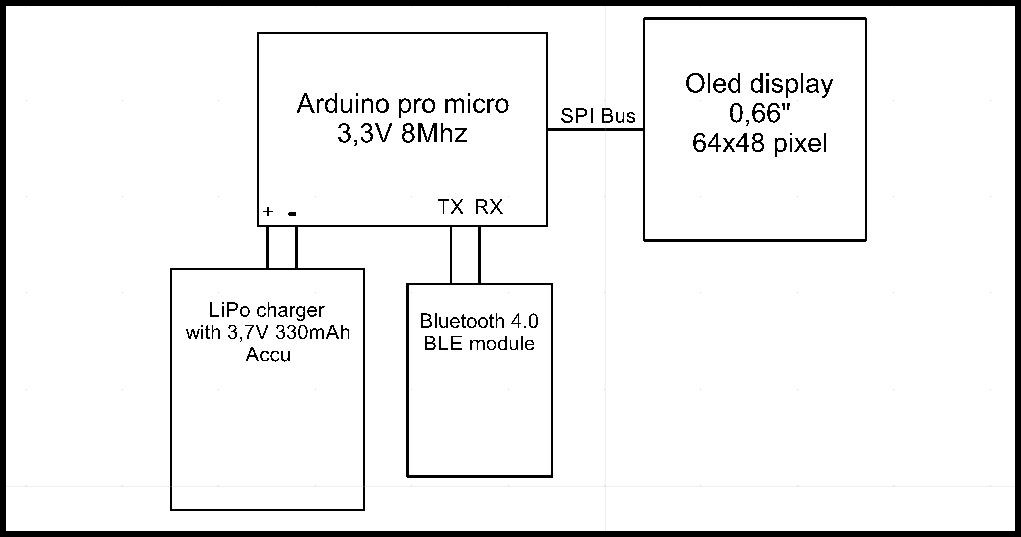
- 1× Arduino Pro Micro 3.3V 8Mhz
- 1× Bluetooth V4.0 HM-11 BLE module
- 1× 280mA Lipo Akku 1×50 - 500mA LiPo charger circuit
- 1× 30mm acrylic plano convex lens with a FL of 100mm www.aliexpress.com/pmma-plano
- 1× Plastic mirror 1mm thick
- 1× 0.66-inch 64x48 pixel Micro OLED: https://www.sparkfun.com/products/13003
- 1× CD box for the reflector
Link to the software on GitHub
Link to all the videos on YouTube
Step 8: Pictures and Videos of the First StepsTest setup with different lenses:
Things to do:
- Finishing the software, to auto connect to a Owon Multimeter.
- Adding a battery indicator in the display. (The BLE module has this feature.)
- Building different reflectors with tint and mirror foils, to make the glasses work in a bright area.
- Reducing the weight and redesigning the enclosure.
- Testing with a smaller 0.49-inch display.


_3u05Tpwasz.png?auto=compress%2Cformat&w=40&h=40&fit=fillmax&bg=fff&dpr=2)
Comments
Please log in or sign up to comment.