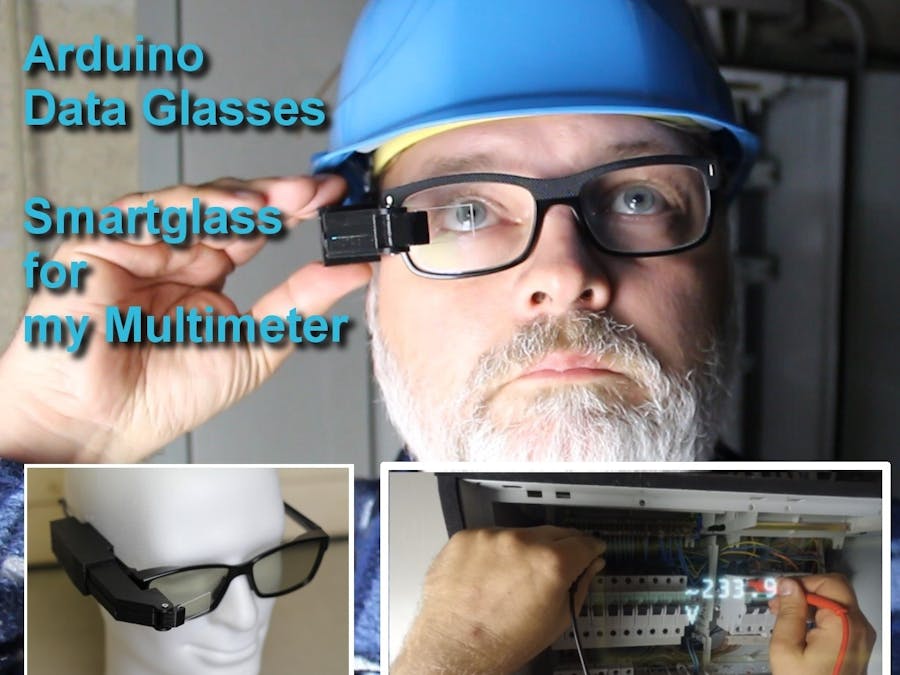
I'm trying to build a cheap Arduino Data Glasses for everybody.
It's working, and now it can even help to avoid accidents. From the first idea to the working prototype, it took 4 Months.
The challenge was, that it should be constructed out of common materials that can be found easily. The project is more about how to build the optical system for this HMD. I have a few ideas, and one of them is to connect it to a Multimeter over Bluetooth to get the Data right in front of my eyes. One thing is clear, you can not just place a screen in front of your eyes, because it will not be possible for them to focus it.
In the logs you can see from the first tests to what I have now. The whole project runs under Open Source License.
DetailsThe optical design will be the most difficult part, but I think I found a solution for this. Follow the project logs to see the updates. The costs of the prototype amounted to 70 Euros.
Here's a video of the working device.
Link to the video and Link to the video in German:
One of the PrototypesBuild instructionsStep 1: How it works:The lens was a tricky thing. I had not really an Idea about optics. So I googled and googled, and I learned a lot about real images, virtual images focal points, and magnification. The best working lens is an Acrylic Plano convex lens with a focal point of 100mm. If you place the screen at a distance of 73mm from the lens away, you will get a virtual image at a distance between 27-30cm. The magnification factor is x3.
That's perfect, because another important thing is, that your eyes can only start focusing things at +-25 cm.
I found this website to calculate the object distance. http://hyperphysics.phy-astr.gsu.edu/hbase/geoopt/image4.html.
Step 3: The ElectronicsHere are all the parts for the data glasses. I just used a smaller battery.
To use the 280mA battery, I had to change the 3k resistor against a 5.6k resistor on the original board. The charging current is now reduced to +- 200mA.
For the first tests I used an enclosure made with cardboard. This was a cheap solution and worked very well:
For the final version, I used my 3D printer. The style file has been created in 123design. I need to make a few modifications to the design, but it's not bad for the first try.
This multimeter has an internal Bluetooth 4.0 communication, so you can connect it to your phone or tablet. I had to reverse engineer the serial protocol.
Config of the BT module. I used a simple Arduino program to send and receive Data to and from the module. First, you have to set the module to Central.
- AT+ROLE1 moule = central
- AT+RESET reset
- AT+SHOW1 show Bluetooth name in response
- AT+IMME0 connect automatically
- AT+FILT0 scan for devices
- AT+DISC? Show devices
To connect to the Owon B35T type AT+CONE0 (Mac address of the Multimeter).
These softwares can be found at my GitHub https://github.com/awall9999/Arduino-Glass.
Step 6: The Arduino Data Glasses


Comments
Please log in or sign up to comment.