It seems that people are interested in these buttons, so I made a project description just for them.
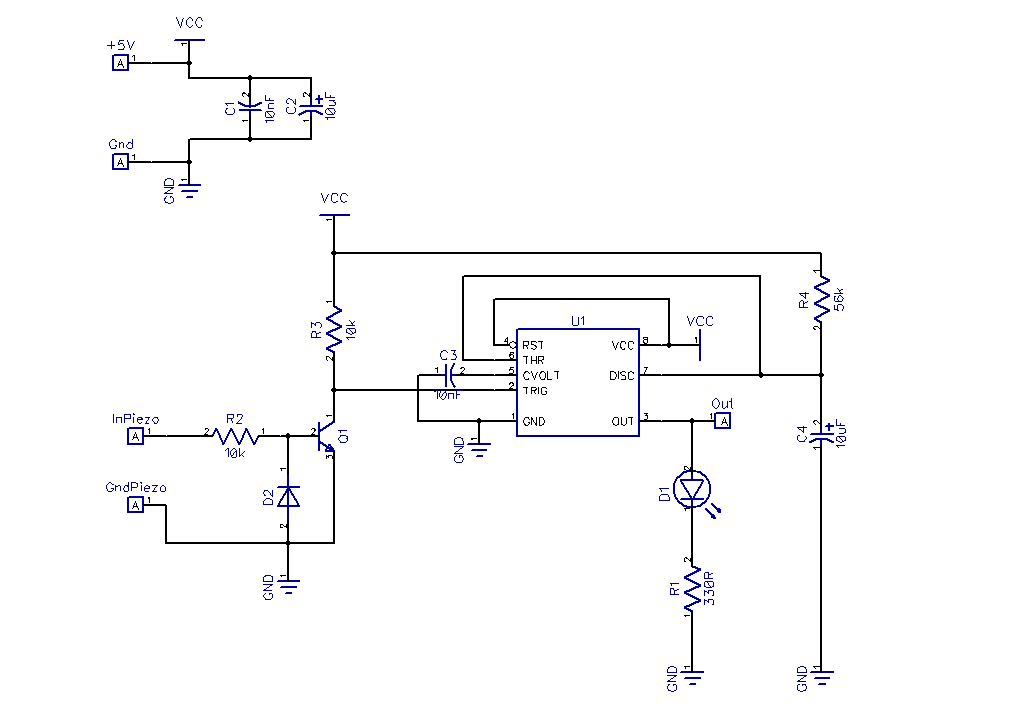
For a project I need a few robust buttons. I could not find buttons in a certain size, so I decided to create my own. When you push or tap the front side of the button, you will get an impulse of ±1 sec. The Piezo will generated a small impulse, which is amplified by a transistor. A Ne555 in monostable mode gives me a 1 sec impulse.
DetailsThis button was created for a project for my son, who is autistic. These buttons are almost indestructible and washable. They can be integrated into any construction. For example, in my Scott TV project. Each time you touch the front of the button or tap against it, you will get an impulse of 1 sec. You can change the length of the impulse, by changing the capacitor and the resistor of the timer circuit. It is also a solution to use these buttons for older peoples or for people with disabilities.
Build InstructionsStep 1: Test Setup
Step 2: The housing for the button
I used a 55mm Pipe Stop End. I sand the piece to remove the irregularities. In the pipe stop end, I glued a 35mm Piezo element inside it with epoxy glue.
Step 3: The PCB
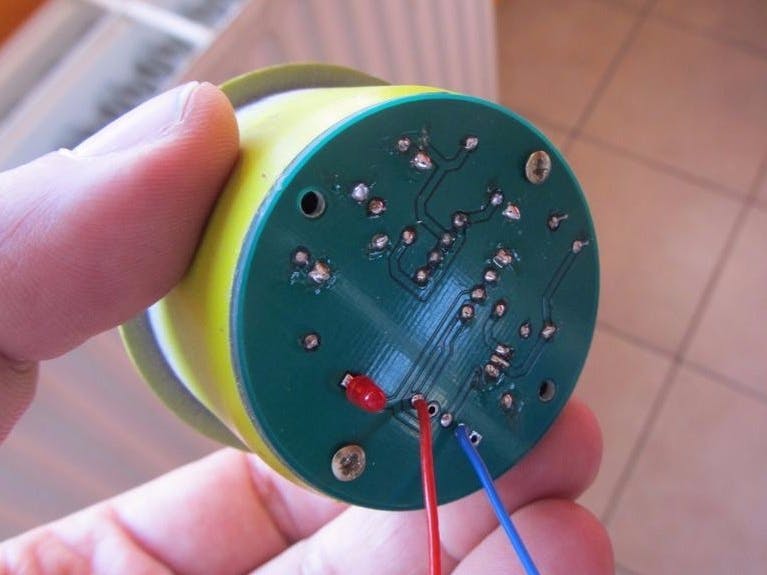
Because I need about 6 buttons, I decided to create a PCB. I used DipTrace for the layout, and I ordered them at http://www.pcbway.com/
Step 4: Paint Job
Paint the Pipe Stop End 2 times with Aerosol spray filler. Then 3 layers of yellow spray paint. To finish I put 2 layers of clear coat.
Step 5: All Together
To mount the PCB, I used a piece of plastic angle and cut 2 small pieces of it. With hot glue they are kept in place, and with epoxy glue they will stay there forever. I drilled 2 small holes in the angels to hold the PCB with screws.
piezobu.zip: The Gerber files for the Button
taster2.dch: The PCB in Diptrace
taster02.dip: The schematic file in Diptrace


Comments
Please log in or sign up to comment.