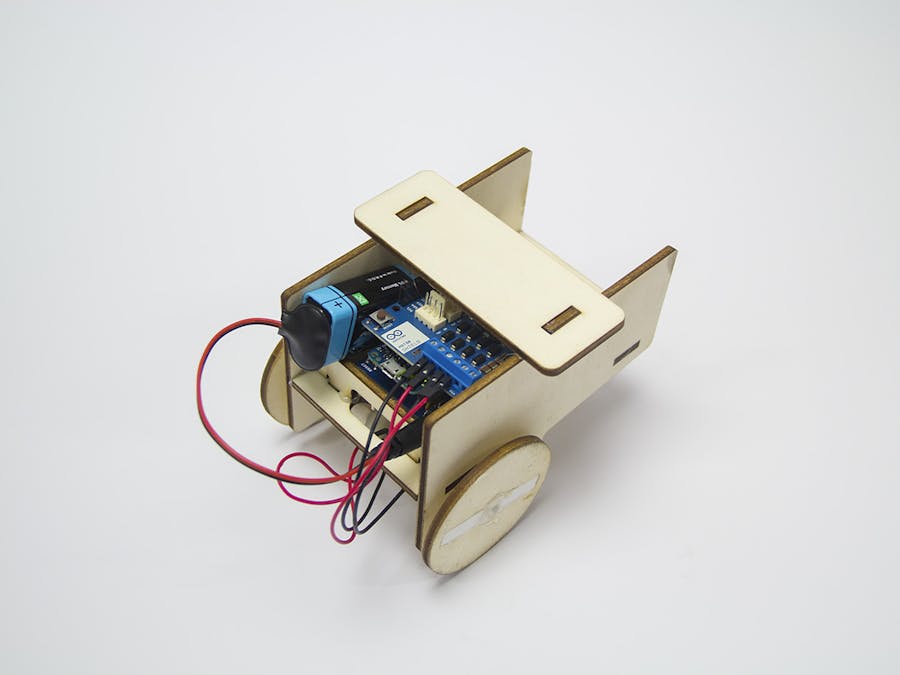
This project aims to show how to use the MKR2UNO Adapter with a MKR1000 and an Arduino Motor Shield. It combines together the Arduino MKR1000 web server abilities and the Arduino motor shield feature to drive two different DC motor in speed and direction building a WiFi controlled mini robot.
Laser cutter fileThe robot is based on this laser cutter file, just download and cut it! You can glue or screw the motors as you prefer!
Even if the wood base is very simple and straightforward to mount, here the mounting steps:
- Screw or glue the two motors on the side walls;
- Glue the two side walls to the center base using hot glue;
- Put the glass ball into the round hole and fix it wit the second piece;
- Glue the glass ball support to the center base;
- Glue the two board stops to the center base. This will prevent the electronic to move too much;
- Glue the top to have a solid structure;
- Insert the tires in the motor gears. You can glue them to the gear to avoid too many movements.
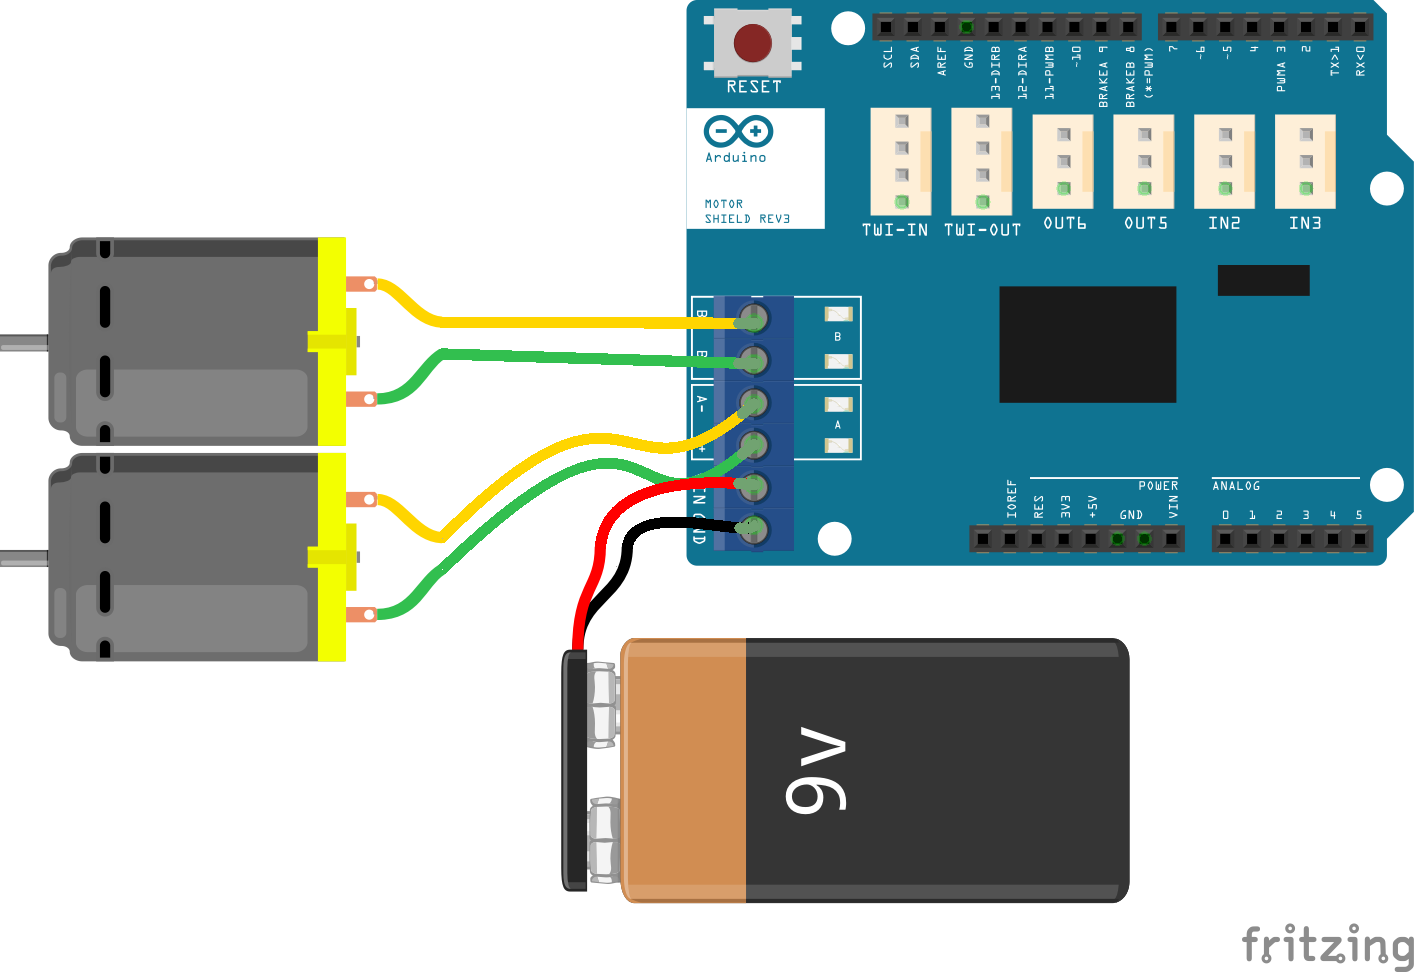
The connections are very simple and showed in the Fritzing layout image. Anyway if the motors do not rotate in the right direction (according to the button pressed in the web interface) you have to swap the motor wires of the one that doesn't behave correctly.
Web interfaceThe very basic and simple web interface is hosted and hard-coded in the MKR1000 and allows the user to choose if the robot has to go UP, DOWN, LEFT or RIGHT as shown by the image below.
In order to easily reach the web interface, the MDNS responding capability of the MKR1000 is used. Once the board is connected to your WiFi network you just have to type WiFiRobot.local in your web browser and that's it! You can now play with your WiFi robot!


Comments
Please log in or sign up to comment.