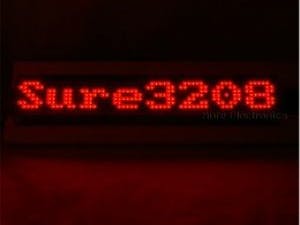
The LED dot matrix that we are going to use, is composed by four 8x8 LEDs mono colour matrix positioned close to form a 32x8 row. Under the hood, we find the HT1632C IC that is capable to drive this huge quantity of LED. The HT1632C is both a controller and a LED driver, because it has an on board RAM memory for the mapping LED display and because provide to give the enough power to the LEDs. The device allows you to vary the brightness of the LEDs integrating a 16 steps PWM control. The matrix provides to communicate with the host controller through a serial interface that behaves like a SPI-like protocol. So, on the Arduino side we have to provide the wiring with the LED dot matrix and to install the library that contains the dedicated communication protocol and the utilities for easy write on the matrix.
2. How to install the libraryThe library for Arduino was written by Guarav Manek and you can find it in his Github. Download it, then follow these instructions:
- Once you have downloaded the library, decompress the archive, and you will obtain a directory called "
gauravmm-HT1632-for-Arduino-13dc18c" that contains some things. It's not ready to be recognized from Arduino IDE.
- Go in your sketchbook folder and open the "
libraries" directory. If you don't already have, create it.
- Follow this path to copy the library: "
/gauravmm-HT1632-for-Arduino-13dc18c/Arduino" and copy the HT1632 directory to the "libraries" directory in your sketchbook.
- Now copy the "
Samples" directory (/gauravmm-HT1632-for-Arduino-13dc18c/Arduino/Samples) inside the library directory (/sketchbook/libraries/HT1632) and rename it to "examples".
- Open the IDE and you'll find the example under this path: Files > Examples > HT1632 > sketch_HT1632_sample_code.
Now your Arduino environment is capable to read the library, and you can use it in your sketches.
3. Wiring the LED matrixThe socket placed behind the LED matrix allow you to plug the 16 pin IDC cable. To work with Arduino UNO you need to connect only five pins, these are:
- Pin 11 to GND
- Pin 12 to VCC
- Pin 3 (CS1) to Arduino Digital pin 9
- Pin 5 (WR) to Arduino Digital pin 10
- Pin 7 (DATA) to Arduino Digital pin 11
The words "Hello, how are you?" with the specified font created in the "font_5x4.h" file, will scroll on the matrix. Enjoy!
On Playground you can find another project that use a different SURE electronics LED matrix and an Arduino Mega2560 for making a clock. This guys uses the same library but they modified it a little.
#include "ht1632c.h"
#include "font1.h"
#include <avr/pgmspace.h>
int i = 0;
int wd;
void setup () {
  // Setup and begin the matrix
  // HT1632.begin(CS1,WR,DATA)
  HT1632.begin( 9, 10, 11);

  // Give the width, in columns, of the assigned string
  // FONT_5x4_WIDTH and FONT_5x4_HEIGHT are parameter specified in the "font_5x4.h" file
  wd = HT1632.getTextWidth("Hello, how are you?", FONT_5X4_WIDTH, FONT_5X4_HEIGHT);
}
void loop () {

  // Font rendering example
  HT1632.drawTarget(BUFFER_BOARD(1));
  HT1632.clear();
  HT1632.drawText("Hello, how are you?", 2*OUT_SIZE - i, 2, FONT_5X4, FONT_5X4_WIDTH, FONT_5X4_HEIGHT, FONT_5X4_STEP_GLYPH);
  HT1632.render();

  i = (i+1)%(wd + OUT_SIZE * 2);
  delay(200);
}


_ztBMuBhMHo.jpg?auto=compress%2Cformat&w=48&h=48&fit=fill&bg=ffffff)

Comments
Please log in or sign up to comment.