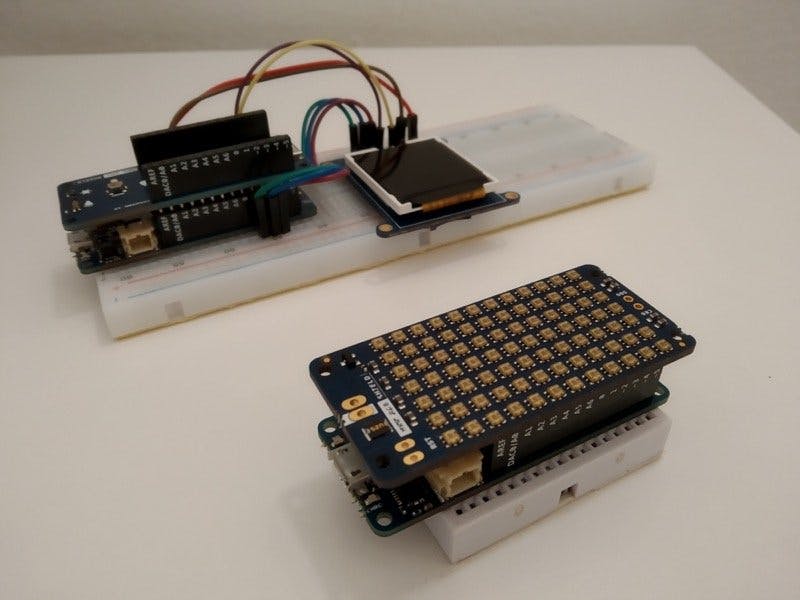
In this tutorial, we will see how to send the values of temperature, humidity, atmospheric pressure and light intensity read by the sensors on the MKR ENV Shield to the Arduino IoT Cloud and the Adafruit IoT Cloud.
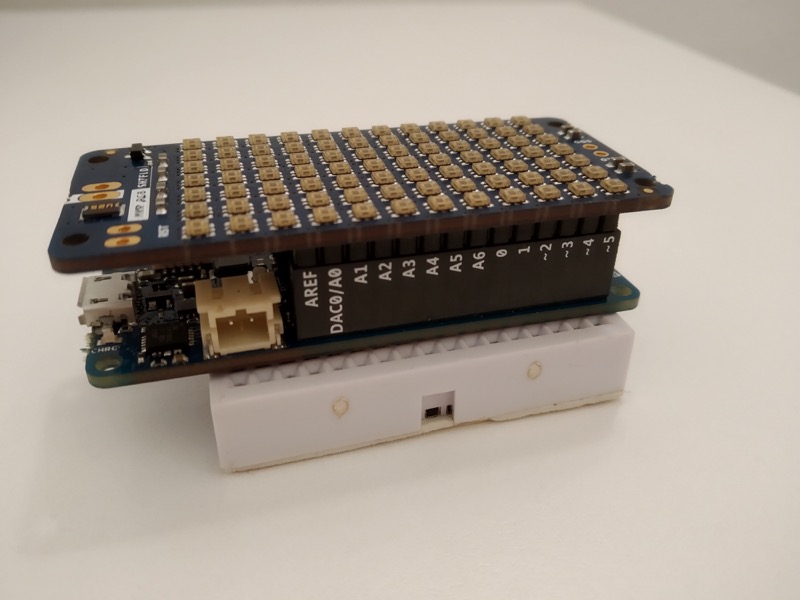
On the other hand, we will also see how to display the message "ON" (in green) and "OFF" (in red) in the MKR RGB Shield depending on the state of a button of type "ON / OFF" (with which we will interact ) created from the Arduino IoT Cloud and from the Adafruit IoT Cloud.
For this project, we will use the Arduino MKR WiFi 1010 board and we will need to have an account in both the Arduino Cloud and the Adafruit Cloud.
"SENDING DATA TO THE CLOUD"In this section, we will see how to send the values of temperature, humidity, atmospheric pressure and light luminosity read by the sensors of the MKR ENV Shield first to the Arduino IoT Cloud and later to the Adafruit IoT Cloud (using the WiFiNINA library and the Adafruit IO REST API v2).
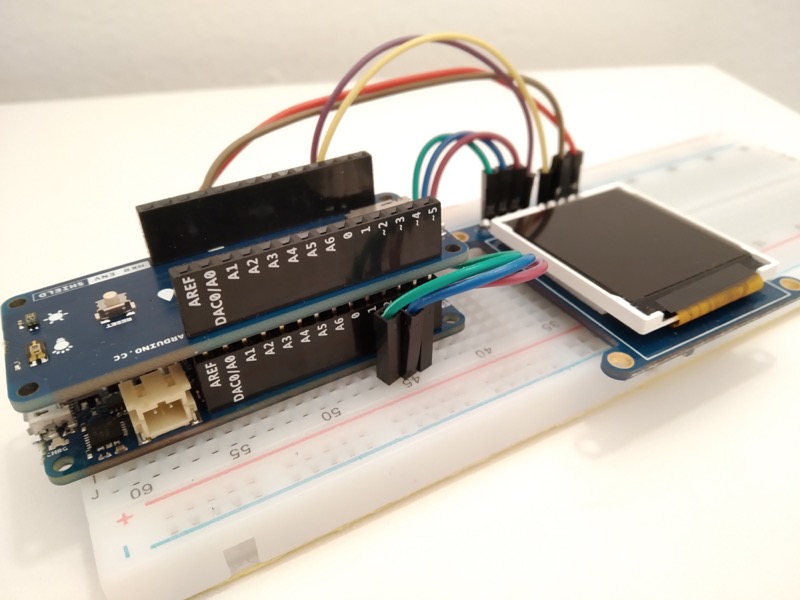
We will also use the Adafruit 1.44 "Color TFT LCD Display with MicroSD-ST7735R to visualize the values that we are reading in the MKR ENV Shield and in this way verify that they are the same values that we are sending and visualizing in the Cloud.
We will follow the following steps:
Step 1: Go to the Arduino IoT Cloud: https://create.arduino.cc/iot/things
Step 2: Press the "NEW THING" button.
Step 3: Select the board that we want to associate in the Arduino IoT Cloud (in our case it will be the MKR WiFi 1010 board).
Step 4: The next step will be the installation of the Arduino Create plugin and the MKR WiFi 1010 configuration.
Step 5: Connect the MKR WiFi 1010 board to the computer using a micro USB cable.
Step 6: Once the board is detected, enter a name for your MKR WiFi 1010.
Step 7: The next step will configure the Crypto Chip on the board.
Finally, we will have our MKR WiFi 1010 board enabled for use on the Arduino IoT Cloud.
Step 8: Now we can create our "THING" (logical representation of a connected object) that in our case will represent the values of temperature, humidity, atmospheric pressure and light luminosity read by the MKR ENV Shield coupled on the MKR WiFi 1010 board.
Step 9: We will create 4 read only properties: TEMPERATURE, HUMIDITY, PRESSURE and LIGHT_INTENSITY that will be updated every 2s.
If we go to the "Widgets" tab we will see that there are still no received values and the indicators appear empty:
Step 10: If we press the "EDIT CODE" button we can see the sketch and the files that have been generated. We just need to complete the programming and add the SECRET_SSID and SECRET_PASS values of our WiFi to the arduino_secrets.h file.
The complete sketch can be downloaded from the following repository:
https://github.com/avilmaru/iot_arduino_adafruit/tree/master/readsensors_sendtoarduino_iotcloud
NOTE: Remember that you have to change the following values for yours:
thingProperties.h
const char THING_ID[] = "xxxxxx-cxxx-xxxx-xxxx-xxxxxxxx";
arduino_secrets.h
#define SECRET_SSID "XXX"
#define SECRET_PASS "YYY”
Step 11: Load the sketch on the board and see how every 2s the values read by the MKR ENV Shield are sent to the Arduino IoT Cloud:
In this example, we will see how to send the same previous information but this time to the Adafruit IoT Cloud using the WiFiNINA library and the Adafruit IO REST API (v2.0.0).
For more information about Adafruit IoT Cloud:
https://learn.adafruit.com/welcome-to-adafruit-io/getting-started-with-adafruit-io
For more information about Adafruit IO REST API (v2.0.0):
https://io.adafruit.com/api/docs/
We will follow the following steps:
Step 1: Go to the Adafruit IoT Cloud: https://io.adafruit.com/
Step 2: We will create 4 "feeds" (what in the Arduino IoT Cloud we call "properties") within a "group" call ENV_ROOM1:
- humidity
- light_intensity.
- pressure.
- temperature
Check out the following guide to understand the basics of creating a feed:
https://learn.adafruit.com/adafruit-io-basics-feeds/overview
Step 3: We will create a "dashboard" to visualize the data of the previous "feeds". In our case we will create 4 blocks (the equivalent of the "Widgets" in Arduino IoT Cloud) of type "toggle" that we will call: TEMPERATURE, HUMIDITY, PRESSURE and LIGHT_INTENSITY that will be associated to the 4 "feeds" that we have created in the previous section.
Check out the following guide to understand the basics of creating a dashboard:
https://learn.adafruit.com/adafruit-io-basics-dashboards/creating-a-dashboard
Step 4: To send the value of the data read by the sensors of the MKR ENV SHIELD we will use the option of creating group data of the Adafruit IO REST API (v2.0.0) that will allow us to send the data of temperature, humidity, atmospheric pressure and light luminosity read at one time.
If we look at the API documentation we see that to send the information we need to make the following call:
POST: https://io.adafruit.com/api/v2/{username}/groups/{group_key}/data
... and generate a JSON with the data with the following structure:
{
 "location": {
   "lat": 0,
   "lon": 0,
   "ele": 0
 },
 "feeds": [
   {
     "key": "string",
     "value": "string"
   }
 ],
 "created_at": "string"
}
To serialize the data and generate the JSON, we will use the "ArduinoJson" library:
https://arduinojson.org/v6/doc/serialization/
Step 5: Finally we will load the sketch of the following repository on the board and check that the values read by the MKR ENV Shield are sent to the Adafruit IoT Cloud every 7s:
https://github.com/avilmaru/iot_arduino_adafruit/tree/master/readsensors_sendtoadafruit_iotcloud
NOTE: Remember that you have to change the following values for yours:
arduino_secrets.h
#define SECRET_SSID "XXX"
#define SECRET_PASS "YYY”
#define IO_USERNAME  "ZZZZ"
#define IO_KEY       "XXXX"
In this tutorial, we will see how to display the message "ON" (in green) and "OFF" (in red) in the MKR RGB Shield depending on the state of a button "ON / OFF" (with which we will interact) created from the Arduino IoT Cloud and from the Adafruit IoT Cloud.
We will follow the following steps:
Step 1: We will add a new property to existing ones that we will call ON_OFF. It will be of type "ON / OFF (boolean)" read and write and will be updated only when its value changes.
Step 2: If we press the "EDIT CODE" button we can see the sketch and the files that have been generated. We just need to complete the programming and add the SECRET_SSID and SECRET_PASS values of our WiFi to the arduino_secrets.h file.
The complete sketch can be downloaded from the following repository:
https://github.com/avilmaru/iot_arduino_adafruit/tree/master/onoff_getfromarduino_iotcloud
NOTE: I have deleted the environment variables from the previous tutorial to leave only the code referring to this new property.
NOTE: Remember that you have to change the following values for yours:
thingProperties.h
const char THING_ID[] = "xxxxxx-cxxx-xxxx-xxxx-xxxxxxxx";
arduino_secrets.h
#define SECRET_SSID "XXX"
#define SECRET_PASS "YYY”
Step 3: Load the sketch on the board and see how changing the state of the "ON / OFF" button causes the text "ON" to appear green (if the state of the button is "ON") or the text " OFF "in red color (if the status of the button is" OFF ") in the MKR RGB Shield.
ADAFRUIT IoT CLOUDTo perform the same example above in the Adafruit IoT Cloud, we will use the WiFiNINA library and the Adafruit IO REST API (v2.0.0).
The steps to follow will be:
Step 1: We will create a "feed" called "ON_OFF" within the "group" DEFAULT (group that exists by default).
Step 2: We will modify the property "Feed History" so that it does not save the value history of this feed since for this example it is not necessary. For this we will put "OFF" this property.
Step 3: We will create a "dashboard" that will contain an "ON / OFF" button that we will associate with the "feed" that we have created.
Step 4: To get the value of the "feed" associated with the button we will use the option to get the last value of a feed of the Adafruit IO REST API (v2.0.0) that as its name indicates will allow us to know the last value of a feed and that in our case will correspond to the value of "ON" or "OFF" that the dashboard button has.
If we look at the API documentation, we see that to get this information we need to make the following call:
GET: /api/v2/{username}/feeds/{feed_key}/data/last
... and deserialize a JSON with the following structure:
{
 "id": "string",
 "value": "string",
 "feed_id": 0,
 "group_id": 0,
 "expiration": "string",
 "lat": 0,
 "lon": 0,
 "ele": 0,
 "completed_at": "string",
 "created_at": "string",
 "updated_at": "string",
 "created_epoch": 0
}
To deserialize the JSON data returned we will use the library "ArduinoJson":
https://arduinojson.org/v6/doc/deserialization/
Step 5: Finally we will load the sketch of the following repository on the board and we will check that by changing the state of the "ON / OFF" button it causes the text "ON" to appear in green color (if the state of the button is "ON") or the text "OFF" in red color (if the status of the button is "OFF") in the MKR RGB Shield.
https://github.com/avilmaru/iot_arduino_adafruit/tree/master/onoff_getfromadafruit_iotcloud
NOTE: Remember that you have to change the following values for yours:
arduino_secrets.h
#define SECRET_SSID "XXX"
#define SECRET_PASS "YYY”
#define IO_USERNAME  "ZZZZ"
#define IO_KEY       "XXXX"


Comments
Please log in or sign up to comment.