You can find a video for this project on my YouTube channel here
When I heard about the AMG8833 thermal camera module, I knew that I really wanted to make a project with it. It's able to send a thermal image to a screen, similar to a FLIR camera. I like to compare hardware with benchmarks so a project like this would be a great addition to my testing arsenal.
The AMG8833 is an Adafruit product and they have a great learning guide on it, showing you how to use it with both Arduino and Raspberry Pi. I chose to use a Raspberry Pi because in the example code provided by Adafruit, it uses bicubic interpolation to basically make the image appear to have a higher definition and not look as pixelated. I wanted to setup the AMG8833 with the Pi as a camera that had a screen on the back and was handheld, portable and not tethered to a wall for power.
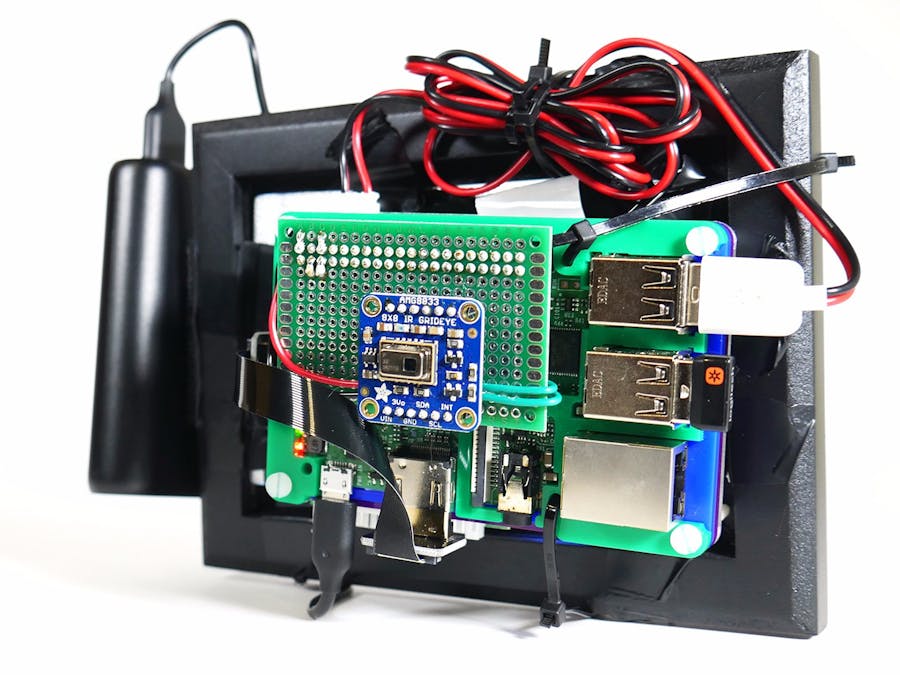
First off I needed to have the AMG8833 connect to the appropriate GPIO pins on the Pi (5V, GND, SDA and SCL). I used some double-sided protoboard to build a pseudo Pi Bonnet to seat the camera module towards the middle of the Pi for framing and to easily connect everything to the GPIO pins. I used low profile female headers to seat the camera and then ran jumper wire to the 40 pin female header.
I wanted to have a screen on the back of the Pi similar to a digital camera setup to view the thermal imaging. I had a touchscreen that I had used previously that was the perfect size, 5". But, how to mount it? I decided to use a 3"x5" picture frame, which was almost an exact fit for the screen. I took the glass and backing out, which left me with the black wooden frame. The frame also had a bit of a lip, which allowed for the Pi and screen's control boards to be recessed.
Next was power. Out of pure curiosity I tried powering the Pi and screen with my battery bank that I use for my cell phone. I didn't expect it to work since SBCs can often be picky about power delivery, especially with additional peripherals but I was pleasantly surprised when not only was the battery bank providing an appropriate power draw but it was also lasting a really long time. It seems that one charge can provide many hours of use. Now I want to experiment with lower capacity banks and different project use cases...hmm...
AssemblyPutting this all together was a bit difficult because of the ribbon cables between the control boards for the touch screen. I used electrical tape to hold the main ribbon that comes from the screen to the first board that handles touch control and then the other ribbon cable, which runs between the two boards I carefully rolled up to get the HDMI port to come out in the orientation that I wanted it to be in. I was able to mount the display board to the Pi's case stand-offs, which let everything be more compact than it otherwise would have.
After everything was haphazardly seated on the back of the touch screen in the frame, I went to adding electrical tape to secure the screen to the frame and then zip ties to condense the screen's power USB. Zip tying continued to secure the Pi thru it's case holes. After doing this everything was surprisingly secure and portable. To attach the battery, I just used some velcro to attach it to the side of the frame. The only issue I had was the USB cable for the touch control was causing some issues with the display's physical stability so for now I have that disconnected until I can procure a more slimmed down cable.
Now afterwards as I took in my work I have no delusions that depending on your style preferences the overall look of this can leave a little to be desired. In this first round for this project, I was definitely going for function over form. I think it has some charm, in a utilitarian steam punk sort of way, but yes an improved housing is first on my list of revisions.
The example code from Adafruit runs really well, so big shout out to them for that! It's written in Python and is super straight forward. You can find their learning guide for the AMG8833 here. I did modify the code slightly to have the thermal image almost fill the screen and to look at a wider range of temperatures.
I tested out the new form factor by taking some readings of various electronic devices running benchmarks and my cats running around. It has really good pick-up and I definitely got an idea of how heat was being dissipated in my main computer. With it being handheld, I can get up close to the heat sources to get some really nice visuals.


Comments
Please log in or sign up to comment.