


Hardware components | ||||||
 |
| × | 1 | |||
| × | 1 | ||||
| × | 1 | ||||
| × | 1 | ||||
| × | 1 | ||||
| × | 1 | ||||
Software apps and online services | ||||||
| ||||||
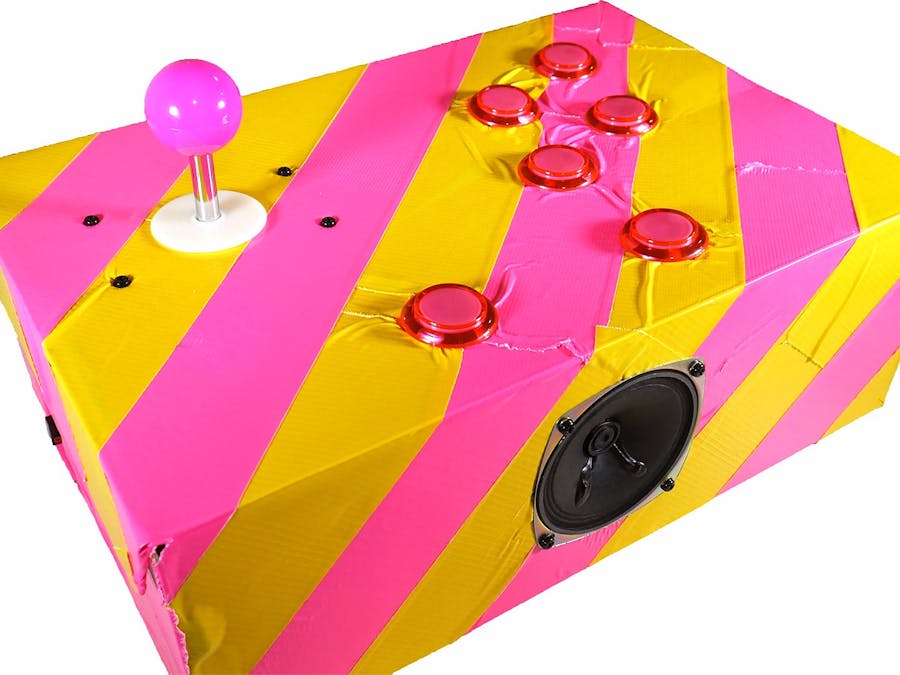
RetroPie emulation stations running on a Raspberry Pi are certainly not new, but here is my version using a shoe box, some duct tape and an Arcade Bonnet from Adafruit. I have a video for this project on my YouTube channel here if you prefer video over text.
I was lucky to recently find a Raspberry Pi Zero W in stock and quickly jumped on it, since the board is still sometimes as rare as a holographic Charizard Pokemon card in 1997.
I wanted to do something special with it for a first project, so I decided to load up RetroPie. I had never used RetroPie before, despite its popularity, and was pleasantly surprised to find that it's quite easy to setup. I followed a tutorial by ETA Prime, a YouTuber who specializes in retro game emulation and single board computers, that you can also watch here.
After I had it all setup and was successfully gaming with my USB game controller, I felt like I wanted to take this a step further.
And this is the result. It's obnoxious and I love it.
AssemblyI was able to get the pink arcade buttons and joystick from Adafruit. Again, similar to the MIDI fighter project, I used quick connect wires for the buttons. I laid out the top of the board in a traditional style (A, B, X, Y, Start, Select). The buttons plug into the arcade bonnet in that configuration. I also have a USB hub with Ethernet that I already had hanging around so I decided to include that so that I could hook up a keyboard easily if I need to configure anything and I honestly prefer wired Ethernet over WiFi for updates and things like that so that will be helpful for the future. And yes, I fully realize this defeats the purpose of having a Pi Zero with the W distinction.
I also really wanted to commit to the old school aesthetic and the options on the Arcade Bonnet so I included a small 4 ohm speaker to get that true mono sound.
I had a Nike shoe box hanging around so I used that for the housing because it's quite large and the lid is attached. I measured the diameter of the actual stick of the joystick to figure out what size hole I needed. I did the same thing for the speaker.
For the buttons I had a hole saw that was the perfect size so I made indentations into the box for cutting. I also cut holes for the HDMI and USB Power. And on the side I cut holes to expose the USB hubs ports. I cut out the holes using an old curved knife from IKEA that I no longer use for food prep, just DIY things.
Next was the fun part: duck tape. I made a striping pattern for the top and speaker panel and then a solid yellow panel on the left and solid pink panels for the right and back port side. To handle the holes, I made tears about halfway across the tape to be able to bend the tape around the holes to kind of make a more refined cutaway.
Next came the component placing. I was happy to see that all the math had paid off. I just taped the hub in place and then for the joystick and speaker, I used some plastic M3 washers and screws to hold them in. to make holes for them, I just made indentations with the screws and then used that trusty IKEA knife to poke thru the tape and cardboard.
To hold the Pi Zero W and accompanying arcade bonnet in place, I used velcro. I have the Pi Zero W in an acrylic case, so that's how I'm able to do that. However, after plugging in the buttons and HDMI and power, I may have underestimated the clearances, so the Pi is kind of in a free form mount, but hey the box doesn't have a window so free form works for now. I do want to get a better mounting system in place those because I know what's happening inside the box and it's honestly bugging me a bit.
To configure the Arcade Bonnet, Adafruit has lovely instructions on their site in a tutorial, right here. Basically, you enable SSH comm on the Pi within RetroPie and then SSH into it from your computer. I used Putty for this. Once you've hacked in, there's some simple scripts to push that are basically changing a few settings and installing some python code. I honestly just copied the code from the Adafruit site and then let it go. Word to the wise: it takes a decent amount of time, about 10ish minutes for the script to do it's thing. A few times I thought I had a hang up or something was wrong but it eventually moved along so be patient.
RebootAfter the reboot from that, there is the optional script for the speaker config, which I ran as well. Afterwards I found that the controller peripherals attached to the bonnet weren't recognized so I just did a controller config and then everything was fine. And I have to say that game play is a lot smoother with the controls attached to the arcade bonnet than they were with my USB controller so if you're serious about retro gaming then this is definitely a project for you.
I like the shoe box form factor a lot since it allows you to do table top play or even hold it comfortably in your lap. It also keeps things very light, portable and neat. I hope that by showing a project in a housing like this it will inspire others to do the same. Fancy enclosures are great and I love seeing the custom MAME cabinets that people build but I also think that people sometimes think that if they can't build something like that then they shouldn't bother with a project. The duck tape is admittedly a bit crinkled by the buttons. If I had to do something over, I would try to be more patient when laying down those strips; maybe even measure the pieces of tape and cut special pieces to properly fit the button holes. Maybe in version 2.0.


Comments
Please log in or sign up to comment.