In the category of security products, you will see cameras known as ip cameras, which actually deliver the received images to the user through the cloud from anywhere in the world. In this tutorial, we are going to use ESP32-CAM boards and Cloud ngrok to build such a device with the ability to send images to different places without any restrictions. In fact, once the project is completed and launched, you will only be able to access it with a single link. Visit CiferTechfor more tutorials, and be sure to follow my Instagrampage to support me.
ngrok is a cross-platform application that enables developers to expose a local development server to the Internet with minimal effort. This software allows your local web server to be hosted under the ngrok.com domain, meaning that no IP or public domain name is required on the local device. Similar performance can be achieved with Reverse SSH Tunneling, but this requires more configuration as well as hosting from your remote server.
ngrok can circumvent NAT and firewall mapping restrictions by creating a TCP tunnel from a randomly created subdomain at ngrok.com (e.g. 3gf892ks.ngrok.com) to the local machine. After specifying the port that your web server is listening to, the client program starts connecting by connecting the server, and then anyone can request a unique address from their local server.
How the project worksThis project works in such a way that by using the ngrok cloud, after registering and receiving the required code and then running the ESP32-CAM web server on the local network with the help of the ngrok cloud, the data is transferred to the cloud and received on the side We will do it again. This process is done using a cmd in your Windows machine, but of course there are other versions for the Linux machine that allow us to use Raspberry Pi to be able to run the server part of the project.
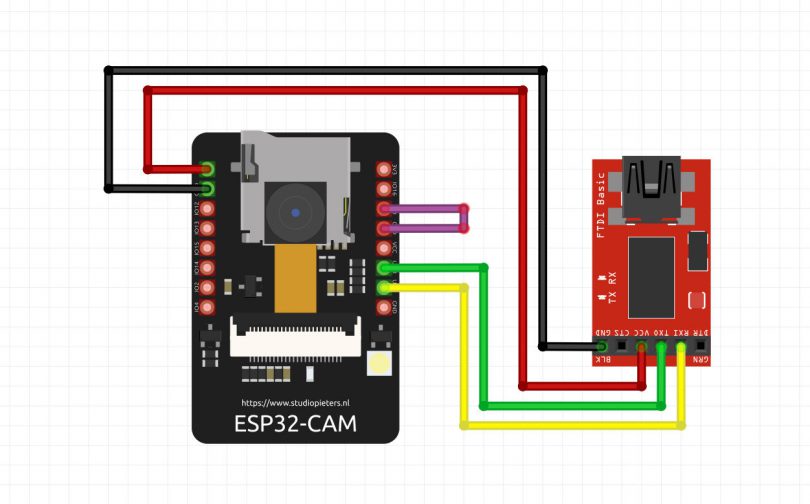
- ESP32-CAM module
- FT232 converter module for program
Launch the project and transfer the images
After completing the previous steps, such as uploading the code and receiving the local ip, we must go to the startup of ngrok prerequisites and send the images to the cloud using the relevant commands. First, from the left tab on the ngrok site, click on Your Authtoken option.
In this section, you will encounter a multi-character code that consists of a sum of several letters and numbers. This code is for your account only and should not be passed on to anyone else, in which case you can reset it from the settings.
In the next step, run the terminal that we downloaded and enter the following command along with the Authtoken that you received.
Then in the next line, enter the following command with the local ip that you received, in the part that is written ip_of_esp32 then press enter.
1ngrok http 192.168.1.103:80
In the following, you will encounter the following information with a new window that gives you links to access the web server via the cloud. You will be able to access your web server by searching for the link specified in the image from anywhere and with any device.
Finally, by searching for the link in the browser, you will receive the image instantly.


Comments