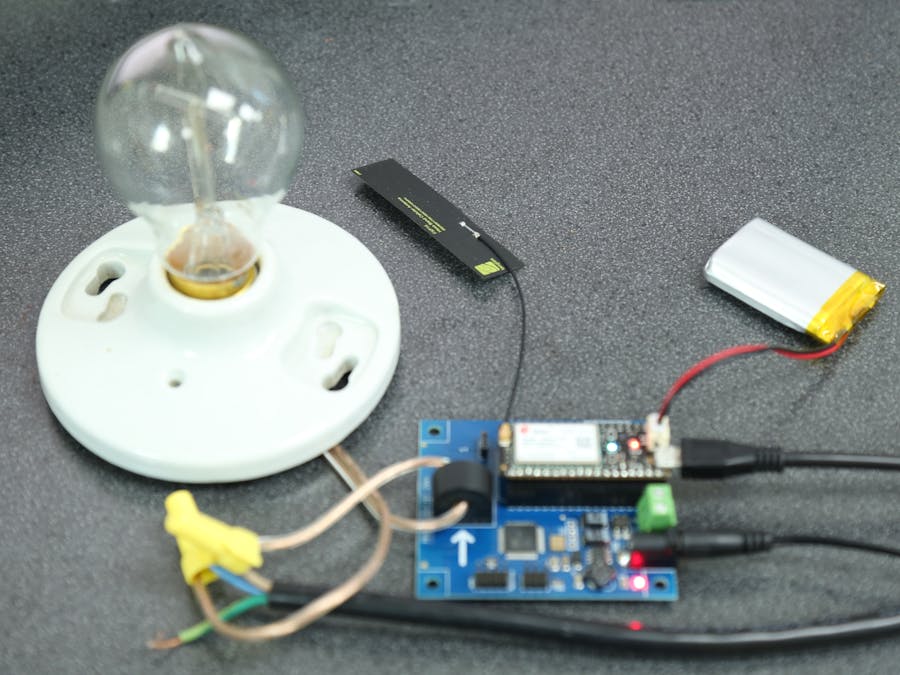
In this article we will monitor the current of a 120VAC circuit. We will set a current limit so that we get notified if the current on that circuit exceeds this limit. There are several use cases for something like this. Let your imagination run wild.
The firmware used in this application also allows the user to monitor the kWh used by the circuit as well as the current being used at the moment.
In this article we are using the Cellular connected Particle Electron module. This would be useful if you needed to install this product in a location where no WiFi were available. There would be several good Agricultural uses for such a device.
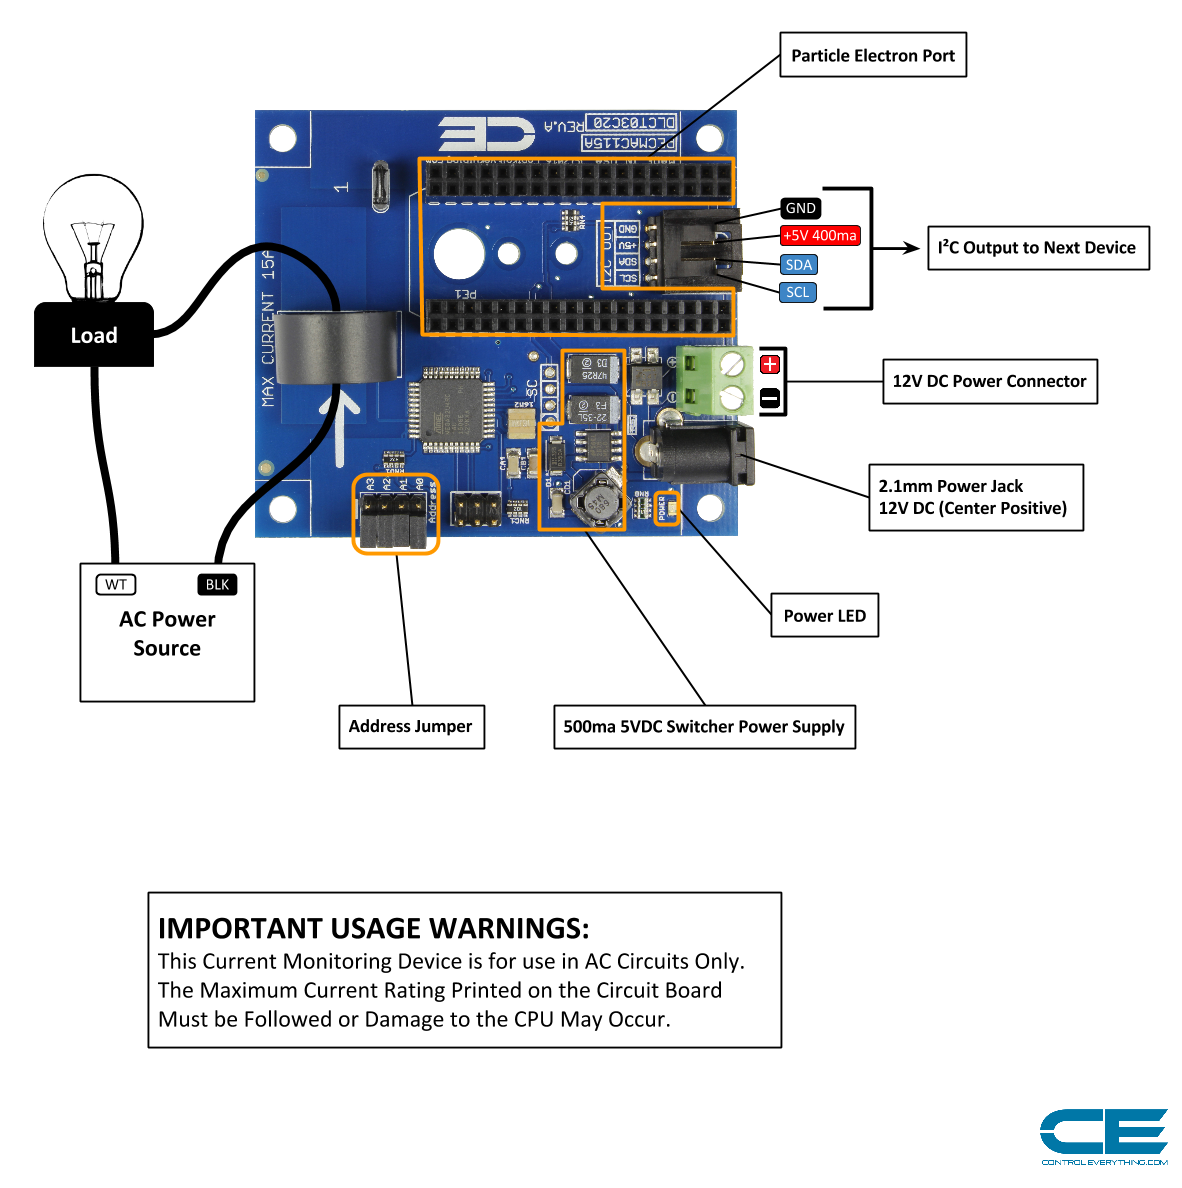
Step 1: Get your Hardware ReadyFirst we need to connect everything. The Current Transducer on the board requires that the hot leg of the AC circuit run through it. The sensor will measure the current being drawn through the wire by reading the magnetic field generated by it. This is a very common way of reading the current draw of a circuit.
Install your Electron module into the board and then wire the board into your Circuit as shown here:
At this point you need to have your module setup and associated with your Particle account so we can access it through the particle cloud and program it. If you have any questions on that procedure I recommend Particle's documentation here. At this point your controller and the module should be powered up.
Step 2: Flash code to the Particle Module
If you are using a Particle Electron module I recommend flashing the firmware over the USB connection rather than "Over the Air" as we have limited data on the cellular plan and flashing the firmware eats that up. Follow this procedure:
- Go to build.particle.io
- Sign in with your Particle account credentials.
- Click on the Libraries icon(looks like a ribbon on the left side).
- Search for Current_Monitor under Community Libraries.
- Select the Current_Monitor Library.
- In the code view window make sure the 1-channel-event-trip tab is selected.
- Click the Use This Example button on the left.
- After the example is forked to your local code repo click the small cloud icon next to the app name on the left side(looks like a little cloud with a down arrow). This will compile the application on Particle's server and then download the firmware.bin file generated.
- At this point you need Particle's CLI installed on your computer. For info on that see Particle's docs here.
- Once you have the Particle CLI installed open your command line terminal.
- Make sure the module is connected to your computer via the USB connection and it is powered up.
- In the Command line terminal change to the directory where you downloaded the firmware.bin file. Then enter:
particle flash --serial firmware.bin- Follow the CLI procedure to flash the firmware into the module.
- Once firmware flash is complete we are ready to proceed.
Step 3: Configure settings in the controller.
We now need to set the current limit for the circuit. If the current exceeds this value we will get a notification on our phone via IFTTT. To do this head over to http://mobicle.io and then follow these procedures.
- Sign in with your Particle account credentials.
- Select the controller you flashed the firmware into from the device list.
- Here on the device page you can see several variables the device publishes including current, kWh usage, etc. Under functions click on the trip function.
- In the argument box we need to enter the current level which we want to send a notification if that limit is exceeded. Enter that value in the box and click send.
- The controller will now publish an event with the name Tripped with data of light_on You can change the name of the event and the data to anything you wish but we will need that information when setting up the notification over at IFTTT.
- At this point the controller is all ready to go. Lets test it out first before proceeding though.
- Go to https://dashboard.particle.io
- Here click on the logs icon on the left. Here we can see events published by our devices.
- At this point you need to draw current in excess of your trip limit. If you do this you should see the event on the dashboard log. If so then we know the controller is doing exactly as we need so we can setup the notification on IFTTT.
We will now configure IFTTT to monitor our Particle account for an event named Tripped with the data of light_on We will configure IFTTT so that when it sees this event it will send a notification directly to our phone.
Before proceeding you will need an account on IFTTT.
- If you have not created one do so now.
- After your account is created download and install the IF app by IFTTT on your phone.
- On IFTTT's website you need to add a couple of channels. The first is the Particle Channel. This will connect IFTTT to your Particle account so it can monitor our events.
- The next channel is the IF Notifications channel.
Once your IFTTT account is setup and you have those two channels connected we are ready to create our recipe. On IFTTT's website follow these instructions.
- Make sure you are signed in
- Click on My Recipes.
- Click Create a Recipe.
- Click the Blue this text.
- Enter Particle as your Trigger channel.
- Click on New Event Published.
- For the Event name enter Tripped or if you changed it enter what you changed it to.
- For Event Contents enter light_on or if you changed it enter what you changed it to.
- From the Device Name or ID drop down box select the module you flashed the Current_Monitor firmware into.
- Click the Create Trigger button.
- Click on the Bluet that text.
- For the Action Channel choose the IF Notifications channel.
- Click on Send a notification.
- In the Notification text box enter the text you would like to receive in the notification when the event occurs.
- Click on create Action.
- Enter a name for the Recipe and then click Create Recipe.
At this point you can test it out. Just draw excess current on the circuit and you should get a notification right on your phone. Cool huh.


Comments
Please log in or sign up to comment.