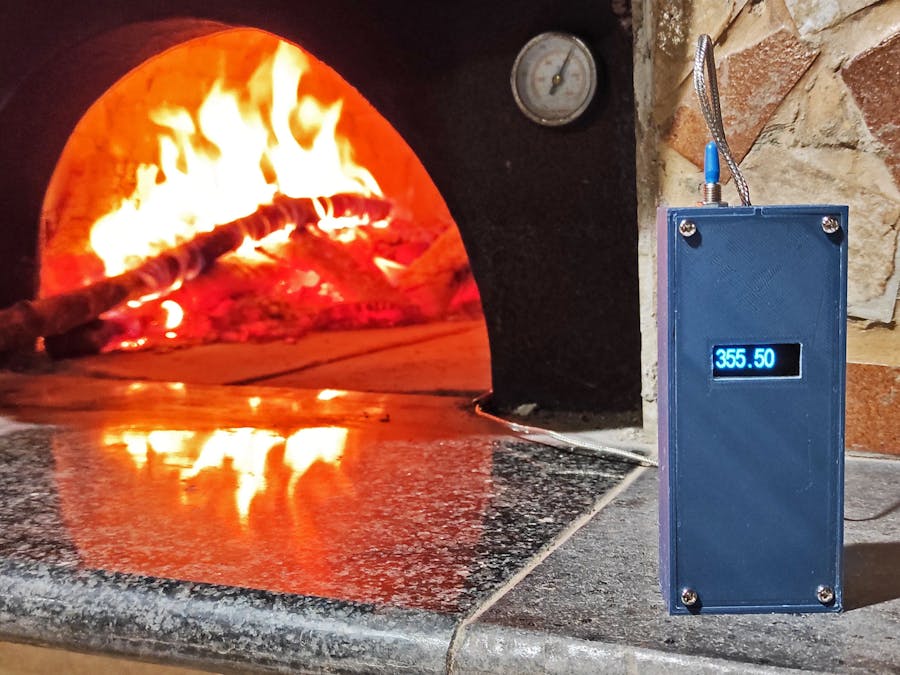
Since I'm a pizza lover and I got a wood oven, I built this thermometer for checking internal oven temperature and compare the reading with the analogue one mounted on the oven
This Handheld Thermometer uses a K-type Thermocouple. You can read from 0°C up to 1023.75°C depending on the used thermocouple (most thermocouple reads from 0 t 400°C). You cannot read negative temperatures.
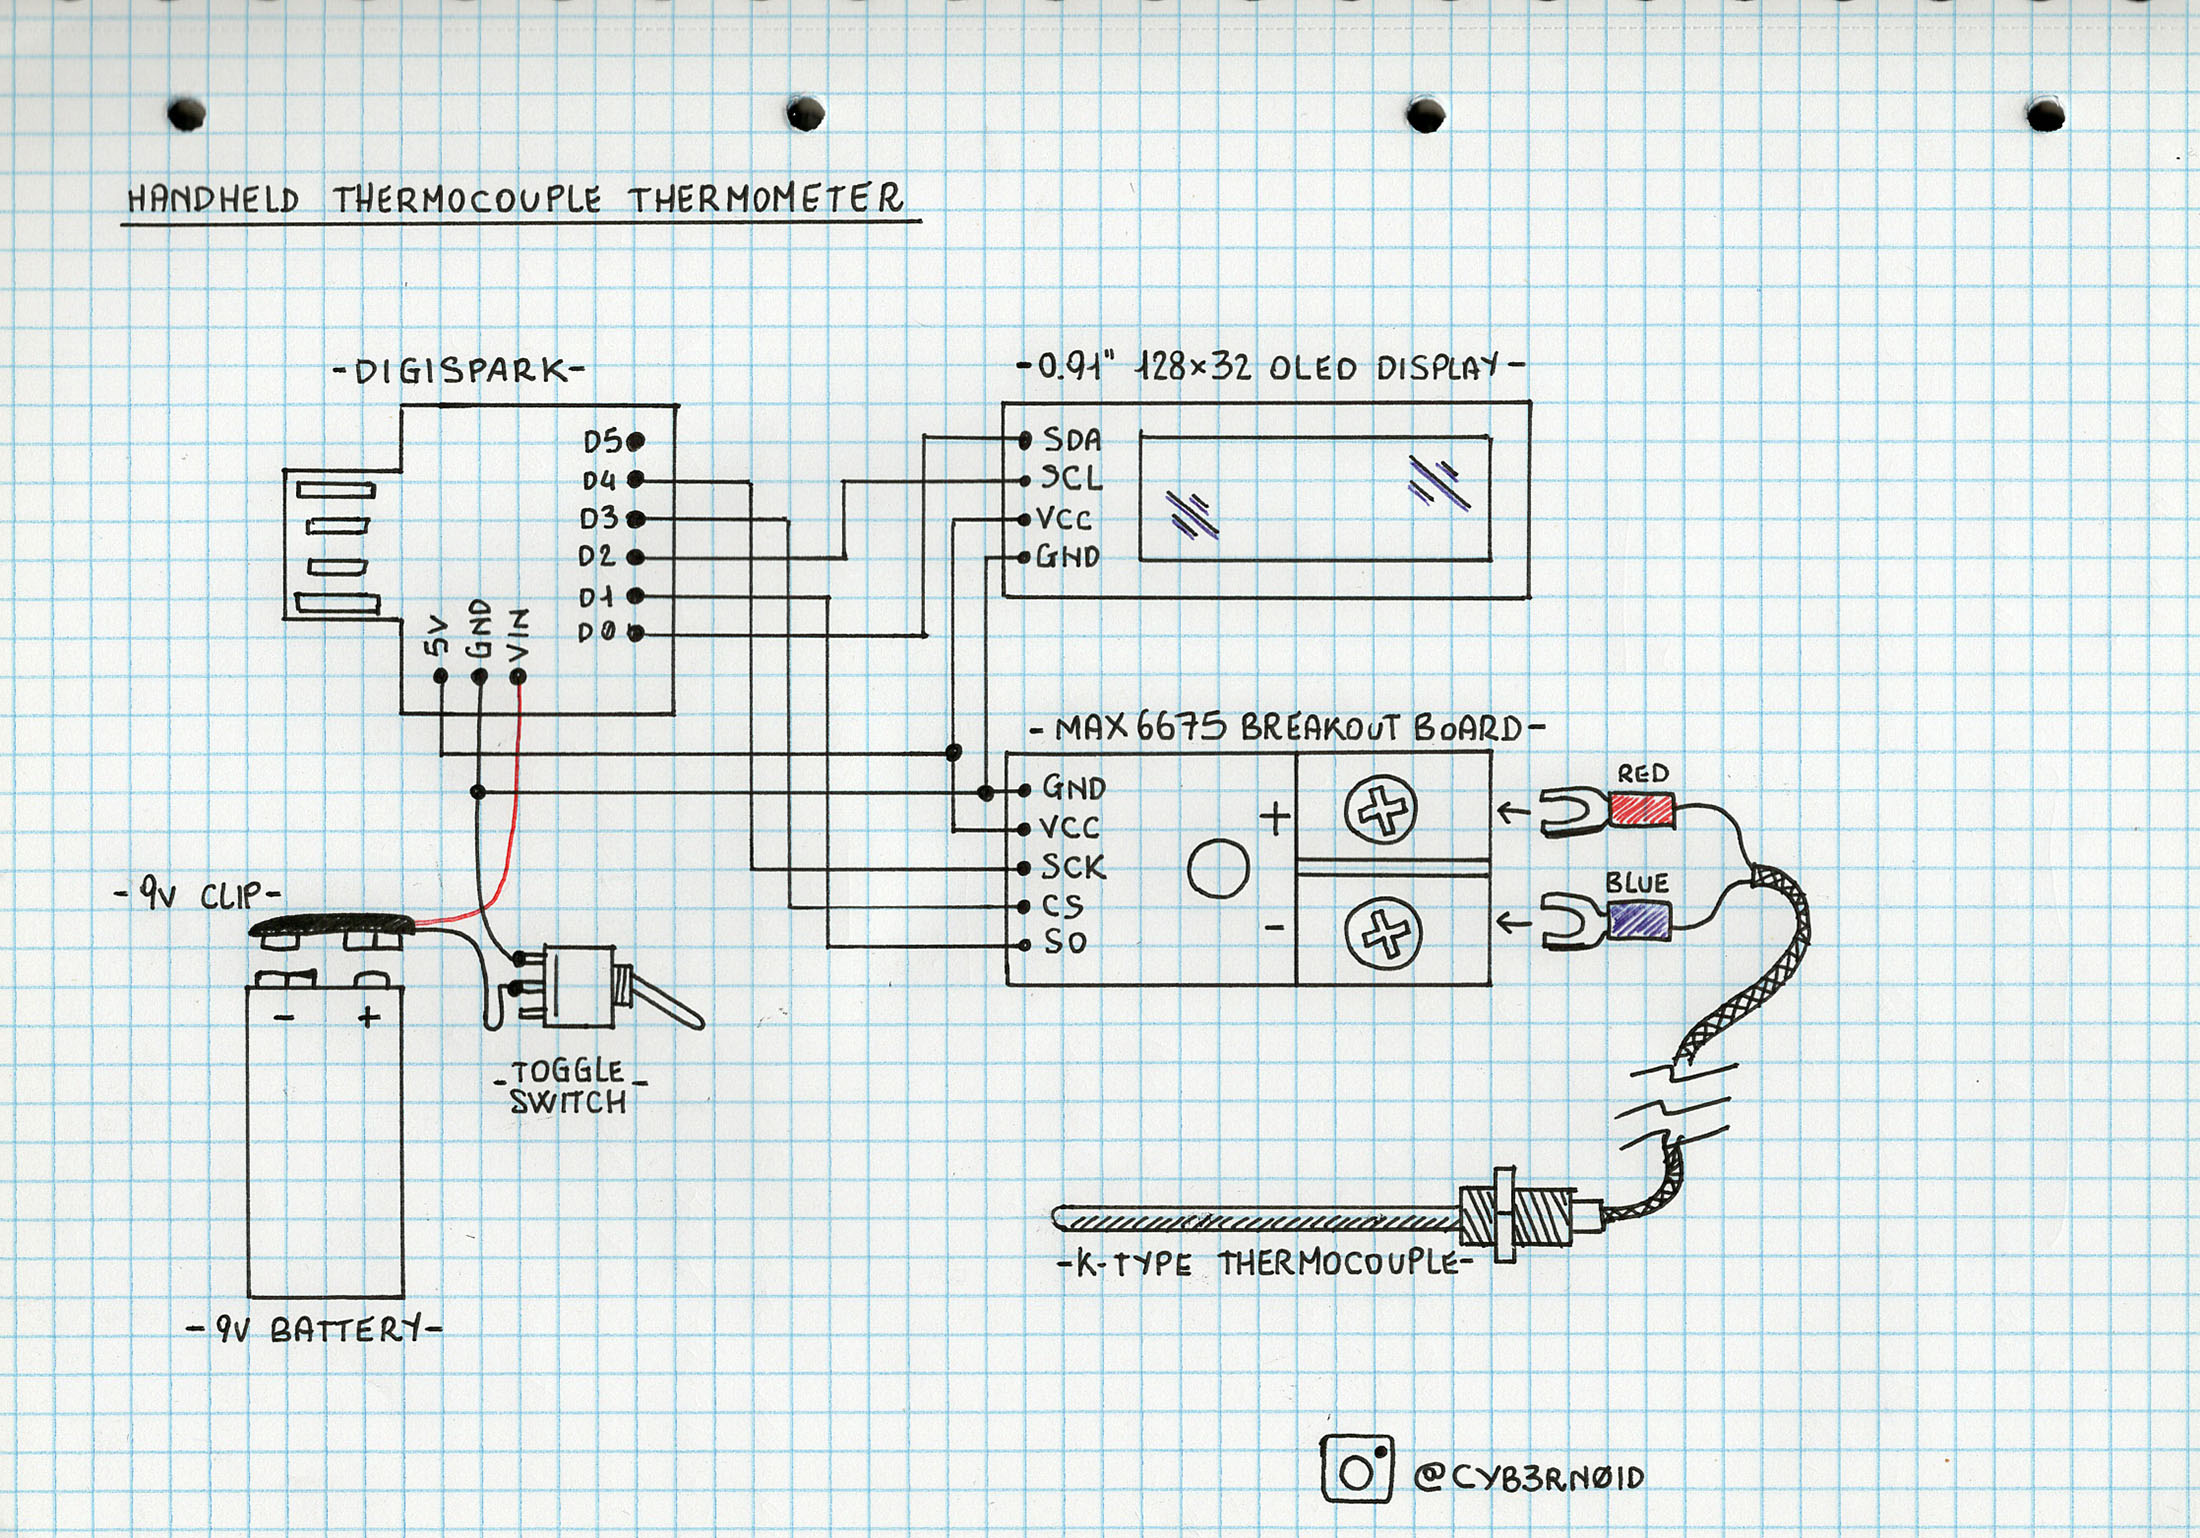
Microcontroller used is an ATtiny85 on the Digistump Digispark. Thermocouple is connected through a MAX6675 amplifier. Readings are showed on a 0.91" (128x32) OLED display with big fonts using the Tiny4KOLED library. Whole thing is powered using a 9V battery connected on Vin pin of the Digispark. Digispark has a 5V regulator on board and its 5V output is used for powering the amplifier and the OLED display.
Even if the OLED controller works at 3.3V is safe powering the display at 5V. Those OLEDS have a voltage regulator on board that step down to 3.3V. SDA and SCL lines are connected on display to 3.3V through pull-up resistors: remember that I2C pulls only lines to GND and when an high logic level must be sent, device put the gpio in high impedance so the logic level is given by the pullup resistor.
A thermocouple is made for reading high temperatures in critical ambients, so if you need accurate and precise readings, maybe a thermocouple is not good for you and you should consider using a PT100 instead coupled to a MAX31865 or similar.I've designed an enclosure in OnShape for putting in all components making the thermometer portable. You must 3D print the 3 parts of which enclosure is composed:
The box has 4 holes in the corner: you'll put M3 inserts here. In the lower part of the box there are 3 housing for (from top to down looking at the pic): Digistump, MAX6675 breakout board and 9V Battery with clip attached. Printing at 0.1 will result in a good fit, with 0.2 boards will remain firmly attached. On frontal part you must put a toggle switch using the hole. The long slot will used for passing the thermocouple cable. Lid has the housing for the 0.91" OLED display:
First of all, you must program the Digispark. If you're not familiar with the Digistump, I wrote a full article on my own blog some time ago. After prepared the Arduino IDE for using the Digispark, you must also install some libraries:
- TinyWireM by Adafruit
- Tiny4kOLED by Stephen Denne (datacute)
- MAX6675 by Adafruit
After you've programmed the Digispark, you can solder cables: you must put some care doing connections since space in the enclosure is limited:
The general rule is: place boards in their slots, take measurements for each cable, cut and sold. Connections are very simple (anyway take a look at hand-drawn schematic):
- 9V Battery : (+) => Digispark Vin, (-) => GND (the toggle switch will broke one of those 2 wires)
- MAX6675 to Digispark: SCK=>P4, CS=>P3, SO=>P1, VCC=>5V, GND=>GND
- 0.91" OLED to Digispark: SCL=>P2, SDA=>P0, VCC=>5V, GND=>GND
Don't make cables too long or lid will not close properly. Thermocouple will be the last thing to be attached.
Once you've soldered all cables you can screw the thermocouple and close the slot using the small 3D printed piece:
Screw the lid using 4 short M3 screws and you can enjoy your new thermometer. When turning ON, the display will take some seconds to light up. MAX6675 has a resolution of a quarter of a grade, so in the decimal part you will read always.00 /.25 /.50 /.75 :it's normal. I've put a refresh of a second but maybe can be lowered.


Comments
Please log in or sign up to comment.