
Hardware components | ||||||
 |
| × | 1 | |||
| × | 1 | ||||
| × | 1 | ||||
| × | 1 | ||||
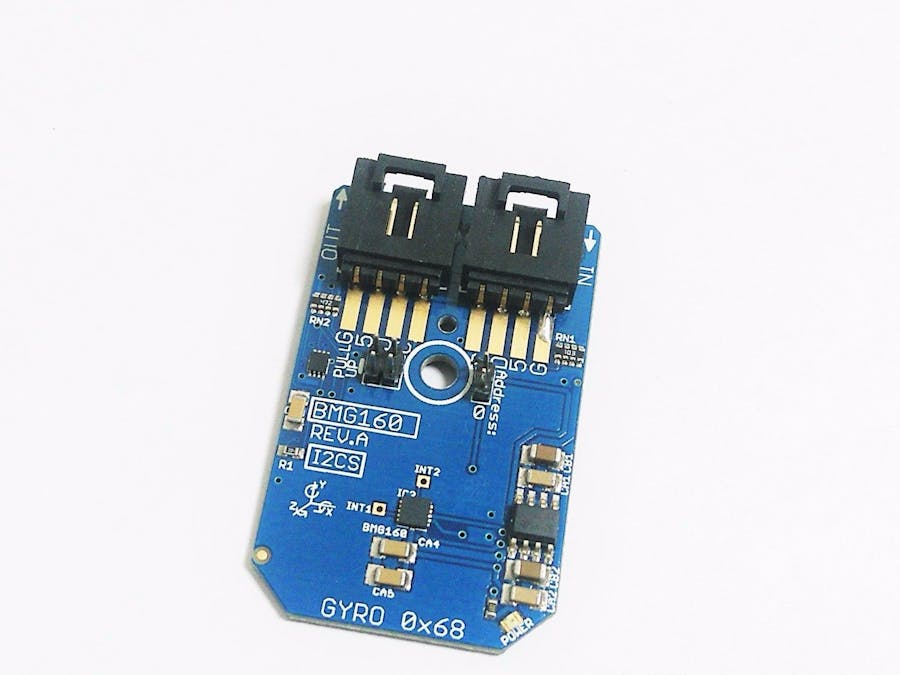
In today's world, more than half of the youth and kids are fond of gaming and all those who are fond of it, fascinated by the technical aspects of gaming knows the importance of motion sensing in this domain. We were also amazed by the same thing and just to bring it on the boards, we thought of working on a gyroscope sensor which can measure the angular rate of any object. So, the sensor we took up to deal with the task is BMG160. BMG160 is a 16-bit, digital, triaxial, gyroscope sensor which can measure the angular rate in three perpendicular room dimensions.
In this tutorial, we are going to demonstrate the working of BMG160 with Arduino Nano.
Step 1: BMG160 OverviewFirst of all we would like to familiarize you with the basic features of the sensor module that is BMG160 and the communication protocol on which it works.
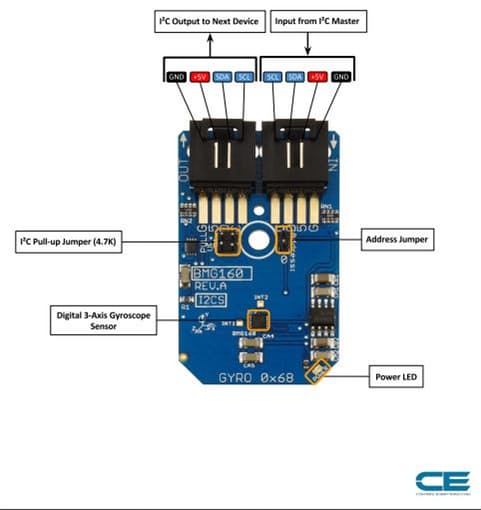
BMG160 is basically a 16-bit, digital, triaxial, gyroscope sensor which can measure angular rates. It is capable of computing angular rates in three perpendicular room dimensions, the x-, y- and z-axis, and providing the corresponding output signals. It can communicate with the Raspberry Pi board using the I2C communication protocol. This particular module is designed to meet requirements for consumer applications as well as industrial purposes.
The communication protocol on which the sensor works is I2C. I2C stands for the inter-integrated circuit. It is a communication protocol in which the communication takes place through SDA (serial data) and SCL (serial clock) lines. It allows connecting multiple devices at the same time. It is one of the simplest and most efficient communication protocol.
Step 2: What you needThe materials that we need for accomplishing our goal includes the following hardware components:
1. BMG160
2. Arduino Nano
3. I2C Cable
4. I2C Shield for Arduino Nano
The hardware hookup section basically explains the wiring connections required between the sensor and the Arduino. Ensuring correct connections is the basic necessity while working on any system for the desired output. So, the requisite connections are as follows:
- The BMG160 will work over I2C. Here is the example wiring diagram, demonstrating how to wire up each interface of the sensor.
- Out-of-the-box, the board is configured for an I2C interface, as such we recommend using this hookup if you’re otherwise agnostic.
All you need is four wires! Only four connections are required Vcc, Gnd, SCL and SDA pins and these are connected with the help of I2C cable.
These connections are demonstrated in the pictures above.
Step 4: 3-Axis Gyroscope Measurement Arduino CodeLets start with the Arduino code now.
While using the sensor module with the arduino, we include Wire.h library. "Wire" library contains the functions which facilitate the I2C communication between the sensor and the Arduino board.
The entire Arduino code is given below for the convenience of the user.
Step 5: ApplicationsBMG160 has a varied number of applications in devices like cell phones, human machine interface devices. This sensor module has been designed to meet requirements for consumer applications such as image stabilization (DSC and camera-phone), gaming and pointing devices. It is also employed in systems which require gesture recognition and the systems used in indoor navigation.

Comments