


Hardware components | ||||||
_ztBMuBhMHo.jpg?auto=compress%2Cformat&w=48&h=48&fit=fill&bg=ffffff) |
| × | 1 | |||
 |
| × | 1 | |||
 |
| × | 1 | |||
Software apps and online services | ||||||
 |
| |||||
Hand tools and fabrication machines | ||||||
 |
| |||||
 |
| |||||
 |
| |||||
Now I have been struggling with this project for like hours now. But at the end I find out I did not have the correct knowledge. So people it is very important to know what you are making. In this case I recommend you to go through the page and not just copy and paste the code.
Now, this project uses a DHT11 temperature and humidity sensor with the three pin but you can also use any other sensor the changes in the code should be as per the model. I have used Arduino UNO for this project.
First, make the connection of the DHT sensor with the Arduino board.
VCC - 5.5V
DATA - PIN 4(you can also use pins 3, 4, 5, 12, 13 or 14
Pin 15 can work but DHT must be disconnected during program upload)
GND - GND
Second, make the connection of the LCD 1602 I2C display with the above circuit.
LCD connections with Arduino board
VCC - 5.5V
GND - GND
SDA - A4(Analog Pin 4)
SCL - A5(Analog Pin 5)
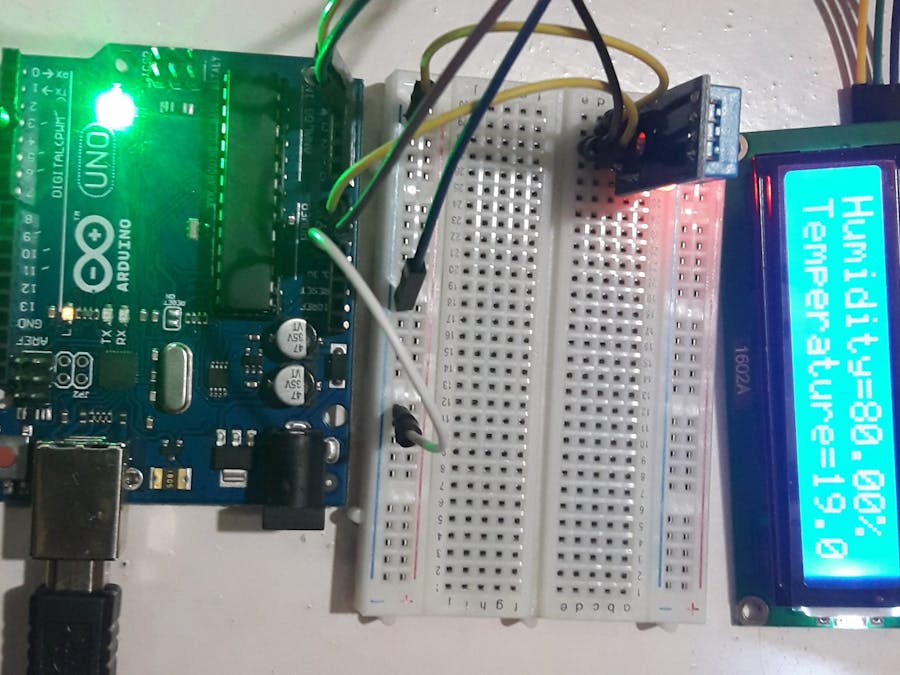
If you are thinking what I am thinking then the circuit will look something like this:
Red Wires indicate the VCC wires and the black ones indicate GND wires.
NOTE- If you see that your sensor is rapidly getting warm(only for 4 pin sensors) then attach a 10K pull up resistor joining VCC and Signal ends of the sensor.
Lastly, the code part where the real understanding begins. So, basically I have used two libraries one for the sensor and the other for the LCD 1602 I2C display. Then let us start:
We first insert the DHT library the link to download this library is given below. So it will go something like this.
#include"DHT.h"
Then define the sensor pin. As I have taken the data pin to be 4. My code will be followed as
#defineDHTPIN4
After that we need to determine the sensor that is being used. Now, I have used the DHT 11 sensor but if you have a different sensor then the code will change as per the sensor model
#defineDHTTYPEDHT11
Then using the above data
DHTdht(DHTPIN,DHTTYPE);
After interfacing with the DHT sensor we now are going to move on to the LCD display
#include<LiquidCrystal_I2C.h>
LiquidCrystal_I2Clcd(0x27,16,2);
So, now we are ready to start with the void setup and loop part.
I wrote the whole code together hope you may not find it too difficult.
void setup() {
 dht.begin();// initialize the sensor
 lcd.backlight();// turn on lcd backlight
 lcd.init();// initialize lcd
}
void loop() {
 lcd.clear();
   lcd.setCursor(0,0);// set the cursor on the first row and column
   lcd.print("Humidity=");
   lcd.print((float)dht.readHumidity());//print the humidity
   lcd.print("%");
   lcd.setCursor(0,1);//set the cursor on the second row and first column
   lcd.print("Temp=");
   lcd.print((float)dht.readTemperature());//print the temperature
   lcd.print("Celsius");
   delay(2000);
   lcd.clear();
}
Please note that the temperature is automatically in the celsius scale ergo you do not need to change any values unless you want the answer in Farenheit.
I strongly recommend the Arduino Web Editor as you do not need to download any additional libraries since it is pre-included but if you do not use the web editor and use the software instead you may need to make slight changes but the main part remains the same.
NOTE- If you are using the software then you do not need to download the LiquidCrystal_I2C library as it is pre-included in the software.
If you want to download the DHT library then click here.
Looks like we have reached the end of the project.
Bye guys, have fun.


Comments
Please log in or sign up to comment.