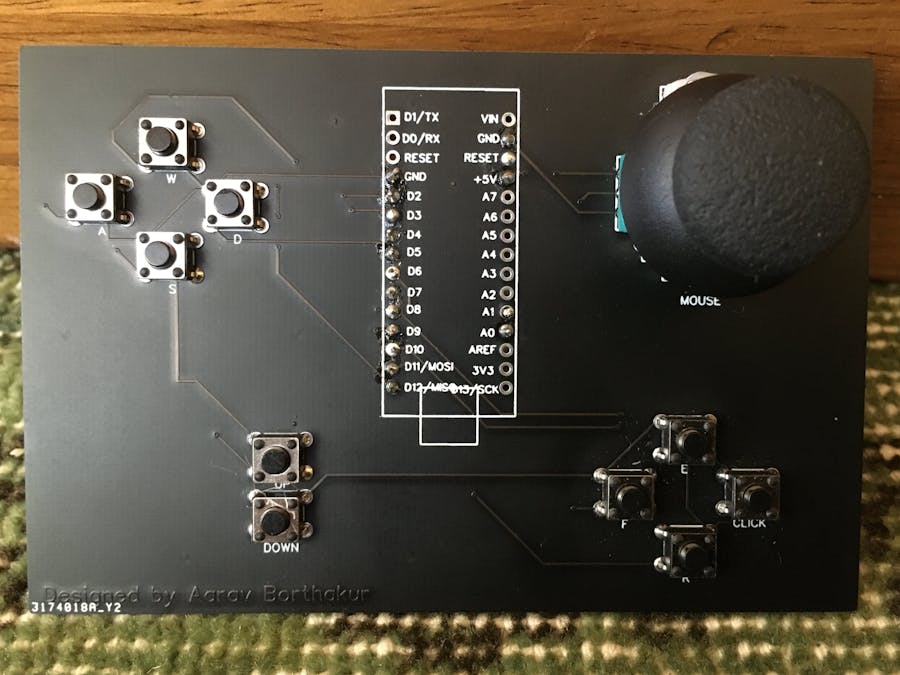
A video game controller that can control any computer game!
The pro micro is an Arduino IDE-programmed board that can function as a USB keyboard or mouse. I took of this feature to create a video game controller. Each button triggers a key on your keyboard to be pressed or your mouse to scroll. The joystick controls your mouse location. With the combination of these two, you have full control of your games.
HardwareButton: https://www.sparkfun.com/products/97
Joystick: https://www.sparkfun.com/products/9032
Pro micro: https://www.sparkfun.com/products/12640
Custom PCB: https://easyeda.com/gadhaguy13/videogamecontroller (see warnings below)
SoftwareThe pro micro is programmed by the Arduino-IDE. I put these functions because every controller will be different.
Keyboard
Import the keyboard library
#include "Keyboard.h"
Begin the keyboard:
Keyboard.begin()
Press a key:
Keyboard.press('key')
Release a key:
Keyboard.release()
Mouse
Import the mouse library:
#include "Mouse.h"
Begin the mouse:
Mouse.begin()
Click:
Mouse.click()
Move mouse or scroll:
Mouse.move(x,y,scroll)
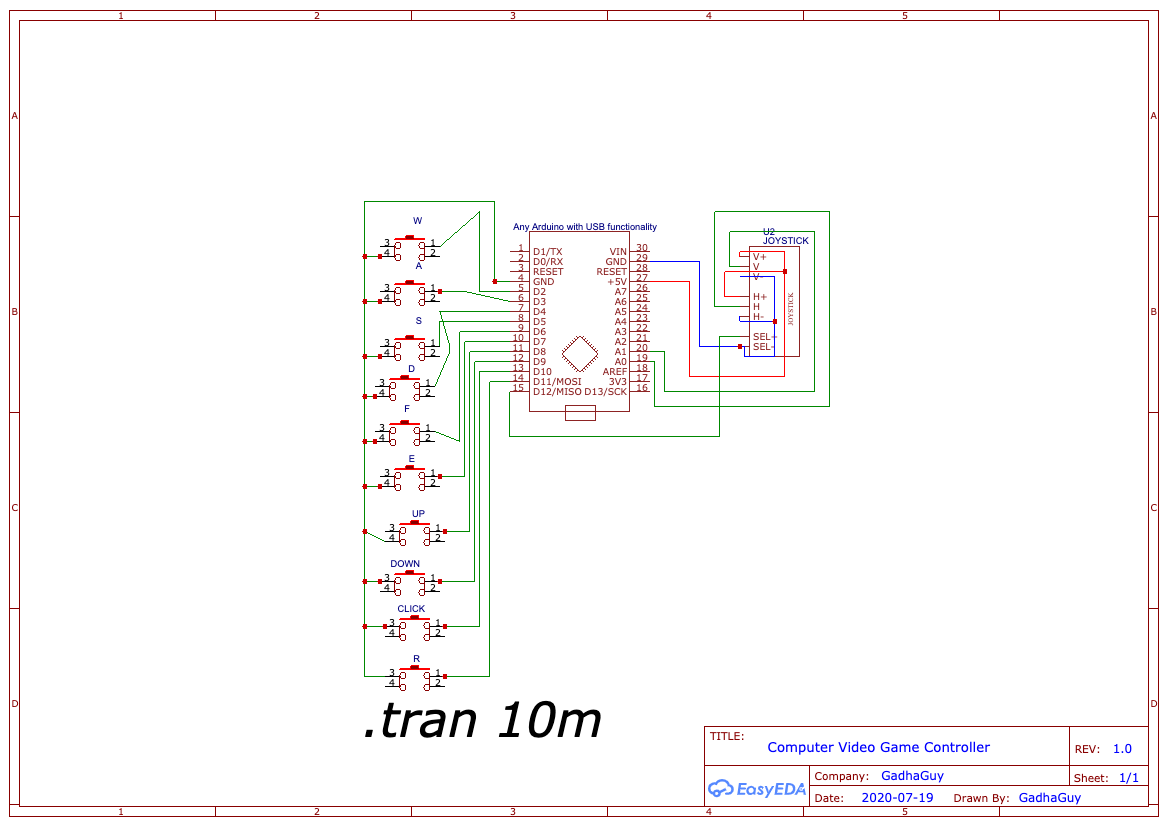
I designed the PCB with EasyEDA and got it manufactured at JLCPCB. This is the link to the PCB design. Please check for errors before ordering it! I made a few untested minor tweaks after ordering it. Also, make sure it matches the pro micro, as the PCB link I gave is for the arduino nano, which is not compatible with the keyboard and mouse libraries. You can add buttons or change the layout to your liking.
Layers
This PCB has two layers. Layers make it so that you can have two wires go on top of each other without shorting.
Vias
Vias connect the layers of the PCB to each other. For example, if you want a wire from the top layer to connect to a wire from the bottom layer, add a via.
Ratlines&Wires
Ratlines are like a guideline for you to place your wires. They follow the schematic. You can make the PCB without using the schematic or ratlines, but I do recommend them. They make the wiring easy in my opinion. When wiring, make sure your wires do not form a 90° angle.
Remember to change the arduino nano slot on the PCB for whichever arduino you are using!


_PnKPri8a6q.jpg?auto=compress%2Cformat&w=48&h=48&fit=fill&bg=ffffff)


_3u05Tpwasz.png?auto=compress%2Cformat&w=40&h=40&fit=fillmax&bg=fff&dpr=2)
Comments
Please log in or sign up to comment.