


Hardware components | ||||||
_ztBMuBhMHo.jpg?auto=compress%2Cformat&w=48&h=48&fit=fill&bg=ffffff) |
| × | 2 | |||
| × | 2 | ||||
 |
| × | 1 | |||
| × | 1 | ||||
 |
| × | 1 | |||
 |
| × | 1 | |||
 |
| × | 1 | |||
Software apps and online services | ||||||
 |
| |||||
I've always wanted to build my own remote control, so I've created a tutorial for you.
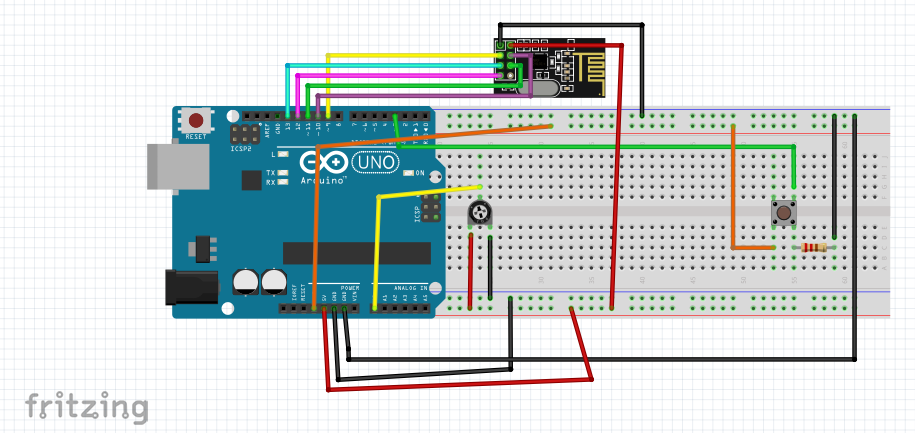
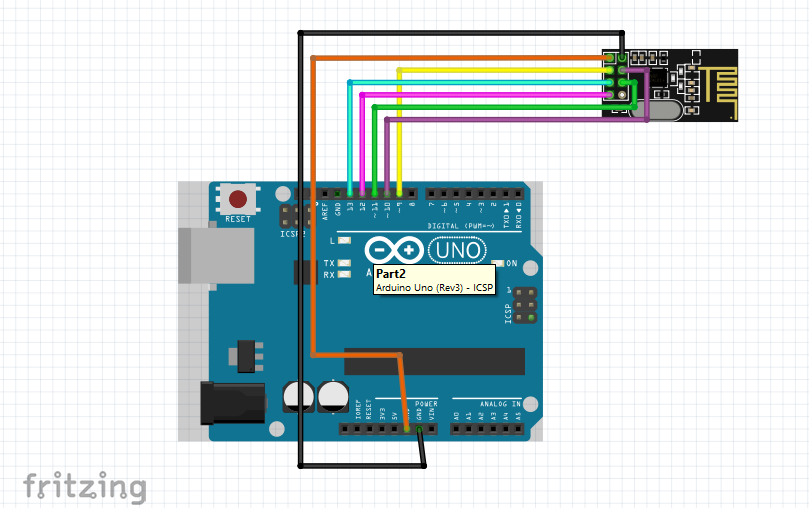
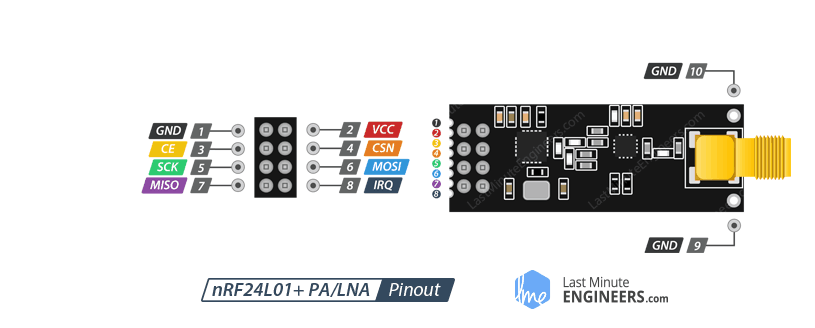
The RF24 can reach up to 100 meters and is very reliable in sending joystick and button data. It can send up to 32 characters at a time.
This project can be made with a Nano, Uno and many other microcontrollers.
By expanding the code, you can add more buttons, pots, and joysticks.
I will continue to update this project
This project requires two microcontrollers and two RF24's and two codes.
Make sure when you launch the Arduino app, you launch both instances from the start menu. Otherwise if you use (ctrl+n) for a new page, it will create another instance sharing the same COM port as the other Arduino. (You switch one to COM4, they'll both switch to COM4). To avoid bugs, make sure the COM port is different on both windows. Or close both and try again.
Also keep in mind the RF24 is not a 5V device. Use 3V.
And make sure the RF24 is connected fully when uploading the code. The RF24 actually saves code as well, so it must be connected to the Arduino during upload.

Comments
Please log in or sign up to comment.