Project Replaced by: https://www.hackster.io/Granpino/raspiplayer-internet-radio-and-mp3-folder-player-rev2-4-3ddfdf
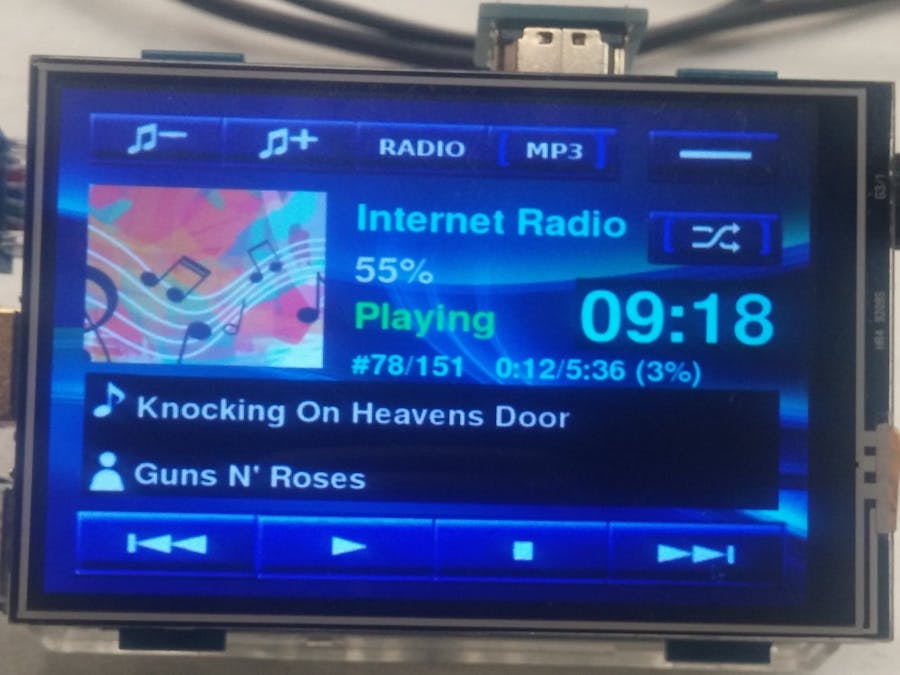
This internet radio and MP3 player uses a 3.5 HDMI LCD touchscreen for operation. The original project was published by Adafruit. https://learn.adafruit.com/raspberry-pi-radio-player-with-touchscreen/overview The project uses MPC, MPD and Pygame. The project has been evolving over time. I am still trying to incorporate automatic album images on the sreen.
Installation:
- Download the raspbian stretch image and burn to a 8GB or bigger SD card. To start you should be know how to SSH to the raspberry pi. You can also connect a mouse and keyboard to the pi and install everything locally. See https://www.raspberrypi.org/documentation/
- Attach the LCDscreen to the raspberry pi.
- After the Pi boots up connect to the internet. Open the terminal screen and type
sudo raspi-config- Set internationalisation options and change the Timezone
- Go to Advanced Options and enable VNC and set the resolution to 640x480. I use VNC for remote connection.
- Exit and reboot.
- The stretch image takes a lot of space on the SD card and we need to make room for the MP3 music. SSH to the Pi and delete Wolfram and Libreoffice, or use the mouse on the Pi and select preferences, add/remove software
sudo apt-get purge wolfram-engine libreoffice* -y
sudo apt-get clean
sudo apt-get autoremove
sudo apt-get update
sudo apt-get upgrade- After the upgrade you are ready for the installation.
- Now install the Pi-radio files.
- Connect your Pi to a TV, or use Vnc and open the Terminal window.
sudo raspi-config
Change the resolution to 640x480 and reboot.
sudo apt-get install mpd mpc
cd
sudo git clone https://github.com/granpino/Pi-Radio-mp3-.git
cd Pi-Radio-mp3-
sudo chmod 777 *.sh
sudo ./install.sh- Now lets test the audio output plug to see if Mpd is working. You should have internet access to hear the radio.
mpc load playlist
mpc play
mpc stop
sudo ./radio.sh- At this point the Pi-radio should work and play internet radio only through the audio port, and without the LCD screen if you have TV connected or are using VNC viewer.
- Now install the LCD drivers.
git clone https://github.com/goodtft/LCD-show.git
sudo
cd LCD-show
sudo ./MPI3508-show- The resolution used with the pi-radio is 640x480, therefore you need change the config.txt.
sudo nano /boot/config.txt- and change the resolution at the bottom of the file to 640 480. Save, exit and reboot.
sudo reboot- At this point the Pi should boot to the stretch desktop and the touchscreen working
- The installation file will create the required playlist for the internet radio. There should be an icon on the raspberry desktop. To open the Pi-radio double tap on the radio shortcut. To change the desktop for a single click go to file manager, click on Edit and at the very bottom select preferences. Select 'open files with single click'.
- The application uses pygame and the touchscreen will only run under lx-terminal. I you run the application from SSH, the touchscreen will work upside down. I elected to run the app from the desktop because I want to run other apps on the same Pi that use the LCD screen. I did not have to calibrate the screen to make it work.
- I included some sample radio stations for your testing. To add other radio stations to the playlist go to http://www.radiosure.com/stations/ and copy the m3u links. There are 2 way to create a playlist.
mpc add <link of station>
mpc save playlist- or edit the file
sudo nano /var/lib/mpd/playlists/playlist.m3u- The Pi-radio is set to read the mp3 files from a USB stick. A playlist is created and stored in the database. To see if the files are there type;
mpc listallThe mpd.conf file
The mpd.conf file needs to show the location of the mp3 files and the type of bluetooth speaker. Put some mp3 files in a USB stick and connect to the Pi, then open the mpd.conf file.
sudo nano /etc/mpd.confand change the file location to;
music_directory "/mnt/usbdrive"BLUETOOTH
It would be nice to send the music to a bluetooth speaker. If you are using a Raspberry pi 2, insert a bluetooth dongle int the USB slot. Go to the raspberry desktop and click on the bluetooth icon then add device. Select your bluetooth speaker and pair. Some speakers will require a password, sometimes 0000. You will need a mouse to righ-click on the speaker icon on the menu to connect.
You will also need to edit the mpd.conf file to include the bluetooth speaker.
bluetoothctlCopy the speaker mac address xx:xx:xx:xx:xx:xx
exit
sudo nano /etc/mpd.conf
Look for the audio output and change to include the mac address and name of the speaker. Replace yhe XX with your mac address
audio_output {
       type            "alsa"
       name            "bluetooth-speaker "
       device          "bluealsa:HCI=hci0,DEV=xx:xx:xx:xx:xx:xx,PROFILE=a2dp"
       mixer_type      "software"
}
You can have more than one bluetooth speaker.
audio_output {
       type            "alsa"
       name            "headphone "
       device          "bluealsa:HCI=hci0,DEV=xx:xx:xx:xx:xx:xx,PROFILE=a2dp"
       mixer_type      "software"
}
If you want to listen to the audio jack and bluetooth at the same time, then add a second audio output as;
audio_output {
       type            "alsa"
       name            "hdmi audio jack"
}If the radio fails to start, check the mpd.conf file for errors. To see if the mpd is running open the terminal and type:
sudo service mpd statusIf it does not say it is running then you have a problem. Look at your mpd.conf for typing errors and correct. To restart mpd after making changes type;
sudo service mpd restartAnd check again and see if it is running.
Telephone controlIf you wish to control the Pi-Radio from your phone, there are several MPD apps available for android and Iphone. The One I use is MPD remote. From the app enter the IP address of your Pi and have fun..


Comments
Please log in or sign up to comment.