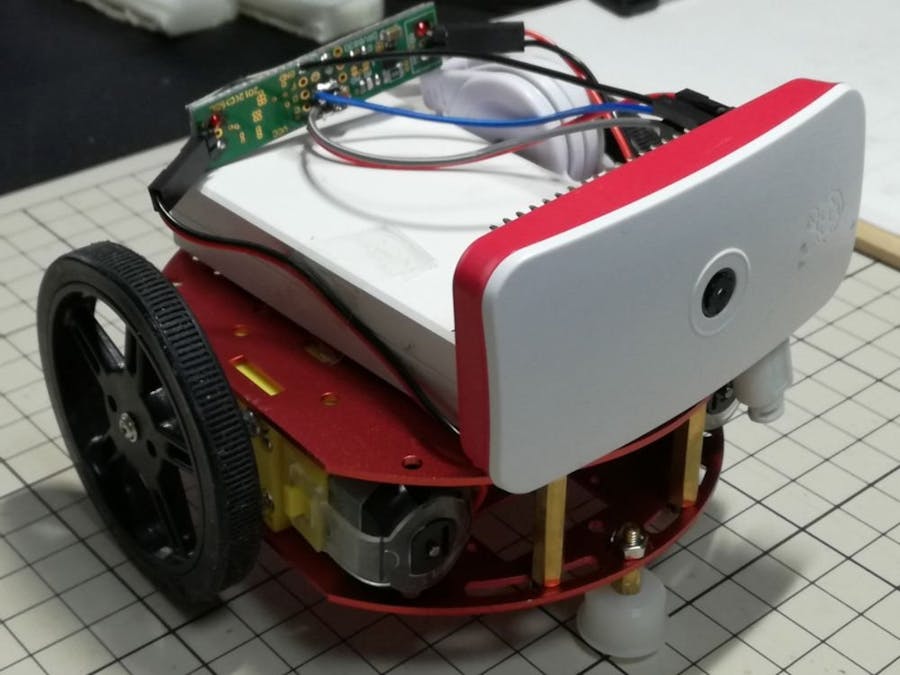
I made remote control car. The motors are controlled by smartphone application Blynk and Raspberry Pi Zero W with the I2C input motor driver DRV8830.
ConfigurationI2C input controls the motor supply voltage (speed) and supply voltage direction (direction of rotation). Two modules were used to control the left and right motors of the robot chassis kit.
datasheet
https://cdn.sparkfun.com/datasheets/BreakoutBoards/drv8830.pdf
Blynk SettingI use the x axis of the two joysticks of Blynk to control the left and right motors.
- [1-1] Create a new project. Select the Raspberry Pi 3B (There's still no Raspberry Pi Zero W.) in Hardware Model and WiFi in Connection Type. AUTH TOKEN will make a note so you use at the time of Arduino code generation.
- [1-2] Place the two the joystick widgets.
- [1-3] Two Joystick widgets setting. The values of the x-axis are output in virtual pin V0 and V1. The values are -63 to 63, respectively.
Blynk Library Installation
I install the Blynk library in Raspberry Pi.
$ git clone https://github.com/blynkkk/blynk-library.git
Details are below: https://github.com/blynkkk/blynk-library/tree/master/linux
Raspberry Pi I2C Activation
Open the setting of Raspberry Pi, select the valid I2C on the interface tag, and reboot.
C ++ programming
When the Blynk library is installed, the blynk-library / linux folder is created at home. Copy the linux folder and rewrite the main.cpp in it as follows.
#define BLYNK_PRINT stdout
#ifdef RASPBERRY
#include <BlynkApiWiringPi.h>
#else
#include <BlynkApiLinux.h>
#endif
#include <BlynkSocket.h>
#include <BlynkOptionsParser.h>
#include <wiringPiI2C.h>
static BlynkTransportSocket _blynkTransport;
BlynkSocket Blynk(_blynkTransport);
#include <BlynkWidgets.h>
int motorL = 0x60;
int motorR = 0x64;
int rot = 0;
//motor driver I2C
void writeMotorResister(int motor,int rot, int vset){
  int vdata = vset << 2 | rot;
  int fd = wiringPiI2CSetup(motor);
  int result = wiringPiI2CWriteReg8(fd, 0x00, vdata);
}
//Joystick L side  x-axis (V0)
BLYNK_WRITE(V0) {
  int x = param[0].asInt();
  printf("L value: %d\n", x);
  //I2C
  if(x > 0){
    writeMotorResister(motorL, 1, abs(x)); //Forward
  } else if(x < 0){
    writeMotorResister(motorL, 2, abs(x)); //Reverse
  } else{
    writeMotorResister(motorL, 0, 0); //Standby
  }
}
////Joystick R side  x-axis (V1)
BLYNK_WRITE(V1) {
  int x = param[0].asInt();
  printf("R value: %d\n", x);
  //I2C
  if(x > 0){
    writeMotorResister(motorR, 1, abs(x)); //Forward
  } else if(x < 0){
    writeMotorResister(motorR, 2, abs(x)); //Reverse
  } else{
    writeMotorResister(motorR, 0, 0); //Standby
  }
}
void setup(){
}
void loop(){
  Blynk.run();
}
int main(int argc, char* argv[]){
  const char *auth, *serv;
  uint16_t port;
  parse_options(argc, argv, auth, serv, port);
  Blynk.begin(auth, serv, port);
  setup();
  while(true) {
    loop();
  }
  return 0;
}
Direction and speed of the motor is controlled to receive the value at V 0, V 1 of Blynk. I use the I2C library of wiringPi: http://wiringpi.com/reference/i2c-library/
Compile
Go to the folder with main.cpp and do the following.
$ make clean all target=raspberry
Blynk execution
$ sudo ./blynk --token=AuthToken


Comments
Please log in or sign up to comment.