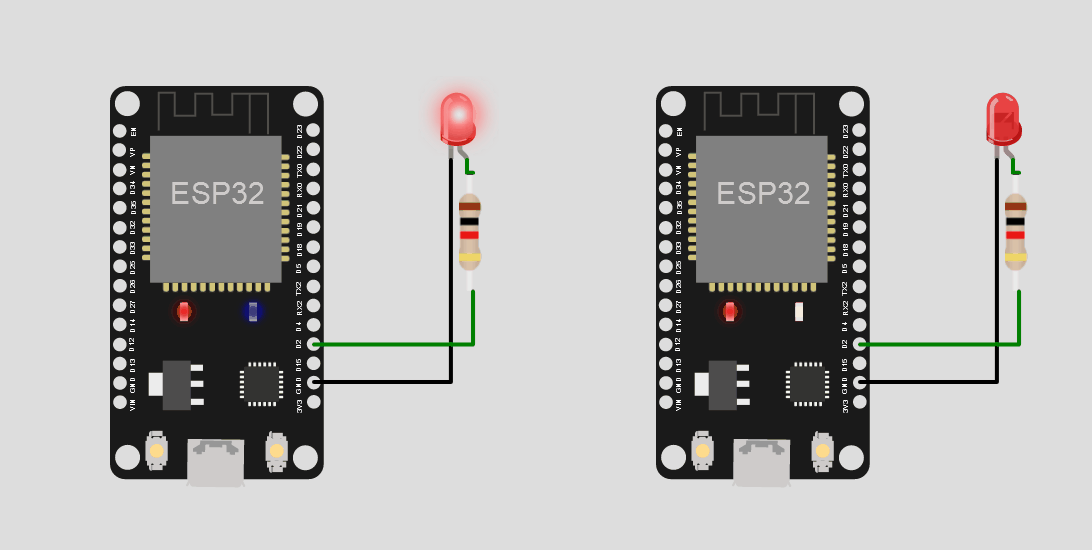
Wokwi Online Simulator has recently announced the availability of the ESP32 Simulator and here in this article, we will see how to build an example to blink an LED using Arduino programming. We will use Wokwi ESP32 Arduino simulator, an LED and a resistor. You can visit the Wokwi Home page or Wokwi ESP32 documentation page for more details.
Without further ado, LED us begin! ( pun intended 😊 )
Step 1: Open the ESP32 Arduino coreSimulator template page
Easiest way is to use the ESP32 Arduino template to kick start. You can click here or copy paste the below address into the address bar of a new tab in your browser.
https://wokwi.com/arduino/new?template=esp32You will see the ESP32 simulator example template page something similar to this below
Step 2: Add an LED!
Adding an LED is an easy task. Just click on the purple plus icon
and select LED in the list
The final window would like this
Let us add a resistor in the similar way!
Step 3: Add a resistor and connect them ALL!
Add a resistor and connect them all using wires. Just point to the pin and click! refer to this guide for some basic tips on usage of controls to build the circuit using Wokwi ESP32 Arduino core simulator!
Step 4: write some code 😅
To blink the LED you don't need much code. We will just define the PIN which will be toggled. Define the PIN as output. In the loop() function we will give some delay and toggle the Pin status. This will create a blink pattern on the LED!. here is the code:
#define LED 2
void setup() {
pinMode(LED, OUTPUT);
}
void loop() {
digitalWrite(LED, HIGH);
delay(500);
digitalWrite(LED, LOW);
delay(500);
}
Step 5: Run it! Play it!
All set!. You can now hit the play button (the green button) to see the simulation in action!
Don't forget the save the project. Sharing is very easy. Just hit the share button. It will generate one permanent link which you can share with your friends!
Suggestions/comments/Support?
Please visit Facebook group page. You can also hop-on to Wokwi Discord channel. Say hi to fellow makers/ developers/learners!
See you with another article! 👍


_ztBMuBhMHo.jpg?auto=compress%2Cformat&w=48&h=48&fit=fill&bg=ffffff)


Comments
Please log in or sign up to comment.