


Hardware components | ||||||
 |
| × | 1 | |||
| × | 1 | ||||
| × | 1 | ||||
| × | 1 | ||||
| × | 1 | ||||
| × | 1 | ||||
I wanted to capture some PlayStation 2 games from my server rack, but I didn't want to buy a capture card and long HDMI cable. So I made battery-powered one instead (though it probably costs more than a simple USB capture card and the long HDMI cable).
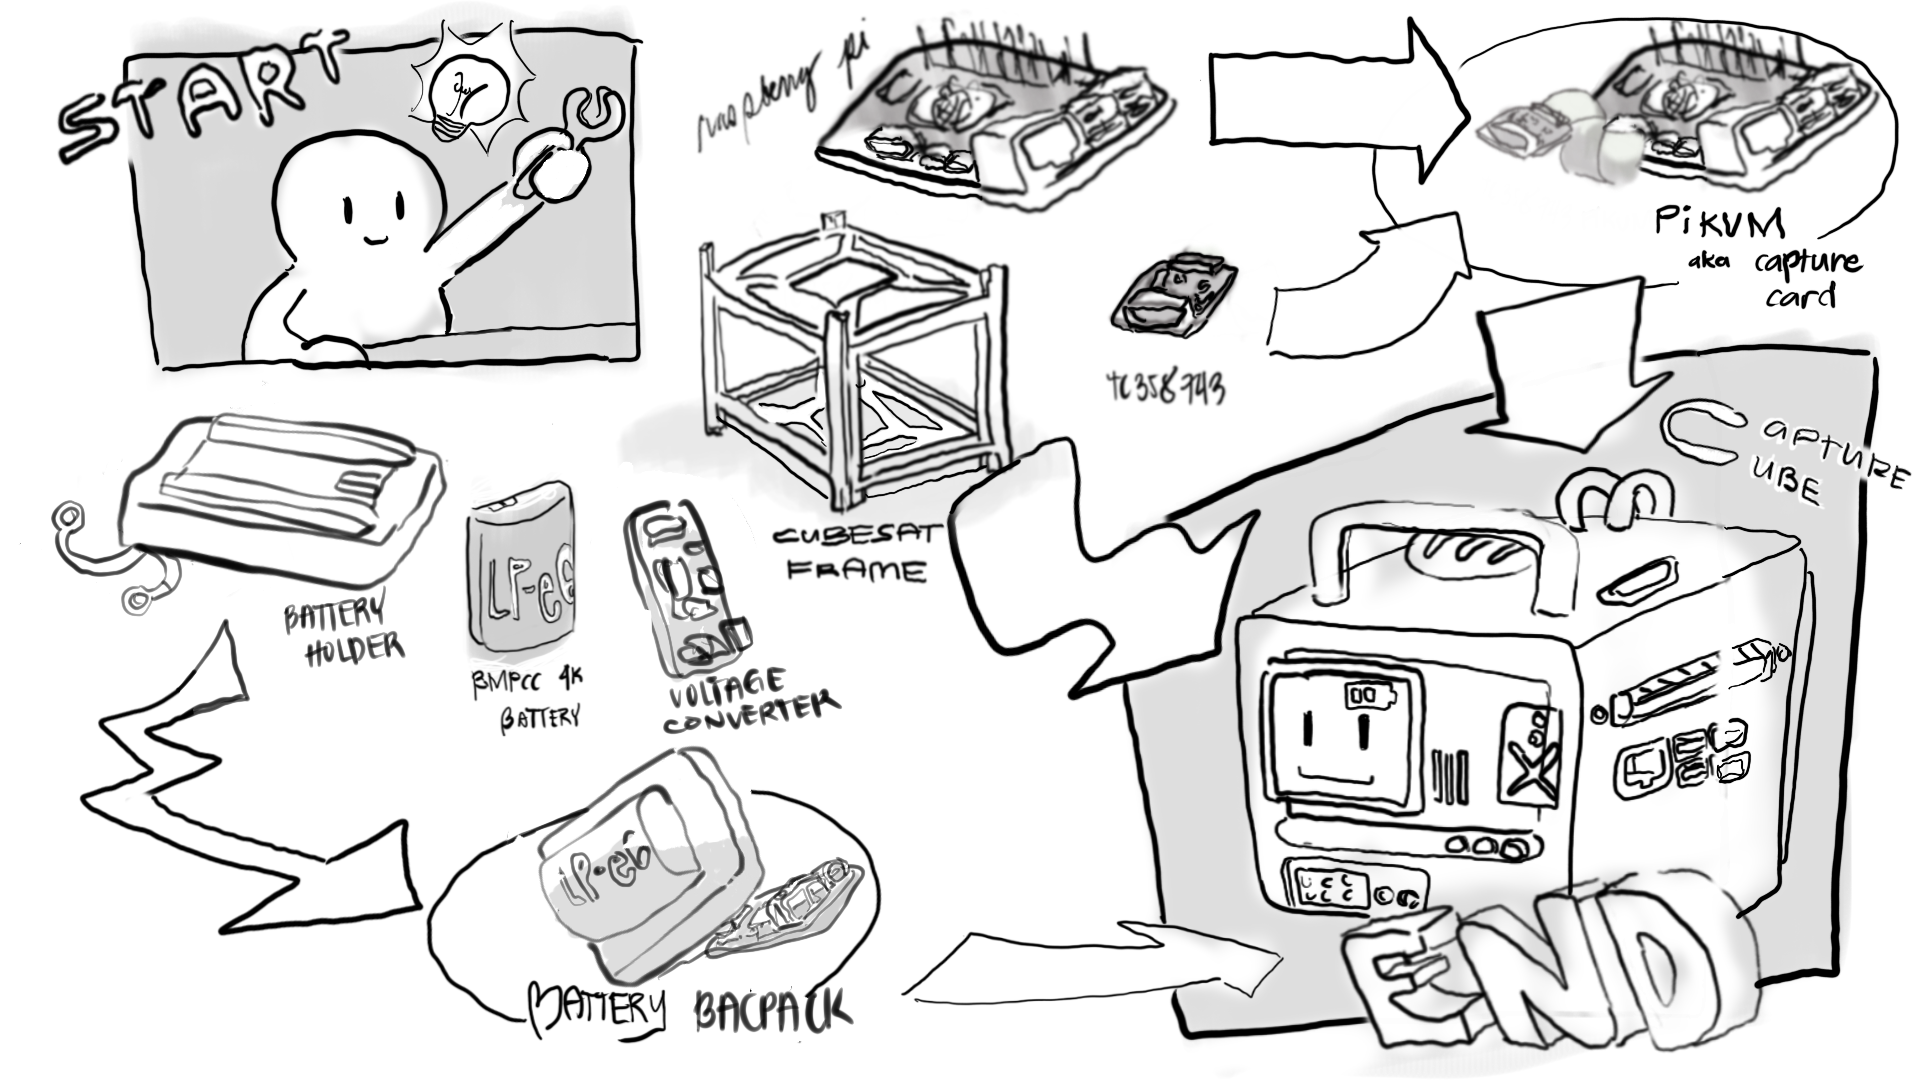
System OverviewThe project consists of the following parts:
- PiKVM = Raspberry pi 4 + HDMI to CSI bridge
- Cubesat frame
- Battery backpack = Battery holder + LP-E6 battery + 12v to 5v converter
To create the PiKVM, I mostly followed the instructions found here: https://github.com/pikvm/pikvm. The PiKVM is really handy because you can control a computer from startup to shutdown if you have the complete hardware configuration. For this project though, I'm only utilizing the PiKVM to capture the video from my modified Playstation 2 with an HDMI out. Therefore, I don't need the extra stuff which means I don't have the functionality to control the PS2 itself (even if I wanted to). Here's what I ended up doing:
1. Attach the HDMI to CSI bridge to the Raspberry Pi 4
2. Flash my SD card with the PiKVM image using the Raspberry Pi Imager
3. Plug the Raspberry Pi into a 5V 3A power source
4. Test for functionality using the pikvm webportal (ie. http://pikvm or http://<insert_ip_address>)
Note: sometimes the http://pikvm doesn't work so you'll have to hunt down your PiKVM's ip address and use that instead.
Setting up the Battery BackpackThe battery pack is a combination of the battery holder, LP-E6 battery, and the voltage converter. The voltage converter can accommodate for higher voltages so you can essentially use any battery (as long as it's within the acceptable voltage range) that you want. I'm using the LP-E6 one because I had spares lying around.
Here's a quick breakdown of what I did:
1. Strip the wires on the battery holder
2. Screw the wires into their respective terminals
3. Attach the USB-C cable from the voltage converter to the Raspberry Pi
4. Add the LP-E6 battery and test that the webportal is still working
Putting things togetherThis project is pretty straightforward (in my opinion anyways), so there's not much to worry about. All that's left is to mount everything onto the Cubesat frame and you're ready to go! Now go capture some HDMI stuff!


Comments
Please log in or sign up to comment.