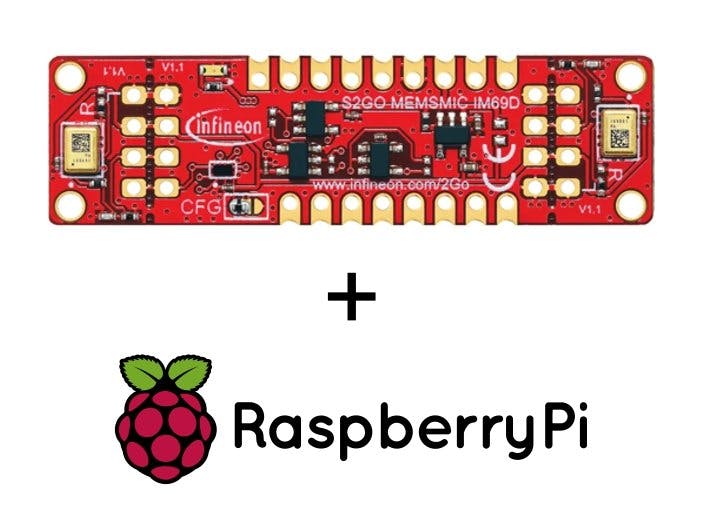
This article describes, how you can interface the IM69D130 stereo microphone Shield2Go to a Raspberry Pi. Later, this article describes how to do basic audio recording and processing in Python.
We assume, that you have a working Raspberry Pi with Raspberry Pi OS set up. To check if things are working, some sort of audio-output (headphones, speaker etc.) might come in handy.
Otherwise, the Pi can be used in headless mode and via SSH or with a keyboard and monitor.
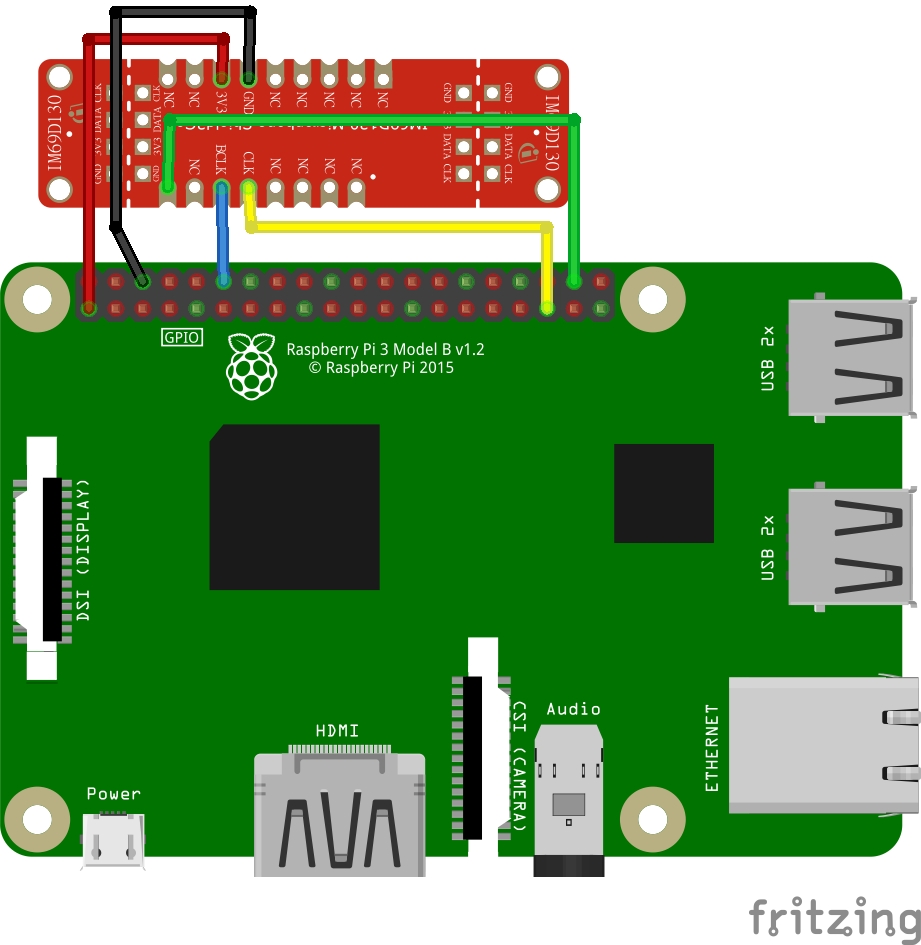
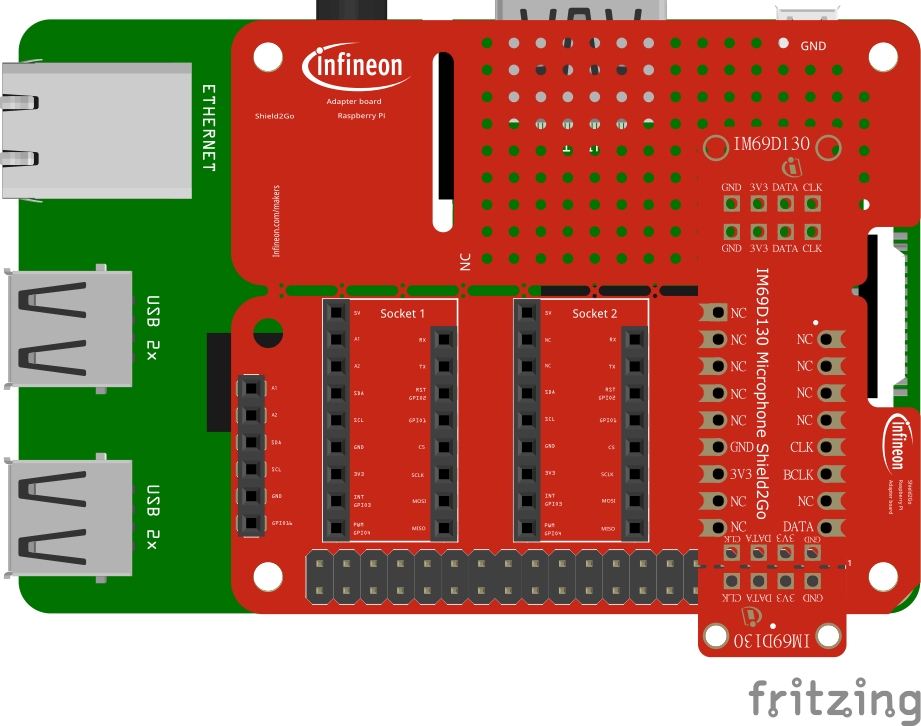
Setting up the HardwareThe easiest way of interfacing the microphone with the Pi is by using the Shield2Go adapter. Just make sure to use the slot with the "NO SPI" marking, since we want to use those pins for I2S (Inter-IC Sound). This might require some soldering. Alternatively you can also use jumper cables:
Microphone - R-Pi
- 3V3 - 3V3
- GND - GND
- BCLK - PCM CLK
- DATA - PCM DIN (GPIO20)
- LRCLK - PCM FS
Connect to the Pi via ssh or open a terminal.
First, pull the newest updates from the repositories:
sudo apt-get update
sudo apt-get upgrade
after that, reboot the Pi
sudo rebootNow we need to install Python and pip:
sudo apt-get install python3-pipTo install the I2S interface from Adafruit, we now need to run several commands installing the adafruit-python-shell, download the installer script and run it:
cd ~
sudo pip3 install --upgrade adafruit-python-shell
wget https://raw.githubusercontent.com/adafruit/Raspberry-Pi-Installer-Scripts/master/i2smic.py
sudo python3 i2smic.py
When asked if you want to autoload the module, type y to accept and press enter.
After the install-script is done, reboot the Pi again.
sudo rebootTo check, if everything worked, run arecord -l in the terminal. It returns a list of audio-devices and sound-cards. Look for a device named sndrpii2scard or similar, if it's there, you are ready to use the microphone.
To make use of it we need to install some libraries:
sudo apt-get install libatlas-base-dev libportaudio2 libasound-dev
python3 -m pip install --user sounddevice
python3 -m pip install --user scipyIn this part we are using the microphone in a basic python recording application:
The code can be cloned from the Infineon Github page:
git clone https://github.com/Infineon/i2s-microphone.git
cd i2s-microphone/application_examples/raspberrypi/audio_processing
The example code will record stereo audio for 10 seconds and save it as out.wav.
Run it with:
python3 basic_audio_processing.pyMake some test noises to record. After the script terminates, you will see an out.vaw file in the directory.
Use an audio-player to verify, that the recording process worked. If you are on a command line interface, we suggest play, but you might have to install the sox package first:
sudo apt install sox
play out.wav
Here you go. This is a very basic example of what you can do with the IM69D130 stereo microphone Shield2Go and Python. Have a look at the different tutorials and sources we linked in this page to learn more on digital audio processing.
Audio Processing InsightsLet's have a quick look into the Python script. An in-depth guide on audio processing in Python would certainly be too much for this page, but we recommend to have a look at the sounddevice, numpy and scipy packages.
The first few lines import the mentioned packages/functions from these packages:
import sounddevice as sd            #to handle the actual audio device
import numpy as np                  #to handle multidimensional arrays
from scipy.io.wavfile import write  #to enable audio file creation
from scipy import signal            #to do audio processing
Next, we want to set some basic variables:
samplerate = 48000
seconds = 10
downsample = 1
input_gain_db = 12
device = 'snd_rpi_i2s_card'
Now we skip the following function definitions for the time and have a look at the actual commands to record audio:
# Record stereo audio data for the given duration in seconds.
rec = sd.rec(int(seconds * samplerate), samplerate=samplerate, channels=2)
# Wait until the recording is done.
sd.wait()
# Process the audio data as explained above.
processed = process_audio_data(rec)
# Write the processed audio data to a wav file.
write('out.wav', int(samplerate/downsample), processed)
The actual audio processing happens in line 66, so lets have a look at the process_audio_data() function:
def process_audio_data(audiodata):
# Extract mono channels from input data.
ch1 = np.array(audiodata[::downsample, 0], dtype=np.float32)
ch2 = np.array(audiodata[::downsample, 1], dtype=np.float32)
# High-pass filter the data at a cutoff frequency of 10Hz.
# This is required because I2S microhones have a certain DC offset
# which we need to filter in order to amplify the volume later.
ch1 = butter_highpass_filter(ch1, 10, samplerate)
ch2 = butter_highpass_filter(ch2, 10, samplerate)
# Amplify audio data.
# Recommended, because the default input volume is very low.
# Due to the DC offset this is not recommended without using
# a high-pass filter in advance.
ch1 = set_gain_db(ch1, input_gain_db)
ch2 = set_gain_db(ch2, input_gain_db)
# Output the data in the same format as it came in.
return np.array([[ch1[i], ch2[i]] for i in range(len(ch1))], dtype=np.float32)
except for ch1 and ch2 variable generation, where we also downsample the audio (the default downsampling rate setting is 1, therefore no downsampling occurs. Increase the downsample variable to introduce downsampling), we are still making some function calls, where the magic happens, so let's have a look at the butter_highpass_filter() function:
def butter_highpass_filter(data, cutoff, fs, order=5):
'''
High-pass filter for digital audio data.
'''
b, a = butter_highpass(cutoff, fs, order=order)
y = signal.filtfilt(b, a, data)
return y
We see, that butter_highpass() return a filter object, with passed on samplerate as fs, cutoff frequency and filter order, that is then applied to the data. The filter object creation looks as follows:
def butter_highpass(cutoff, fs, order=5):
'''
Helper function for the high-pass filter.
'''
nyq = 0.5 * fs
normal_cutoff = cutoff / nyq
b, a = signal.butter(order, normal_cutoff, btype='high', analog=False)
return b, a
First, we need to normalize the cutoff frequency to the Nyquist-Frequency, which is the maximum frequency we can record with a given sample-rate. If you are interested, have a look at the Wikipedia-page, the underlying theory is the most important and fundamental basis of digital signal processing.
Then scipy creates a butterworth filter for us, with the given parameters. btype='high' indicates, that we want a high-pass-filter, i.e. we want to eliminate low frequencies.


Comments
Please log in or sign up to comment.