Ingeimaks Ingeimaks
Published © CERN-OHL

How to Create a Joystick Controller with Arduino

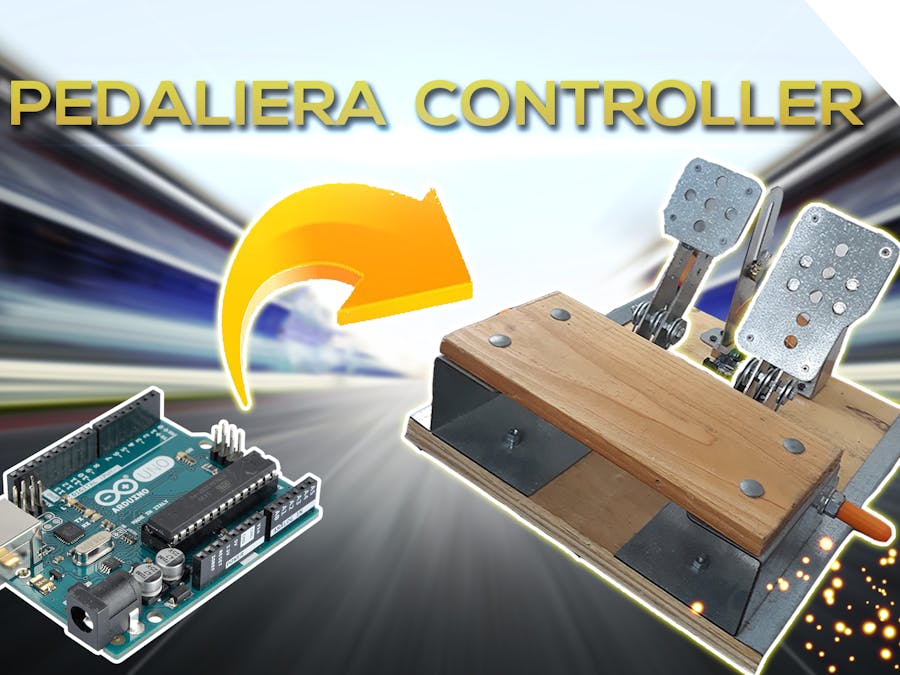
Hi everyone, in this article we're going to make and build a pedal board and a sequential gearbox with Arduino Uno, making it a joystick.

IntermediateFull instructions provided42,287
How to Create a Joystick Controller with Arduino

Things used in this project

Hardware components

Arduino UNO
Arduino UNO
×1
Rotary potentiometer (generic)
×1

Software apps and online services

Arduino IDE
Arduino IDE

Hand tools and fabrication machines

3D Printer (generic)

Story

Read more

Schematics

Image

Code

CODE

C/C++
/* Arduino USB Joystick HID demo */

/* Author: Darran Hunt
  Released into the public domain.
  Update by RICLAMER in 25/03/2014 to use Analog ports and digital ports
  This code is to be used with Arduino UNO (6 axis and 13 Button )
  This code is compatible with Arduino Mega.
*/

/* INSTALATION
 Just install POT in each analog port. Using the _Grnd _Analog _5V Arduino.
 Like this image: http://arduino.cc/en/uploads/Tutorial/joy_sch_480.jpg
 To setup the buttons, just install you prefered button switch under GND and Port Digital 02~13.
 Use Flip to erease and burn this firmware DFU: https://github.com/harlequin-tech/arduino-usb/blob/master/firmwares/Arduino-big-joystick.hex
 I used Arduino R3 with Atmega 16U2.
*/

#undef DEBUG

#define NUM_BUTTONS  40             // you don't need to change this value
#define NUM_AXES  8        // 6 axes to UNO, and 8 to MEGA. If you are using UNO, don't need to change this value.

typedef struct joyReport_t {
 int16_t axis[NUM_AXES];
 uint8_t button[(NUM_BUTTONS + 7) / 8]; // 8 buttons per byte
} joyReport_t;

joyReport_t joyReport;

uint8_t btn[12];
int fulloff = 0;
void setup(void);
void loop(void);
void setButton(joyReport_t *joy, uint8_t button);
void clearButton(joyReport_t *joy, uint8_t button);
void sendJoyReport(joyReport_t *report);


void setup()
{
 //set pin to input Button
 for ( int portId = 02; portId < 13; portId ++ )
 {
   pinMode( portId, INPUT_PULLUP);
 }
 Serial.begin(115200);
 delay(200);


 for (uint8_t ind = 0; ind < 8; ind++) {
   joyReport.axis[ind] = ind * 1000;
 }
 for (uint8_t ind = 0; ind < sizeof(joyReport.button); ind++) {
   joyReport.button[ind] = 0;
 }
}

// Send an HID report to the USB interface
void sendJoyReport(struct joyReport_t *report)
{
#ifndef DEBUG
 Serial.write((uint8_t *)report, sizeof(joyReport_t));
#else
 // dump human readable output for debugging
 for (uint8_t ind = 0; ind < NUM_AXES; ind++) {
   Serial.print("axis[");
   Serial.print(ind);
   Serial.print("]= ");
   Serial.print(report->axis[ind]);
   Serial.print(" ");
 }
 Serial.println();
 for (uint8_t ind = 0; ind < NUM_BUTTONS / 8; ind++) {
   Serial.print("button[");
   Serial.print(ind);
   Serial.print("]= ");
   Serial.print(report->button[ind], HEX);
   Serial.print(" ");
 }
 Serial.println();
#endif
}

// turn a button on
void setButton(joyReport_t *joy, uint8_t button)
{
 uint8_t index = button / 8;
 uint8_t bit = button - 8 * index;

 joy->button[index] |= 1 << bit;
}

// turn a button off
void clearButton(joyReport_t *joy, uint8_t button)
{
 uint8_t index = button / 8;
 uint8_t bit = button - 8 * index;

 joy->button[index] &= ~(1 << bit);
}

/*
  Read Digital port for Button
  Read Analog port for axis
*/
void loop()
{ 
 

 /* Move all of the Analogic axis */
 /* Arduino UNO have only 6 port. Will be necessary set to 0; the not used port */
 /* In this example, i will use just 3 axis. X, Y, Z */
 /* if you will use all 6 analog ports, set axis < 3, to axis < 5 */


 for (uint8_t axis = 1; axis < 3; axis++) // 2 - A1 = Gas Pedal  
 {

   joyReport.axis[axis] = map(analogRead(axis), -180, 180, -32768, 32767 );

 }
 

 //Set to 0; the not used analog port.
 //if you will use all 6 analog ports, exclude the lines, axis[3] at axis [5] */
 //Report.axis[3] = 0;

// You need to ground A1 pin, because its the Y axis and if you dont use it, need to ground.

 
 joyReport.axis[5] = A1;
 joyReport.axis[7] = 0;
 joyReport.axis[8] = 0;

 //Send Data to HID
 sendJoyReport(&joyReport);

 delay(35);
 fulloff = 0;
}

Credits

Ingeimaks Ingeimaks

Ingeimaks Ingeimaks

14 projects • 45 followers
Giovanni Mannara is a Maker. Thanks to Massimo Banzi I have traversed this path of Digital Creator ... I LOVE ARDUINO !!!

Comments