When I travelled to the scenic Luxembourg City, a friend complained about having to drag luggages across the hilly terrain. He suggested that companies should produce luggages that follow their masters. So here I am, building a prototype follow-me suitcase.
Due to time constraints, I started out by building a remote controlled car with its body made out of a cardboard box.
Electronics1. Connect the Bluetooth module to Arduino.
I am using a Adafruit Bluefruit LE SPI Friend breakout board. It comes with detailed tutorials and a phone app that allows for remote control. This BLE module is compatible with both Android and IOS.
Some tutorial I followed are shown below.
I am using the controller panel on the app, whose interface looks like this:
For my RC car, I am using the arrows for direction control and the numbers for speed control. The control mapping is as follows:
- up: go forward (both motors spin forward)
- down: go backwards (both motors spin backwards)
- left: turn left (right motor spins faster than left motor )
- right: turn right (right motor spins faster than left motor )
- 1: 25% PWM duty cycle
- 2: 50% PWM duty cycle
- 3: 75% PWM duty cycle
- 4: 100% PWM duty cycle
2. Test the motor controller
I am using a L298N motor controller with 2 DC brushed motors. This motor controller can control 2 DC brushed motors or 1 stepper motor. It has 10 logic pins.
- GND: connect to Arduino GND
- +5V: connect to Arduino 5V output
- IN1 & IN2: controls MOTOR1 direction
- IN3 & IN4: controls MOTOR2 direction
- ENA: controls MOTOR1 speed, write PWM to this pin
- ENB: controls MOTOR2 speed, write PWM to this pin
- CSA: enable/disable MOTOR1
- CSB: enable/disable MOTOR2
I originally wanted to give stepper motors a try, but this motor controller can only control 1 stepper motor which would make steering quite hard. So I ditched stepper motors and switched to 2 DC brushed motors.
3. Make an RC car
I made a simple prototype car by Velcro-ing 2 wheels to a box. A caster wheel was attached to the front of the car to assist turning. The motor control code can be found in the Github link attached to this blog. Basically, I sent commands to the BLE module through the Adafruit app, The Arduino parses the inputs from the BLE module and forwards the commands to the motor controller.
4. Add Ultrasonic Sensors and Pizeo-buzzer
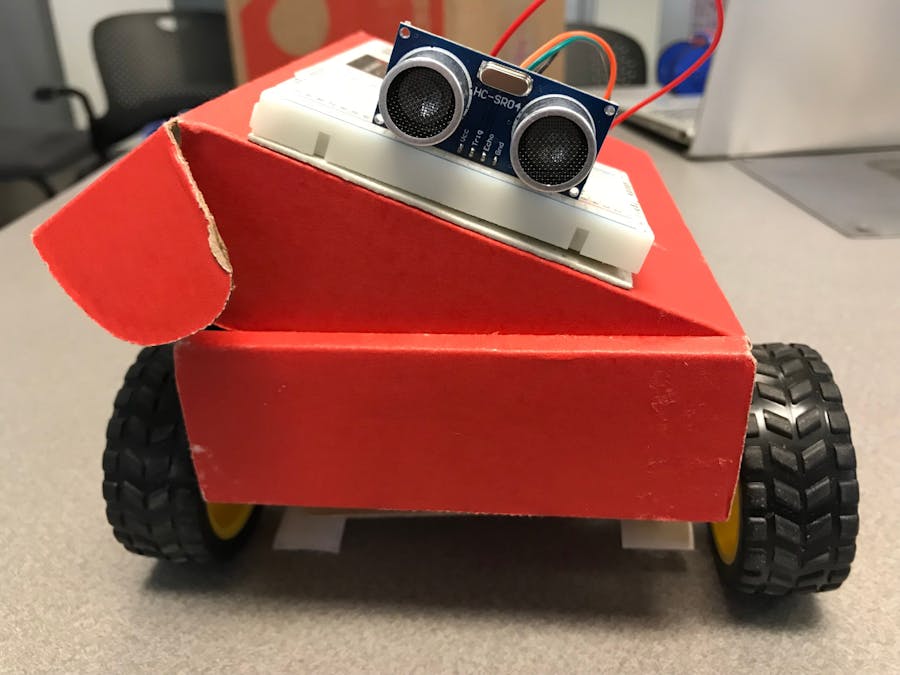
To make the car a bit smarter, I attached an ultrasonics sensor to the front of the car. If it gets too close to obstacles, it will stop moving and beep through the piezo-buzzer.
Here's a picture of the final setup, it looks like Wall-e, doesn't it?
Future Development
I will add in the GPS module and a compass to make the car truly autonomous.
I have been prototyping on an Arduino because it's compatible with most BLE modules. I will work on converting to other popular micro-controllers like a PocketBeagle or MSP430 in the future.


_ztBMuBhMHo.jpg?auto=compress%2Cformat&w=48&h=48&fit=fill&bg=ffffff)


_3u05Tpwasz.png?auto=compress%2Cformat&w=40&h=40&fit=fillmax&bg=fff&dpr=2)
Comments
Please log in or sign up to comment.