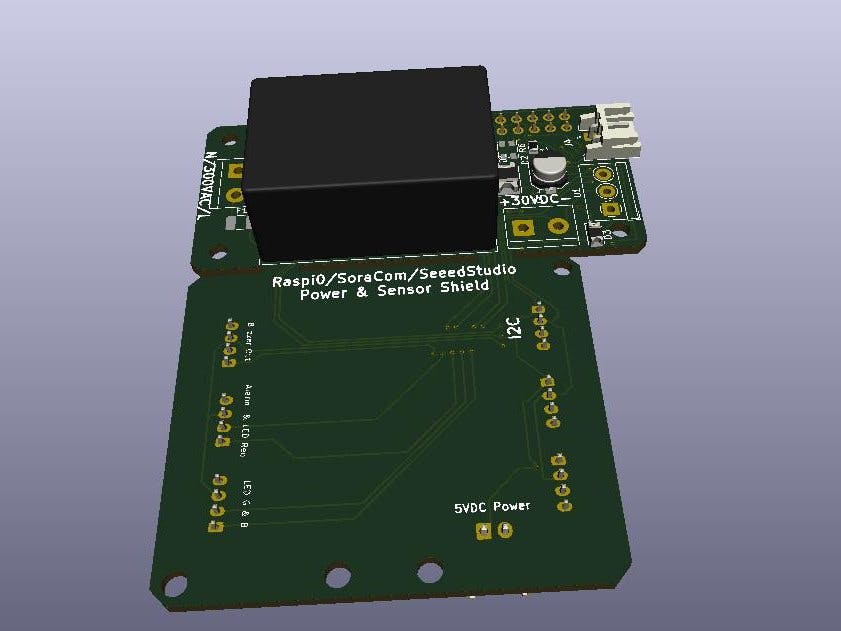
This a stand alone compact Mesh PCB sensor array to monitor environmental conditions for safety in Homes and Businesses and even city’s. There are no existing solutions that monitor VOC, CO, CO2 , NH3,NO2, Smoke ,Temperature ,Humidity as a total Monitoring Solution that will come under less than $150 connectable to the Cloud. and be Powered by 120/240 Volts AC.
I've made some changes to the original design enabling larger connectors and easier soldering.
My solution works by monitoring its environment in regards to air quality and location. my Device is simple in design but packs in Industry standard sensors and power supplies that enable it to be deployed anywhere and quickly with the use of the Cellular IOT Kit . it will be a total solution Plug and Play systems that only needs to be powered up , Plugged in or mounted in an industry standard electrical box to be used.
The solution can be used with either the Raspberry Pi all versions or the Seeed Studio LoRa board.
For the power supply portion I am using the following -IRM-02-12 Mfr.: MEAN WELL PCB mounted 120/240 volt to 12 VDC power supply (up to 300 VAC 50/60Hz ) CSA approved . - R-78C5.0-1.0 Mfr.: RECOM DC to DC converter For the Sensor Array
I plan to use the Following:
https://www.mouser.mx/ProductDetail/474-SEN-14045
Sparkfun Max30105
https://www.mouser.mx/ProductDetail/474-SEN-13676
Sparkfun Pressure Sensor Development Tools Atmospheric Sensor B/O BME280
https://www.mouser.mx/ProductDetail/474-SEN-11295
Temperature Sensor Development Tools SparkFun Humidity and Temperature Sensor Breakout - HIH6130
https://www.mouser.mx/ProductDetail/474-SEN-13763
Temperature Sensor Development Tools Humidity and Temp Sensor B/O - Si7021
( Specification Sheets are available for download below)
The Services of PCBway or PCBgogo for PCB manufacturing .
Schematic
Setting Up Your Device
go to the following link and Setup your account and Register your Credit card and SIM
https://www.soracom.io/iot-starter-kit/
https://developers.soracom.io/en/start/iot-starter-kit/raspberry-pi/#welcome!
after following the simple script I logged back into my account and Voilà it was on line and active.
Setting up the Raspberry Pi0 Program
I had some issues setting up my raspberry pi0 for the first time so I wiped the SD card and started over using a standard Raspberry pi to install the new operating system and get it talking to the Wifi connection then swapped the SD card back into the PI0
Here is the Raspi Setup link
https://www.raspberrypi.org/documentation/setup/
For Setting up your Raspberry Pi to run C++ and send the analytics out from your Soracom device ..I use a nifty work around called Particle Pi ..You need a particle account to activate the Program and work on the WEB IDE ..Open a command portal and paste the following in it and press enter
bash <( curl -sL https://particle.io/install-pi )
The Particle Pi uses the same programming language as the Arduino and a lot of the program sketches work without much modifications for programming ease.
https://docs.particle.io/guide/getting-started/examples/raspberry-pi/
Data Output From Raspberry PI
Node Red Setup for Transmitting Data From Particle PI to Soracom
I am not much of a programmer but I can find work-arounds to avoid it at all costs LOL.. Ok so I am transmitting the Data by MQTT collecting it in Node red ..Splitting it apart and sending it along for data collection to Soracom.
Function Node Code(Copy/Paste) this splits your String apart into different Strings
var OutPutMsgs =[ ];
var words =msg.payload.split(",");
for (var w in words) {
OutPutMsgs.push({payload:words[w]});
}
return [OutPutMsgs];
The Switch seperated your Output into different channels
TO send the Data to Soracom via The Cellular attachment you need to send it as a curl command ..
curl -v -X POST -H 'content-type:application/json' -d 'Humidity'


_4YUDWziWQ8.png?auto=compress%2Cformat&w=48&h=48&fit=fill&bg=ffffff)


Comments
Please log in or sign up to comment.