Our baby needs constant attention. However, we can't be in his or her room every hour of every day. That's what baby monitors are for. Generally, there are three kinds of baby monitor systems. The first one is based on audio-only devices, which lets us listen in on our child from another room. The second one is based on video cameras, which has connected features, so we can always keep an eye on the little one. Most connected baby monitors are just home security cameras, devices that let us watch another location with color video and sound, so we can tell if anything is amiss. The third solution is based on wearable devices, in which baby’s body will be equipped with the devices. However, video camera based solution may not work normally in weak light conditions, while the wearable device based solution may cause uncomfortable feelings for babies.
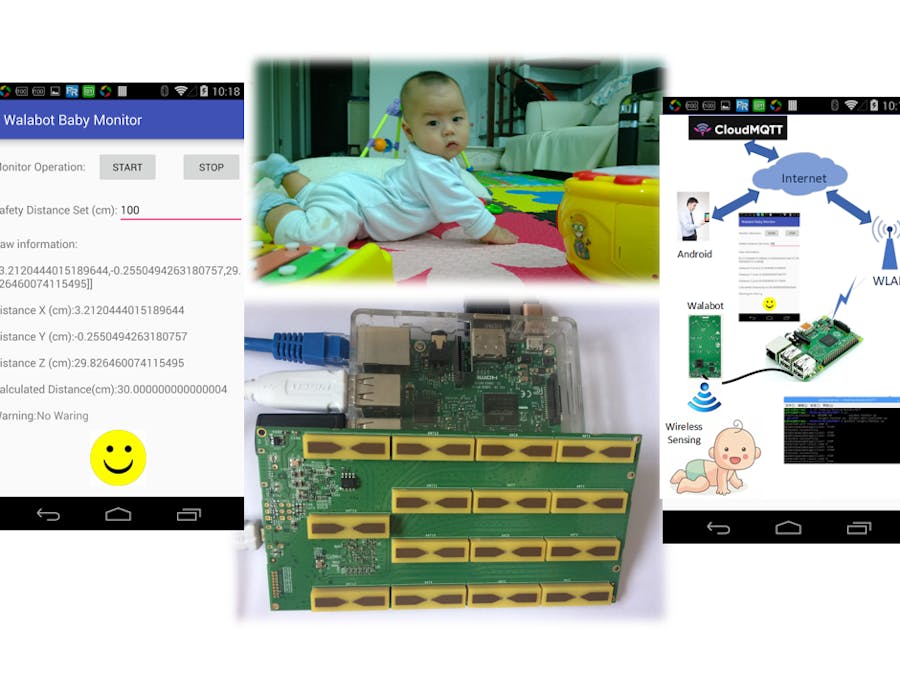
In this project, a baby monitor with Walabot and Raspberry Pi is proposed, which offers more options for letting us know when something might be wrong at that moment. With Walabot, the location of the baby will be captured, with no need of additional devices that equipped on baby’s body. Then the data will be transmitted to the cloudMQTT server with MQTT (Message Queue Transport Telemetry) protocol. Finally, the location data will be sent to android phone. And the user can set the security perimeter for their baby. Once the security perimeter is breached or a lack of movement is detected, the alarm music and the crying face will be trigged to catch the attention of their parents. The system architecture is shown in figure 1 as follows.
The introduction video of the project is presented here.
And the APK file build for Android device (from API level 19 to API level 27) is attached at the end of this tutorial.
Principle of baby monitoring
According to the official docs for Walabot (https://api-beta.walabot.com/_features.html), it is a pocket-sized device that provides cutting-edge technology for Radio Frequency (RF) tridimensional (3D) sensing and image processing. Walabot processes and provides image data for a configurable, delimited space known as the arena, with configurable image resolution. For arena definitions, and in image data provided by Walabot, Cartesian (X-Y-Z) axes start from Walabot's center as the origin, and their positive directions are presented as follows.
And the distance between the Walabot and the tracking object can be expressed as the Root Mean Square(RMS)of the distance X, Y and Z. So, we have designed two monitoring user scenarios is depicted as follows.
Firstly, Walabot with Raspberry is placed on the roof of the room as follows.
We can set the R_max to define the places where our baby can play. And the minimal value should be the height of the room. According to the official docs for Walabot, the maximal detection distance is about 5 meters, which means that the radius of the circle where our baby can play is about 4.5 meters. And this is enough for baby.
Secondly, Walabot with Raspberry is placed on the desk or other furniture as follows. In this method, Walabot is easier to place. However, we should make sure that the device is safely placed out of baby’s touch.
Step 1: Connect the Walabot to Raspberry Pi
Time: 5 minutes
Parts: Walabot Creator, USB cable, Raspberry Pi 3 B+
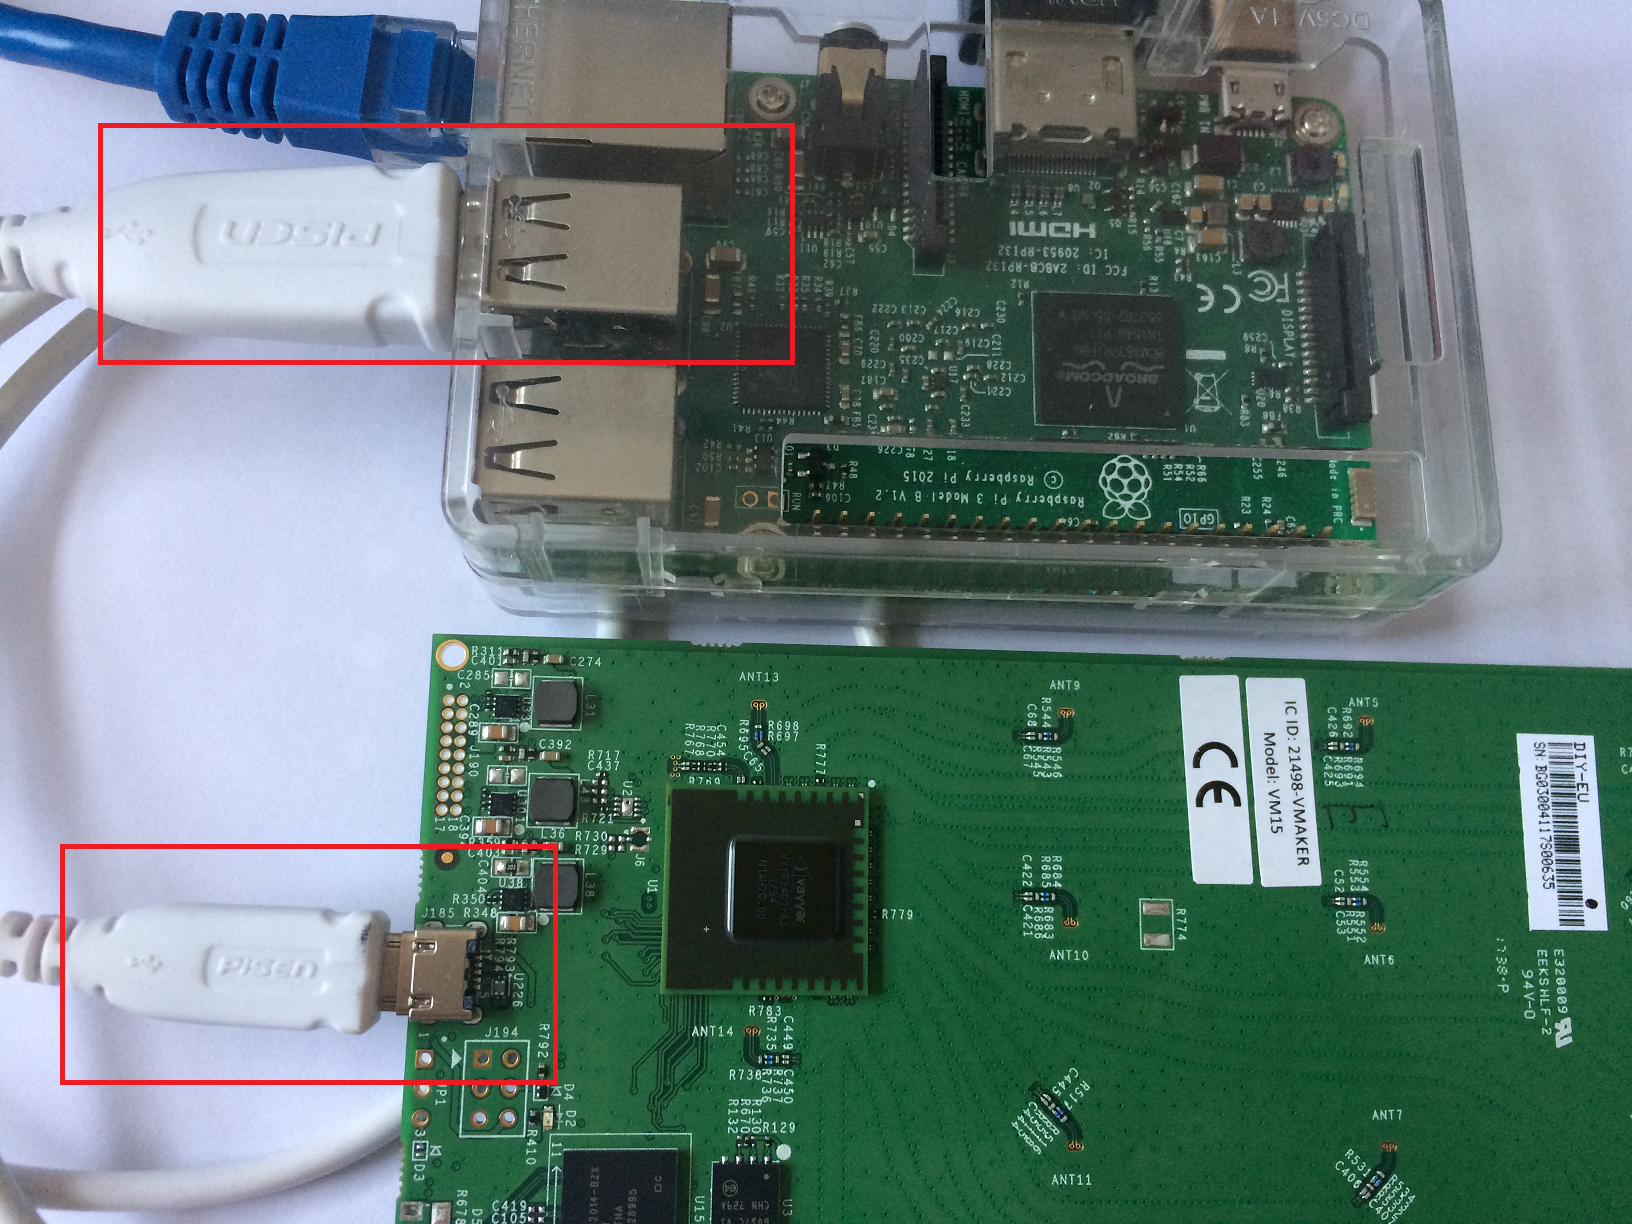
In this project, a micro USB to USB cable is used to connect the Walabot Creator and Raspberry Pi 3B+. Please note that the Walabot Creator only has one micro USB port, which is used for both power supply and signal exchange. And the connection is demonstrated in figure 2 as follows.
Step 2: Give More Power to USB Port on Raspberry Pi
Time: 5 minutes
Parts: Raspberry Pi 3 B+
We know that Walabot Creator will cost more power to transmit wireless signal and analyze the received signal to get the location of the target. However, the default power supply of USB port on Raspberry Pi 3B+ is 600mA, which is not enough for Walabot Creator. So, we can find the file under “/boot/config.txt” and add the following line of code:
max_usb_current=1
Please note that you will get “Protocol Error” or “Device Not Fonud Error” if the power supply is not enough during the initialization process of Walabot Creater.
Furthermore, you should give enough power to Raspberry Pi 3B+ to make sure that Walabot Creator will work. If your power supply is not enough, you will get “Under voltage warning” during the boot process of the Raspberry Pi.
Step 3: Create MQTT Broker on cloudMQTT
Time: 10 minutes
Parts: cloudMQTT
In this project, a free private cloud QMTT broker, cloudMQTT (https://customer.cloudmqtt.com/login) is used. Follow this tutorial (https://wildanmsyah.wordpress.com/2017/05/11/mqtt-android-client-tutorial/) to sign up for a free account as well as create a new CloudMQTT instance. After this step, you will get your cloudMQTT broker instance as follows.
Please copy the server, user, password and port on this page to your local file. They will be used later in this project.
Step 4: Install Paho MQTT on Raspberry Pi
Time: 5 minutes
Parts: Raspberry Pi
Power on your Raspberry Pi 3, run the following commands to install paho-mqtt.
sudo pip3 install paho-mqtt
After installation, Raspberry Pi 3 has paho-mqtt version 1.3.1. See figure 4 as follows.
Step 5: Copy Python Files to Raspberry Pi
Time: 5 minutes
Parts: Raspberry Pi
Download the files under folder “RaspberryWalabotMQTT” (you can find here https://github.com/shijiong/WalabotBabyMonitor), change the configuration in the “targets_handler.py” according to the server, user, password and port that you get in step 3. You can find the code from line 13 to 18 as follows.
Step 6: Run RaspberryWalabotMQTT on Raspberry Pi
Time: 5 minutes
Parts: Raspberry Pi
Change the current path to the RaspberryWalabotMQTT folder (for example, the desktop folder here), and run the following command.
python3 targets_handler.py
If everything is OK, then you will get message “Connected with result 0” as follows.
Step 7: Run AndroidWalabotMQTT on Android
Time: 20 minutes
Parts: Android device
Download the files under folder “AndroidWalabotMQTT” (you can find here https://github.com/shijiong/WalabotBabyMonitor), change the configuration in the “MainActivity.java” according to the server, user, password and port that you get in step 3. You can find the code from line 18 to 22 as follows.
Load the project in Android Studio, here we use version 3.0.1, and the version of Gradle is 4.4.
Plug the USB port of your Android Phone to the PC, and after the Gradle is finished, Android Studio will automatically download the app to your device.
Step 8: Configure the Safety Distance on Android App
Time: 5 minutes
Parts: Android device
Once the app is running on your Android device, you will see the UI as follows.
Here we should input the safety distance first, which means that if the distance between the Walabot and baby is lager than the set value, the alarm will be trigged. And we know that the detection distance limit for Walabot is 5 meters, so the largest value we can input here is 500.
Then, we can touch the “Start” button to start monitor, which means that the messages will be received on the Android device and the app will analyze the data and show them on the screen. If everything is OK, you can see the notification “START” on the screen which is connected to the Raspberry Pi as follows.
If the baby is out of the distance that we set, the app will notify you with message in red font, alarm sound and crying face as follows.
If the distance is not lager than that we set, the app will behave as normal as follows.
In this tutorial, we have introduced the hardware and software that we need to run a baby monitor with Walabot.
Further Work
Add breath sensing for baby monitor to the project in the near future.


_copy_P5AWOdT4dX.png?auto=compress%2Cformat&w=48&h=48&fit=fill&bg=ffffff)


Comments
Please log in or sign up to comment.