Watch it in action here.
I was doing my usual, browsing YouTube when I saw some floppy drive music. Having known that floppy drives are controlled by stepper motors, I decided to make my own stepper motor sound generator.
I had seen that people had done this before, but every instance had either not shared the code or their code was highly flawed and/or limited.
Having been learning C++ in school, I decided to put my skills to use.
What I wanted really to do was make a code that was simple and easy to use and modify. And that is exactly what I did!
The Overall Process
To start off, I thought out what needed to be done. In the most basic of terms, I needed to extract MIDI data and turn it into a speed that made a stepper motor create the corresponding pitch.
Extracting MIDI DataThis part was rather easy. By utilizing the MIDI library, I could interpret the MIDI data, and send it to another function to control the speed.
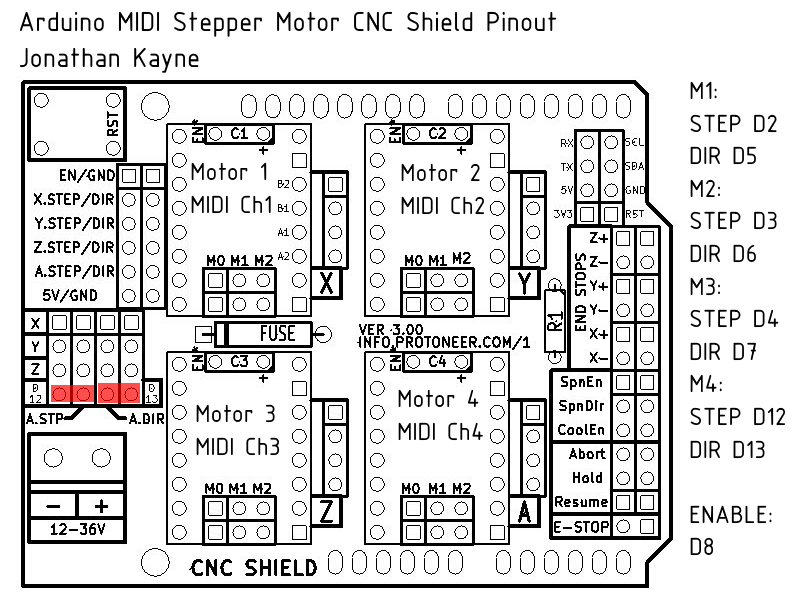
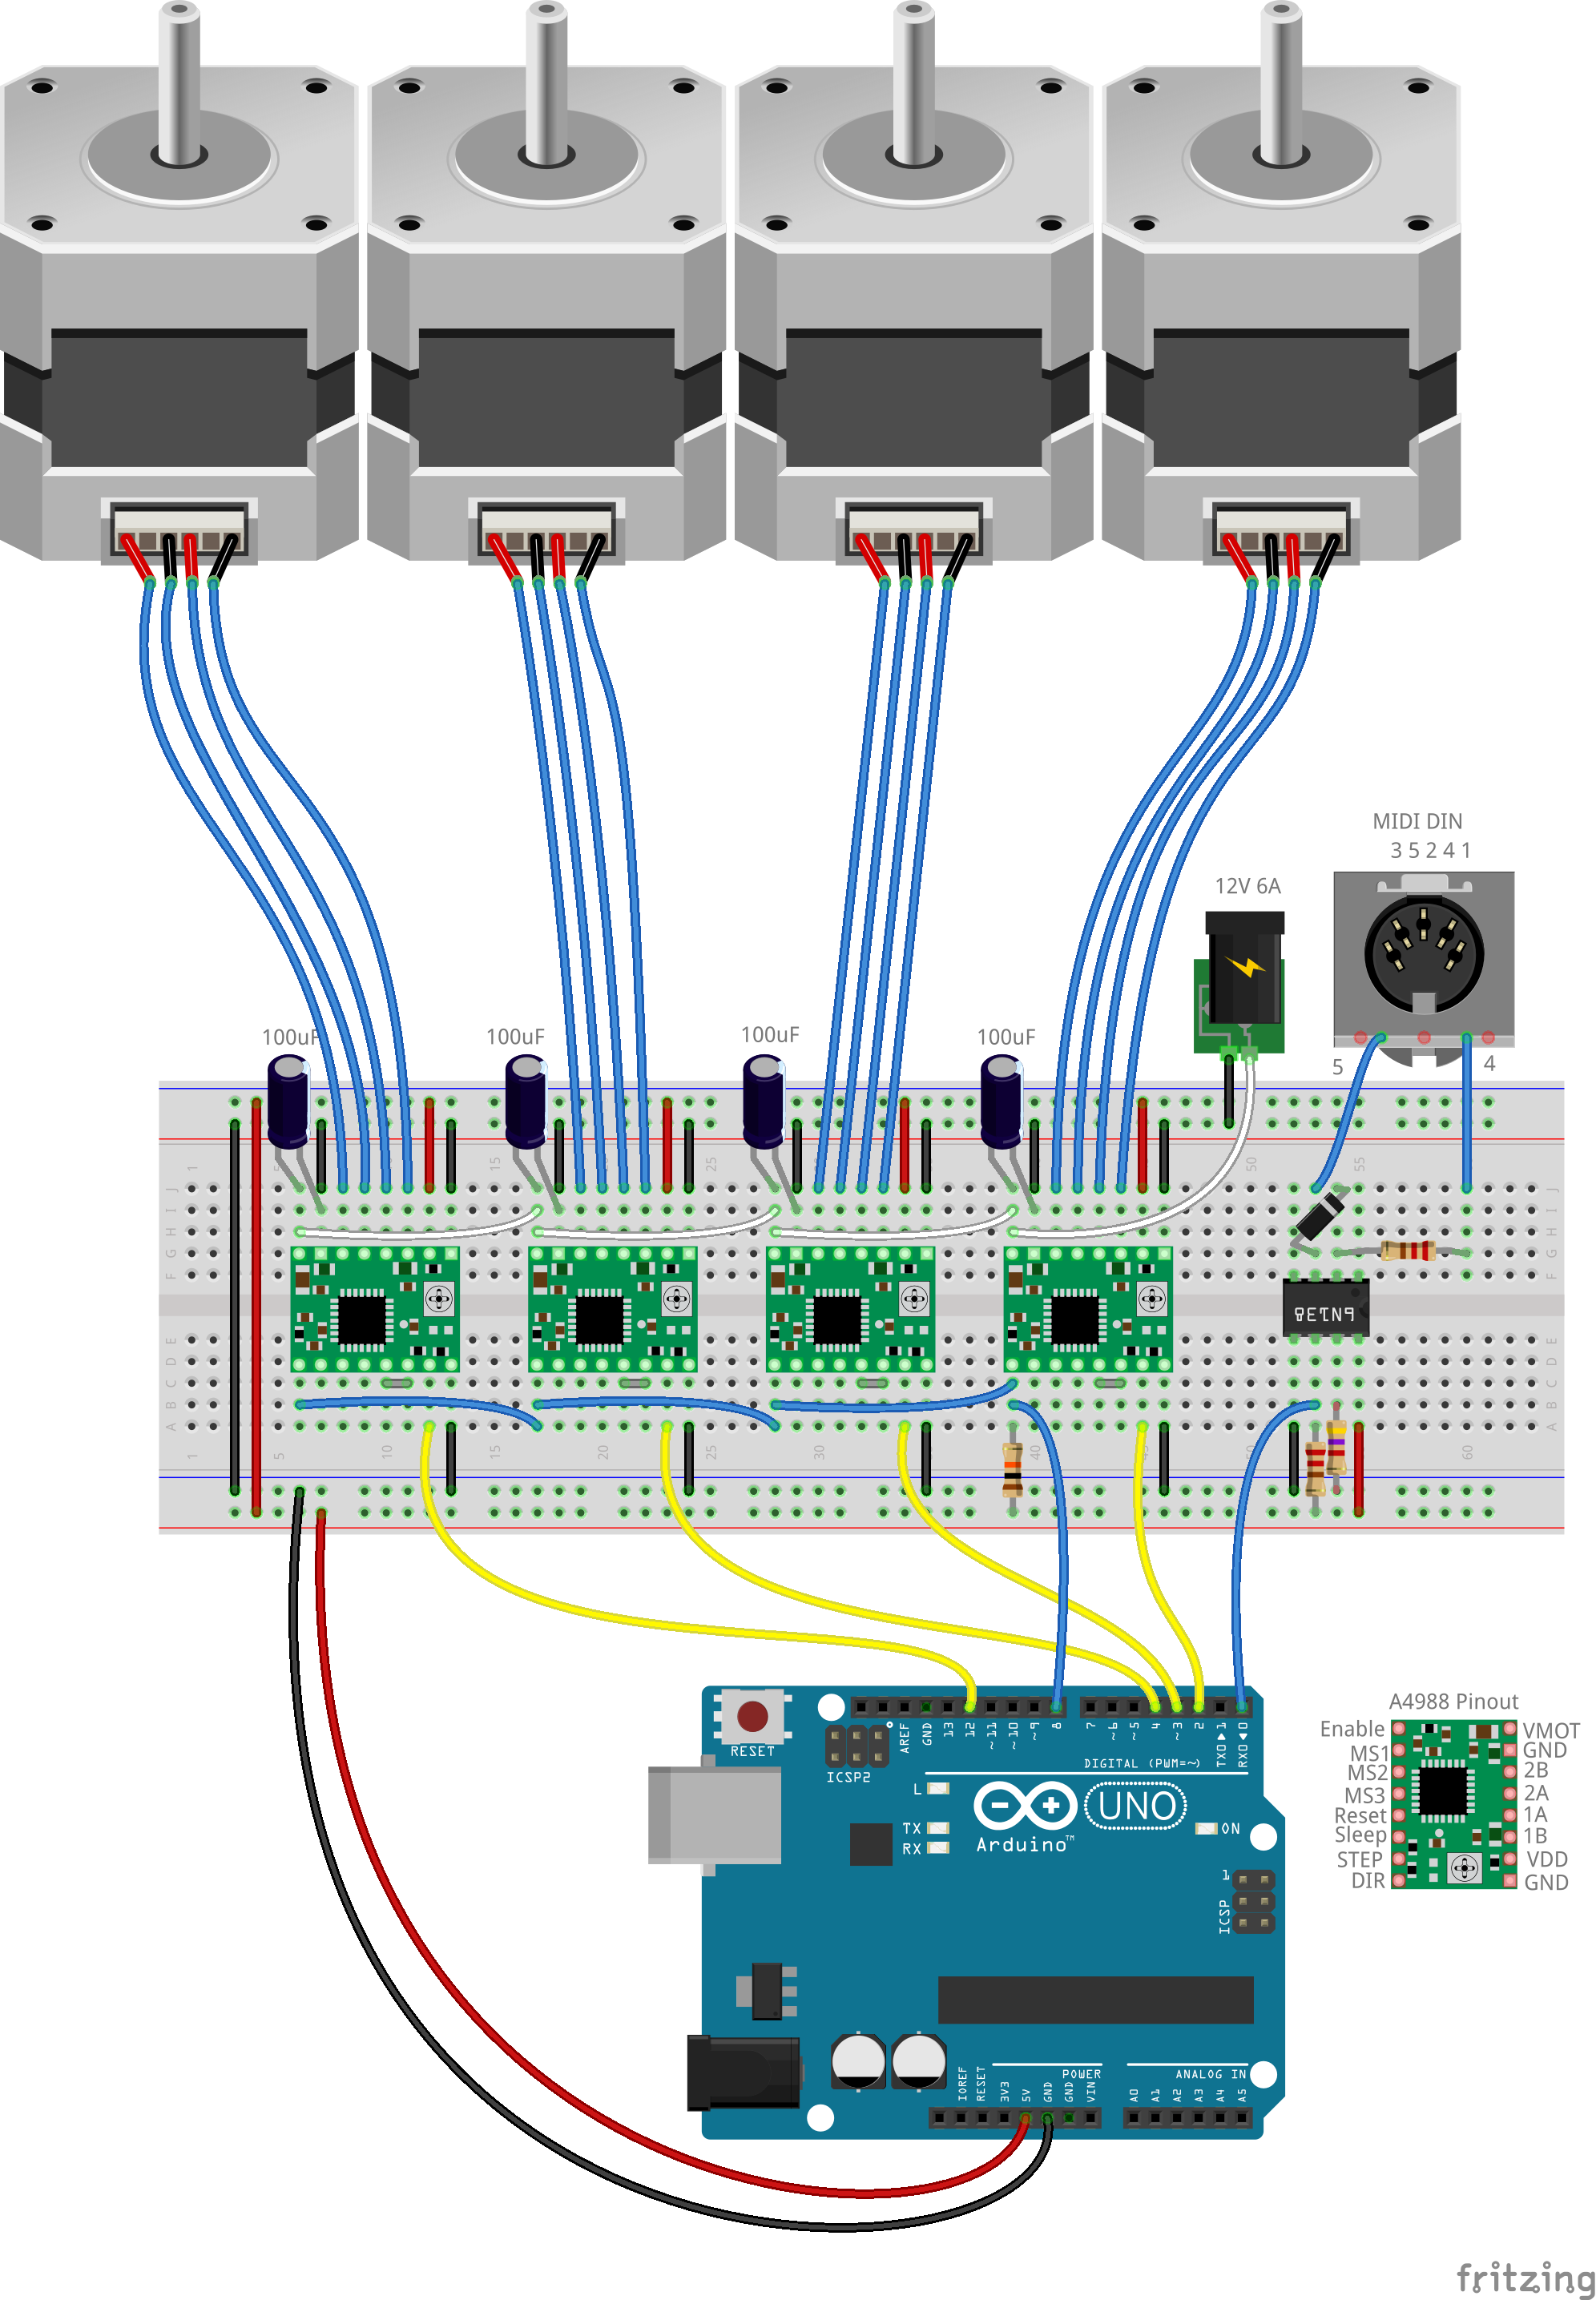
Controlling the SteppersThe A4988 stepper motor drivers have two pins that directly control stepper motion; STEP and DIR. DIR controls whether the motor spins clockwise or counterclockwise depending on the state, and STEP moves the stepper one step every time it is pulled high (how much depends on the microstepping resolution). Since the sound isn't affected by direction, I simply set it as low (or just connect it to ground). Now I can just step the motor using a digitalWrite command.
The ChallengeThe main challenge in dealing with this project was that I wanted to drive multiple stepper motors at once, so using a delay() command was out of the question (otherwise the motors wouldn't run simultaneously). Instead, I used the micros() command to calculate the duration to pulse the steppers. Since there is going to be different speed values for each stepper motor, I turned the speed variables into arrays, with their index corresponding to the motor number and MIDI channel. I originally used the millis() command, but found that it lacked resolution to produce different pitches.
Using an array to control the speed of the stepper motors meant that I could use a single variable for all the motors, and this gives the ability to have the arduino control any number of steppers, just by changing the array size!
Speed CalculationsIn a test, I sent a 440 Hz square wave (using the tone command) to the step pin and found that the stepper motor created an A440 pitch. Since the speed value sent to the stepper function was the period in microseconds, I simply converted the note frequencies to the period. I put these values in another array called pitchValues, with their index corresponding to the MIDI note value. Using the array also allowed me to control the playable range of the stepper. I made it so that a speed value of zero is considered stop.
Using an array instead of a calculation meant that there was complete control over the speed of each note, effectively setting a range for the instrument. Also, when a stepper motor is near its resonant frequency, it produces a very terrible noise (looks like it is stalling out). You can identify what that is and change the value for the pitch by an octave to solve this. For me, the resonant frequency was around F3, so I had to change E3, F3, and F#3 by an octave to fix this. (You can check this using the "Tune Stepper.ino" code)
Creating a USB MIDI DeviceI wanted to make the device be seen as a MIDI device so I did a little digging and found that you could change the firmware of the AVR chip on the board. The firmware could be HIDUINO or mocuLUFA. I decided on mocuLUFA, because it had a dual boot option, so I could easily reprogram the Arduino without having to re-flash the AVR chip. I could simply connect a jumper on the ICSP header to switch between USB MIDI and USB Serial.


_ztBMuBhMHo.jpg?auto=compress%2Cformat&w=48&h=48&fit=fill&bg=ffffff)


Comments
Please log in or sign up to comment.