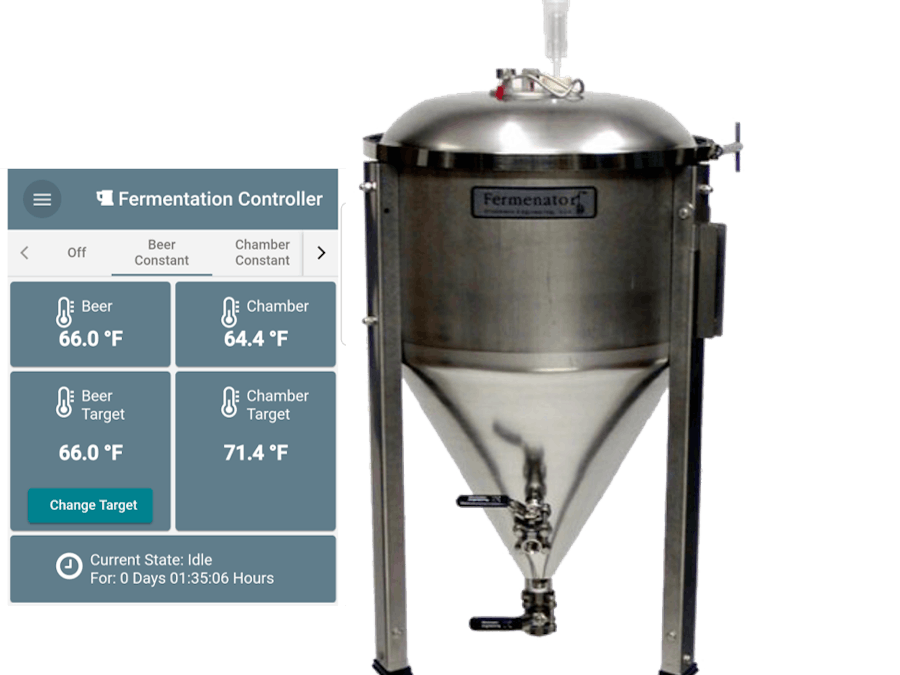
In a quest for repeatability and control of the beer brewing process I have taken an interest in controlling the fermentation temperature. I quickly learned that the temperature of the air around the fermentor can vary significantly from the actual fermenting beer temperature. Many years ago I discovered the BrewPi project and build one using a Raspberry Pi and an Arduino. This is a very well designed project that has continued to improve over the years. While I liked this setup and found it very accurate I didn't like the lack of remote access. The desire for a modern application able to access, monitor and control the fermentation from a phone or a PC inspired this project.
To achieve these goals I decided to develop a web app that was reactive making it user friendly and accessible from any device with a web browser. The project consists of several parts: the Photon hardware, the code running on the Photon, an Angular-based application, as well as integration to and web hosting on Google Firebase.
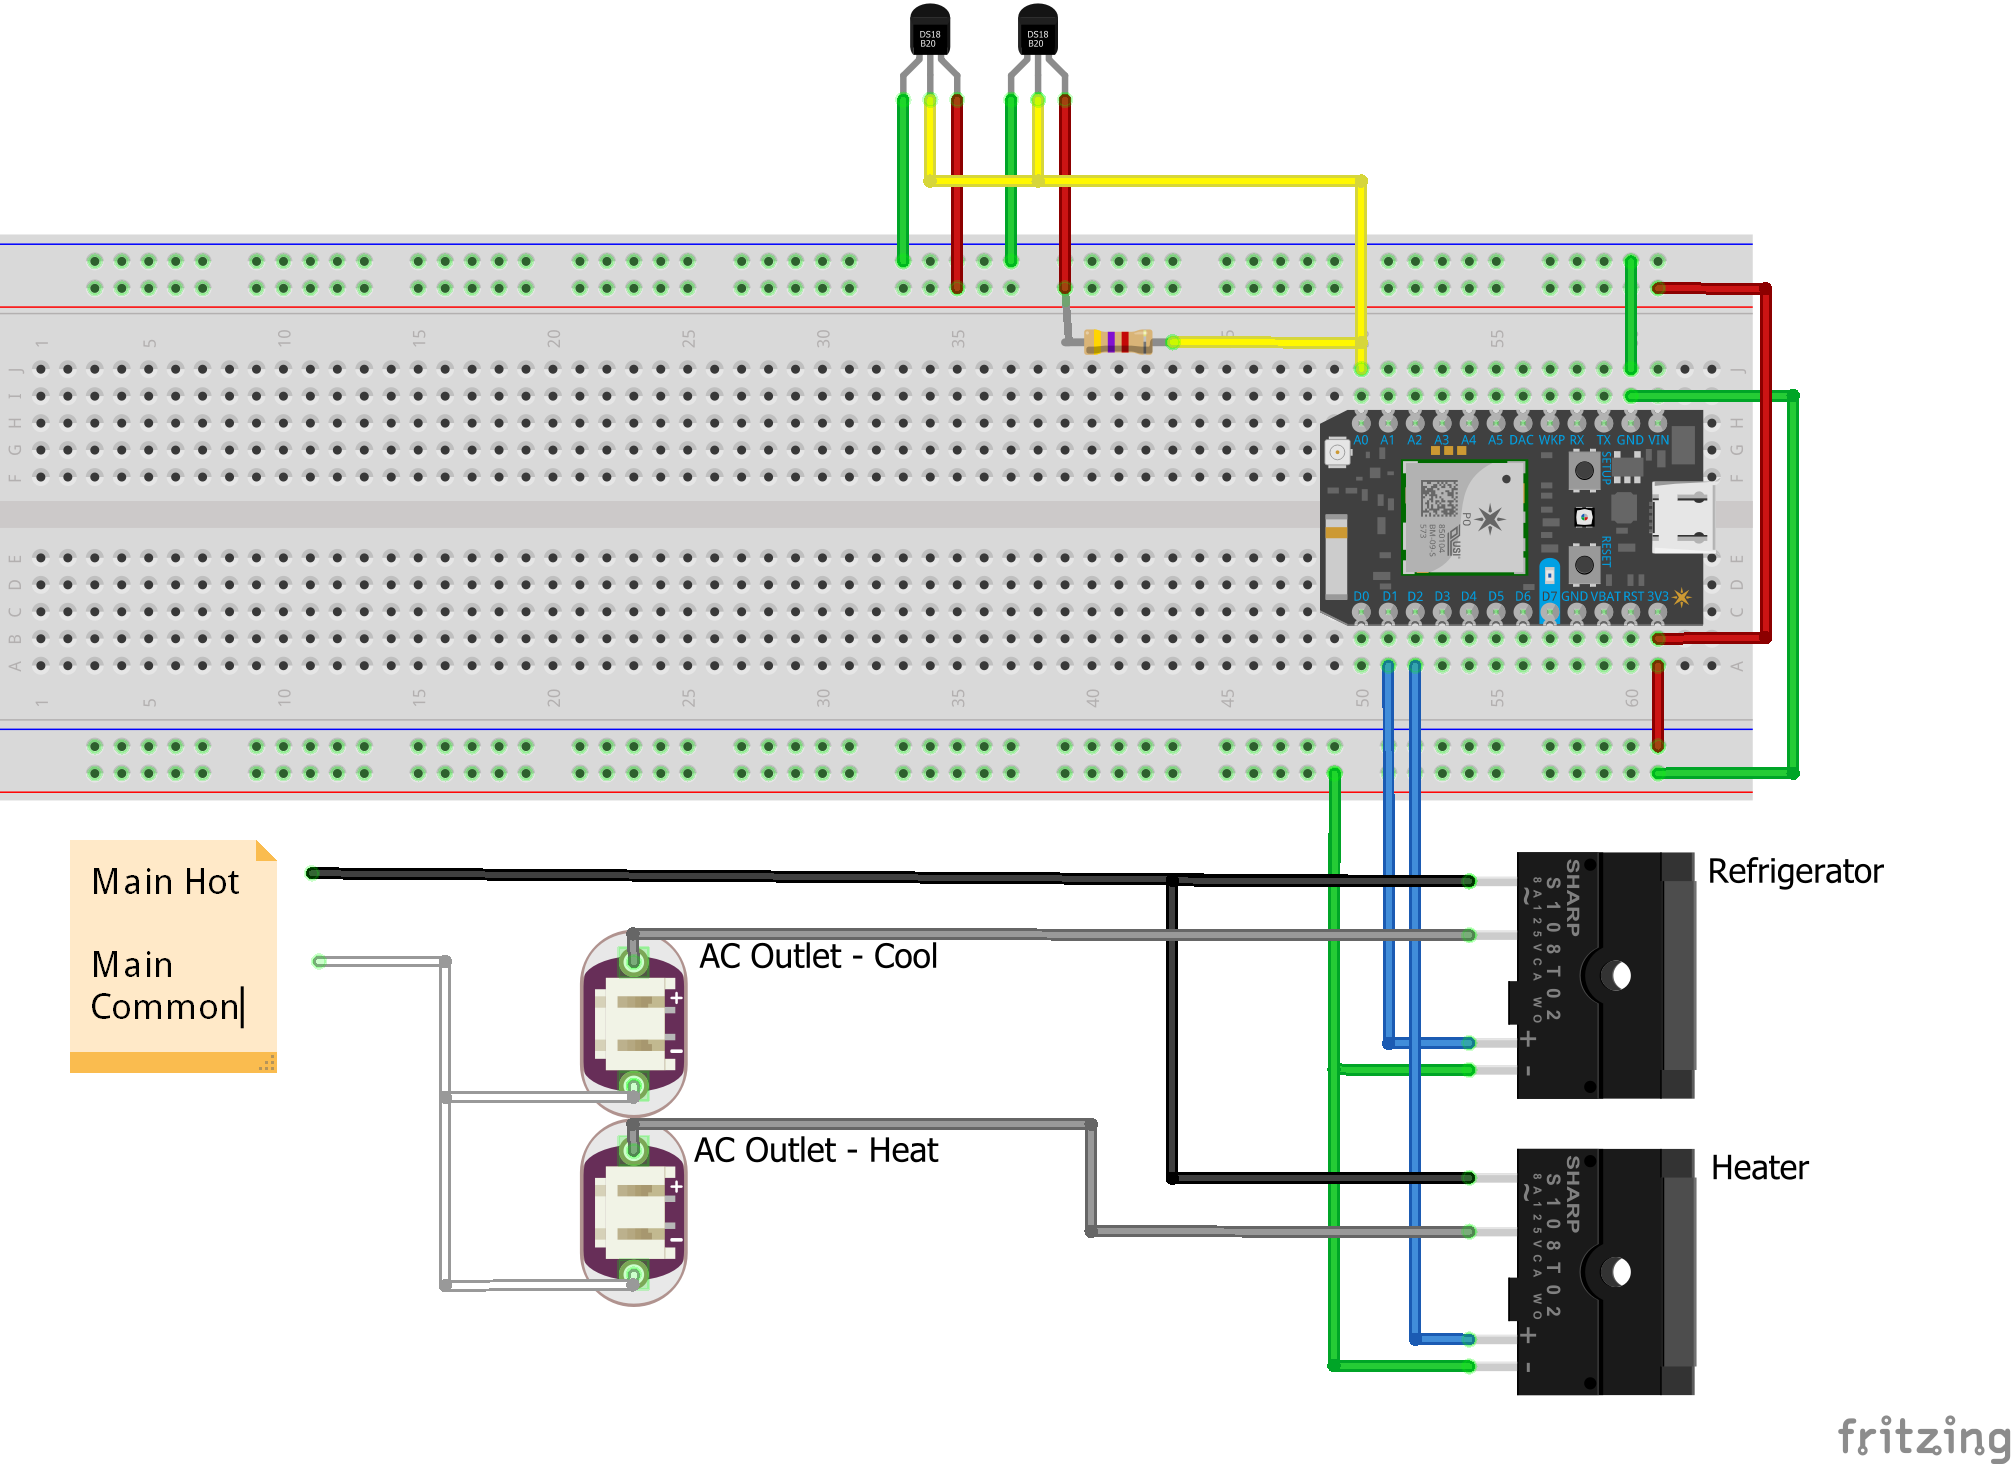
The HardwareThe hardware portion of the project is pretty simple consisting of two Dallas temperature sensors and two solid state relays connected to a Particle Photon. I chose to use the Dallas temperature sensors as they are inexpensive, easy to use and accurate. When wiring up the 110V residential outlet the two plugs need to be separated so they can be controlled individually. To do this be sure to break the connecting tab on the hot side of the plug.
The controller is connected to a modified refrigerator or freezer that can hold a fermenting vessel. Modify the refrigerator so to is turned on and off through the plug connected to the Photon controller. A simple way to do this is to turn the refrigerator control to the coldest setting. In some climates it is necessary to heat the enclosure, rather than cool, using a heating element which is also controlled by the Photon controller. This project uses a ceramic heating element in an old light socket. The BrewPi team has a really detailed refrigerator conversion guide here.
Note on Particle login. Particle has moved to a multi level authentication but this project has issues logging in from the web app if this is turned on. For now it only works with a normal login.
The particle code revolves around a PID controller that adjusts the refrigerator temperature to maintain a constant beer fermentation temperature. It also has guards to prevent excessive cycling and damage to the refrigerator compressor.
In the Particle console you need to create two integrations to the Google Cloud Platform. Follow the instructions to create a Google cloud account and project. Particle has a nice tutorial here. Create two cloud platform pub/sub topics, one named "photon" and the other named "chart".
The basic free account will work but it is limited so I recommend setting up a Blaze pay by usage account. The free levels are generous and I have never exceeded the free usage. The photon topic is the main integration used to send current status information to the Firebase database. The chart topic sends temperature data to a Firebase database for creating a historical graph of the temperatures while the controller is in one of the control modes. More on this in the web app section.
Log into Firebase and go to the console. Open the project you just created then select the web setup button on the top right. Copy this data for the Angular app.
Note on security: Currently the application is not using any security with Firebase. The database is set up wide open for anyone to access and read or write from. Not really an issue for a prototype. In the future it would be nice to add Firebase authentication.....
Angular Web AppFollow the readme to setup the development environment and to add the Firebase configuration information. Deploy the application to Firebase using the Firebase deploy command. If all goes well you should get at link to the web site.
The first time opening the application you will automatically be asked to login. Login using your Particle email and password then select your Photon controller from the drop down list.
Next you will need to setup the PID. Select the hamburger button on the top left then setup. In the setup screen open the PID settings screen for general instructions and default settings. I have found these setting work reasonably well (+/- 1 degree over/under shoot on temp changes and +/-0.1 once at steady state). Every system is different and may benefit from some tuning. PID tuning is an in-depth discussion beyond the scope of this project. This is a good PID tuning site if you are interested in learning more. Once the PID settings are entered the app is ready to run and control fermentation temperatures.
The application has three control modes. Beer Constant will hold the beer temperature at the target setting. Chamber Constant will hold the refrigerator air temperature at the target temperature. Finally Profile mode allows you to create custom temperature profiles for different beers. You can create new profiles that are saved to the Firebase database for later use. Once you have created a profile to fit the desired fermentation profile select start profile. The controller will hold the beer temperature at the desired temperature following the profile. At the end of the profile the controller maintains the last temperature until manually turned off.
Happy brewing!!!


_3u05Tpwasz.png?auto=compress%2Cformat&w=40&h=40&fit=fillmax&bg=fff&dpr=2)
Comments
Please log in or sign up to comment.