This is my first Guide, so bear with me!
Here is a video. This is also my first video. Lots of firsts today! Sorry if the quality isn't that great. (I didn't script this either, obviously)
In this guide, I will show you how to hook up and code your Arduino to connect to your Pixy! The first thing you want to do is gather the materials.
1) Arduino Uno (or other board, as long as it has an ICSP breakout.)
2) Pixy cmuCAM (I got mine from amazon, but you can find yours in other places)
3)Arduino IDE (to program the Arduino board)
4)Arduino Pixy Library (This is important, your code wont work without this)
5)Pixymon (to set signatures and view what the camera is seeing)
I included the links to everything in the description
Step 1: Installing the software.
First, go to the website I provided for Pixymon and download it. When it is finished, install it. If the installed program has a picture of a purple dinosaur, it worked.
< the dinosaur
You also need to download the Arduino IDE and the library.
Once you have the Arduino IDE program working. Then go to Sketch>Include Library> Add .zip Library and choose the library you downloaded earlier.
Step 2: Preparing the Pixy and the Arduino
Open the Pixymon program from step 1, and connect your pixy to the computer. It should take a couple of seconds to start.
Now its the fun part!
Find a nice, colorful object that you are sure is not similar to the colors around you. (I used a bright pink ball for mine)
Now, go to action>set signature one. hold the object in front of the cam and click the link. Your screen should freeze. Then take your mouse and select the object. Now if you hold the object in front of the pixy it should register as signature 1.
For the final configuration, go to configure>PixyMon Paramers and change runprogArg 8 1 to runprog 0. This will make the camera start up with the regular mode. If you want to see the video feed with the signitures, change the video to raw or cooked mode.
Step 3: Set up Arduino and Pixy
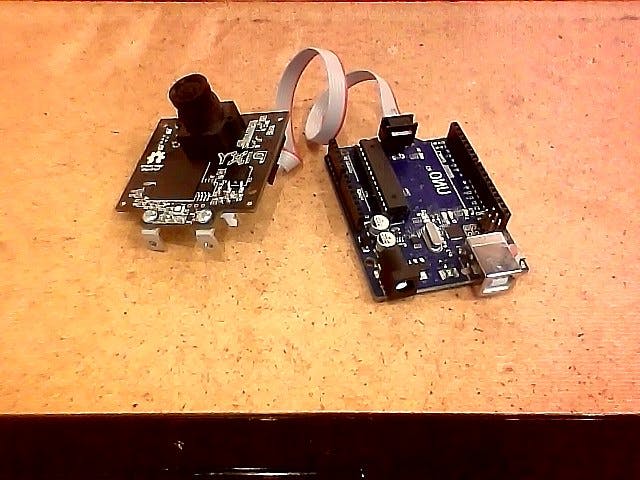
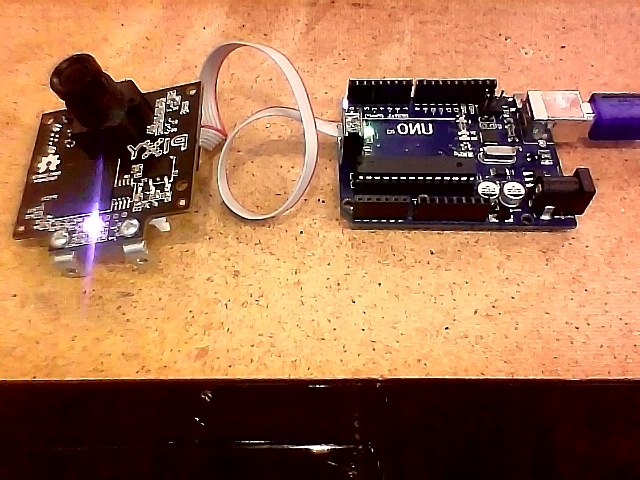
Here are some pictures. This part is probably the quickest and the easiest.
Step 4: Uploading and running the code.
Now plug in the Arduino. Both the Pixy cam and the Arduino should turn on.
If you plugged something in backwards, don't worry. Just unplug the Arduino and flip it around and you should be fine.
Now open the Arduino IDE and go to File>Examples>Pixy and open the hello world file. If you cant find it, the code is in the code section below.
Now the last part is to load it to the Arduino. When that is done, open the Serial monitor and hold your object in front of the cam. It should say the X, Y, Height, and Width.
Congradulations!! You just connected your Arduino to your Pixy!


_ztBMuBhMHo.jpg?auto=compress%2Cformat&w=48&h=48&fit=fill&bg=ffffff)


Comments