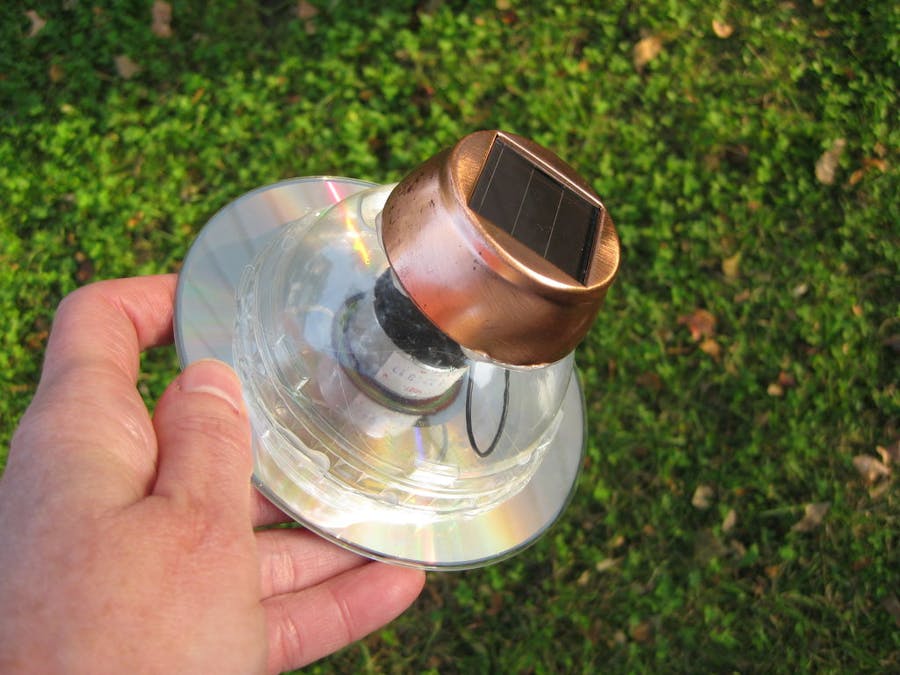
The Solar WobbleBot is a great little project for kids and other beginners. I love that it can be made entirely from recycled parts, and requires no soldering.
I do this project with teens (ages 12 and up) in my enrichment programs at schools and libraries, where it's always a big hit. It usually takes about an hour to make.
The Solar WobbleBot is one of the projects from my first book of robot activities, Robotics: Discover the Science and Technology of the Future from Nomad Press, for ages 9-12.
I also have a "Souped Up" version -- which uses a Miller Solar Engine to store energy, letting it work in low light -- in my book Making Simple Robots from Maker Media, publishers of MAKE: magazine.
Here's how to make the no-solder Solar WobbleBot:
Step 1: Materials
You will need:
- pencil with an eraser
- 1.5 volt, low-inertia/low-speed DC motor with wires attached (or take one out of an old Walkman or DVD player)
- solar panel (can be recycled from a solar garden light)
- wire strippers
- electrical tape
- scissors
- recycled CD or DVD
- hot glue gun or glue dots
- recycled clear dome from drink cup
Step 2: Prepare the Solar Light and Test the Solar Panel
If reusing a solar panel from a garden light, open up the back and remove any batteries or capacitors. You will see two wires connecting it to a circuit board. Cut away the circuit board, leaving as much wire connected to the solar panel as possible.
Before going further, make sure the solar panel produces enough power to run the motor by temporarily connecting the wires with small pieces of electrical tape. Also put a little "flag" of electrical tape on the shaft. Take it out in bright sunlight or hold the panel up to a very bright indoor light, such as a halogen light or shop light. If the motor doesn’t turn, try a different motor or a more powerful solar panel. Once everything works, carefully take off the tape and separate the wires.
Step 3: Attach the Motor
If your motor has a short shaft, you may want to attach a rubber "foot" to give it a little more traction. Break the eraser off the pencil. Use the point of the pencil to make a hole in the middle of the broken-off side. Push the eraser up onto the shaft of the motor. It will probably hold on well enough without glue.
Now insert the shaft of the motor into the hole in the CD. Use hot glue or glue dots to attach the motor to the disc.Be careful not to get any glue into the motor or on the moving parts. Add some electrical tape if needed for extra security.
Step 4: Connect the Solar Cell to the Motor
Place the clear dome top over the other end of the motor. Pull the motor wires through the hole at the top, where the straw would go. Attach the bottom of the dome to the CD. If you use Glue Dots, you can make adjustments before attaching it permanently.
Attach the motor wires to the solar panel wires and tape them together securely. Then push the wires back inside the dome and glue the solar panel on top.
Step 5: Testing Your Solar WobbleBot
Use your bright indoor light or take the Solar WobbleBot outside in bright sunlight to test it. Put the bot with the disc-side down and the solar panel facing up (it will be just a little bit tilted), on a very smooth, flat surface. The motor shaft should spin and make the bot dance and skip around!
Troubleshooting Tips: If your bot doesn't spin, check to see that the wires are connected. If it still doesn't run, try a different surface (the glossy cover of a coffeetable book works well). Sometimes giving the shaft a little turn to get it started before putting it down on the test surface helps too. Be careful not to leave your bot out in bright sun for too long -- it can overheat!
Step 6: More Simple Robot Fun
There's more information and more projects to help you learn about simple robots in my books Robotics: Discover the Science and Technology of the Future and Making Simple Robots. Both are available from my website Crafts for Learning. Have fun building robots!


Comments
Please log in or sign up to comment.