


Hardware components | ||||||
| × | 1 | ||||
Software apps and online services | ||||||
 |
| |||||
Morse code expresses different English letters, numbers, punctuation marks, etc. through different arrangements. The International Morse Code is still in use today. For example, the most well-known use of Morse code is to send the distress signal SOS. The combination of SOS signals is:. As another example, suppose we send "Arduino" via Morse code with the combination: ".-.-. -....-.. -. —".
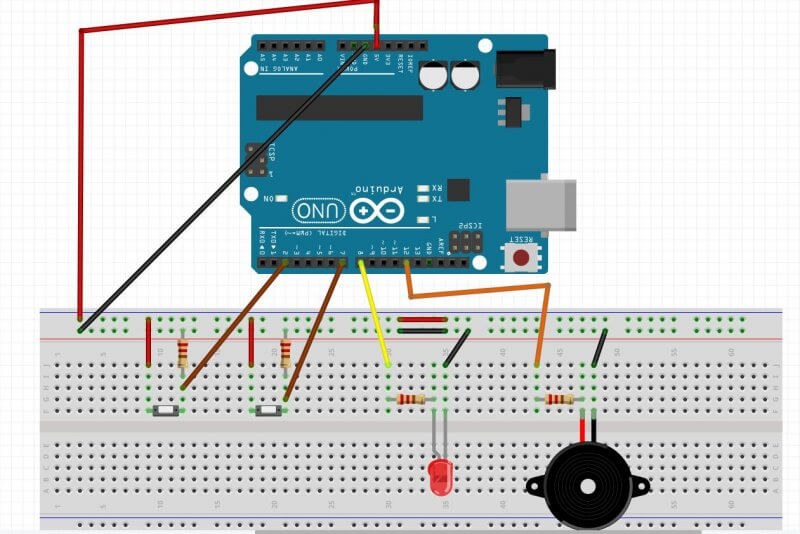
Step 1: Circuit PartArduino to Breadboard Pinout:
Pin D2 is connected to one end of button 1 and then to ground through a resistor. The other end of button 1 is connected to 5V.
Pin D7 is connected to one end of button 2, and then connected to ground through a resistor. The other end of button 2 is connected to 5V.
Pin D8 is connected to the LED positive terminal through a resistor, and the negative terminal is connected to ground.
Pin D12 is connected to the positive pole of the buzzer through a resistor, and the negative pole is connected to ground.
At the end of the article is the complete code, save it as MorseCode.ino, then open the Arduino IDE "File->Open->MorseCode.ino" and upload it to Arduino. After the upload is completed, open the serial monitor and you will see the following display:
The operation sequence of the Morse code decoder: first write Morse code by clicking button 1 and button 2; fill in the space between letters with 2 in the input box above, and then press the Enter key. For the spaces between words, fill in 3 in the input box above, and then press Enter. After all input is completed, fill in 1 in the above input box and press Enter, the Morse code content will be translated. The translated Morse code will be displayed below on the serial monitor. For example: let's write ".-.-. -....-.. -. —", which will be displayed as "ARDUINO" after translation.


Comments
Please log in or sign up to comment.