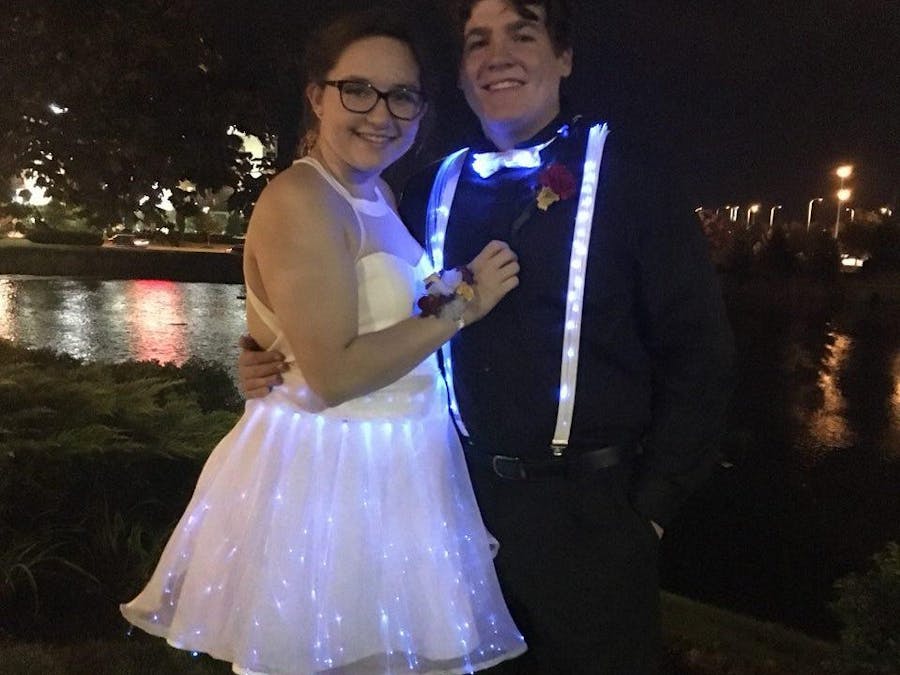
How can you make any dress a light up dress? An easy method is fiber optics and lots of hot glue.
The first step is to plan out your project. One tutorial can't cover every option, but I will cover a feminine and a masculine look. I recommend reading the tutorial to the end before deciding on your plan. When you plan your look consider if you will modify the clothing itself or make a detachable lights set. The light up portion of my dress is a Velcro skirt that goes on top while the suspenders and bow tie have lights hot glued to them. Consider where you want the ends of your fiber optics, which is where the light will shine, and where you want the fiber optic cables to run to, which is where your LEDs and wiring will go.
Once you plan out where you want your LEDs and how the optical fibers will be distributed it's time to start producing your look by connecting your LEDs to the fiber optics. I bought 1.5mm optical fiber on Amazon for this project which came in a roll. The cables retained the circular shape so I had to straighten them for the skirt. Fiber optics can take any form you want them to but sharp turns can diffuse the light and make them dimmer, and heating the cables to desired shape can make them brittle. After shaping cables its easy to light them up. Using a 5mm RGB common cathode I was able to attach 8 strands to each light. To do so gather the strands in a small, tight bundle with the ends on one side closely gathered, and use electrical tape to keep them together. The bundle can be attached to the led with shrink wrap, and the connection should be secured with hot glue inside of the bundle and along the edges of the shrink wrap.
After all your LEDs have fiber optics attached the next step is to attach the LEDs to your project. For my skirt I hot glued the LEDs onto a band of elastic at equal distances. When gluing LEDs in place be sure to hot glue the fiber optics and not just the LED. The fiber optics do not have a secure enough connection to the LED to support the fiber optics. For the suspenders I had my boyfriend wear the suspenders while I hot glued the tips into place on the front of his suspenders with the LEDs hidden in the back.
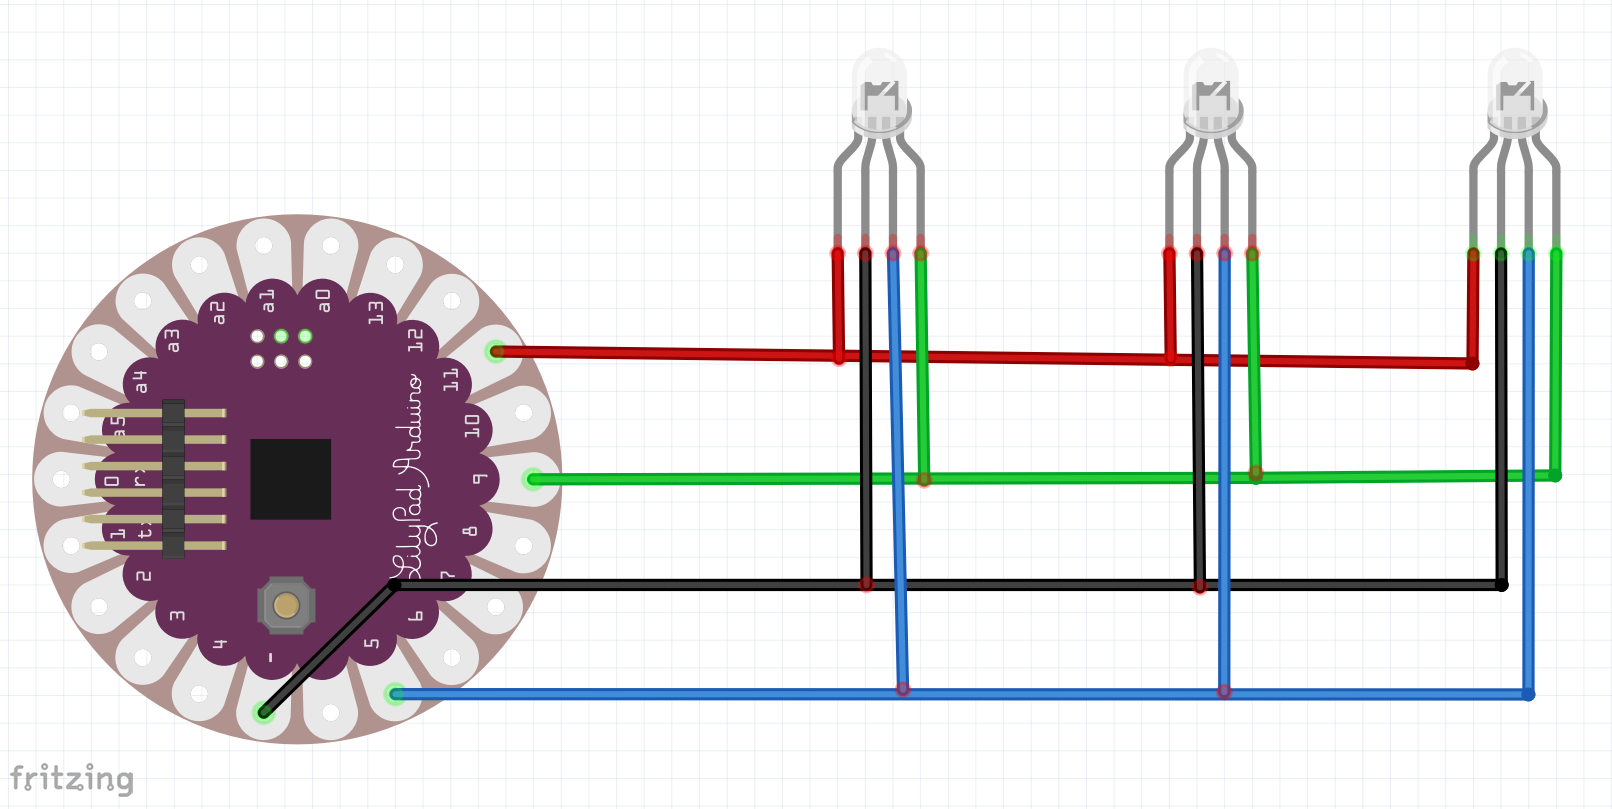
Next is the wiring. Be sure to accommodate wires, power and the Lilypad in your plan in step one because this step can be tricky without enough space. The Lilypad is a micro controller used to make the RBGs change color in whatever pattern you desire. For my skirt I ran four 'rails', red, green, blue and ground, along the waist band by using leftover wire from installation of our invisible dog fence. Any long wire will work for the rails to provide a continuous power supply that each LED can connect to. The colored rails connect to whichever pwm enabled digital port or analog port on the Lilypad you choose, but ensure the code correlates. The ground wire connects to the negative port. Each LED had jumpers connecting to the rails by stripping one end of the jumper, stripping the rail and wrapping the stripped end of the jumper around the rail and hot gluing the connection. For the suspenders wiring was done by stripping the ends of jumpers which connected to the LEDs and attaching them all to the stripped end of a jumper which connects to the Lilypad. Wires ran up the back inside of the shirt from the connection to the Lilypad up to the collar where the lights for the bow tie were plugged in.
After everything is wired the only thing left is finishing touches. My mom sewed white fabric over the elastic to match the dress, attached a sheer skirt to the waistband, and attached Velcro to each side of the waist band.


_WSuxLGLqeO.jpg?auto=compress%2Cformat&w=40&h=40&fit=min&dpr=2)


_WSuxLGLqeO.jpg?auto=compress%2Cformat&w=60&h=60&fit=min&dpr=2)


Comments
Please log in or sign up to comment.